3
lp-642 Rev. 000 Rel. 002 Date 10.5.20
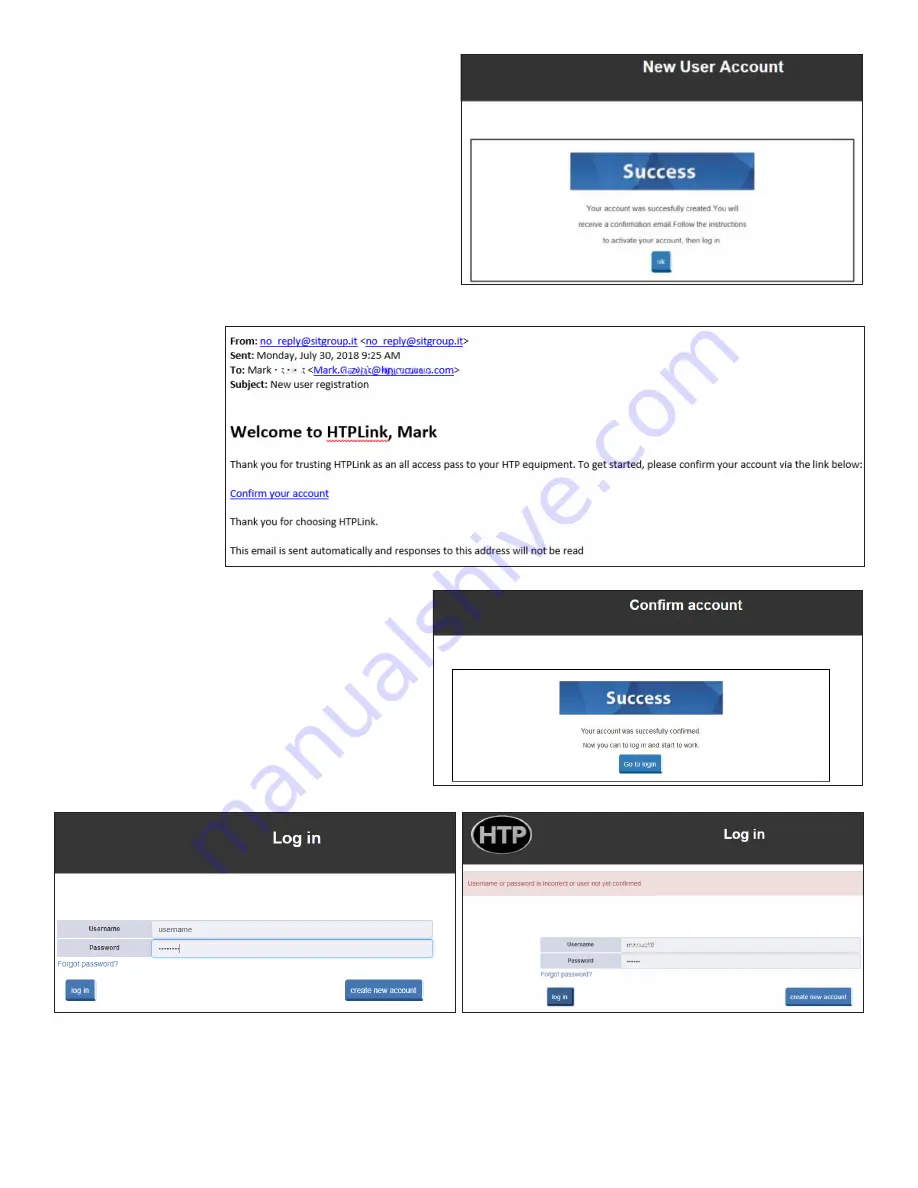
Figure 7 - HTPConnectAP Log In Screen - Success Popup
3. The fields will be checked for all required information. If all
required information has been provided, a success popup
will appear. See Figure 7.
4. After successfully setting
up an account, the
account goes into the
“Account Cloud”. The
User will receive an auto-
reply email with a link to
confirm the account. See
Figure 8.
Figure 8 - HTPConnectAP Account Confirmation Email
5. Click the “Confirm Your Account” link to bring up the success
screen. See Figure 9.
6. After your account is confirmed, tap “Go to login” (or go to
https://webmonitor.htplink.net) to log in to your account.
See Figure 10.
7. Enter your log in credentials and select “Log In”. If you log
in successfully, the End User License Agreement screen in
Figure 12 will appear. An error will display if an incorrect
username or password is entered. See Figure 11.
Figure 9 - HTPConnectAP Confirm Account Success
Figure 10 - HTPConnectAP Account Log In Screen
Figure 11 - HTPConnectAP Account Log In Fail


