


PPD3 User Manual
18
CHAPTER 4 CONTROL PANEL AND OTHER FUNCTIONS
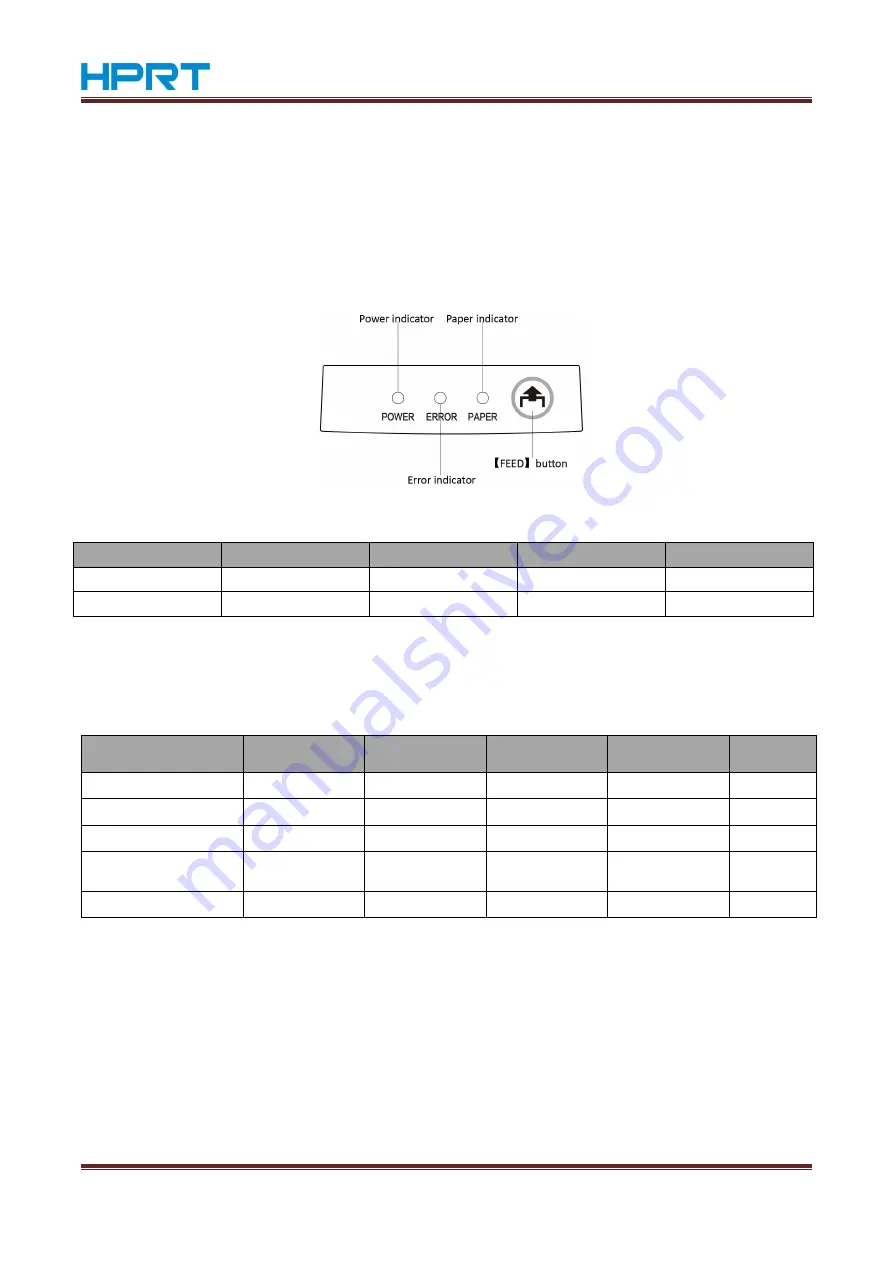
4.1 Control Panel
①
FEED button:
Press the FEED button to feed roll paper.
②
POWER indicator (Green LED):
Lights when the power is ON.
③
ERROR indicator (Red LED):
Indicates various errors in combination with POWER indicator.
④
PAPER indicator:
Indicates various paper out in combination with PAPER indicator.
4.2 Basic Indicators
Status
POWER Indicator
PAPER Indicator
ERROR Indicator
Buzzer
Power on/off
ON/OFF
--
--
--
No Error
ON
OFF
OFF
--
4.3 Errors
1) Recoverable Error
Error Description
POWER Lamp
PAPER Lamp
ERROR Lamp
Buzzer
Recovery
Conditions
Paper end
ON
ON
Flashes
Beep
*1
Printer cover open
ON
ON
Flashes
Beep
*2
Front cover open
Flashes
ON
Flashes
Beep
*3
Head high temperature
detection
Flashes
OFF
Flashes
Beep
*4
Mechanical error
ON
OFF
Flashes
Beep
*5
*1 Automatically recovered by loading a new paper roll, then closing the printer cover.
*2 Automatically recovered by closing the printer cover.
*3 Automatically recovered by closing the front cover.
*4 Automatically the printer is recovered after the print head has cooled.
A print head temperature error is not abnormal.
*5Turn the power OFF, clear the jammed paper or remedy another problem and then turn the power ON.
Automatically the printer is recovered if the carriage returns to the home position after turning the power OFF
and ON.
Restoration is also possible with the <DLE> <ENQ> n command when in the ESC/POS mode.
Содержание PPD3
Страница 12: ...PPD3 User Manual 9...


