6.
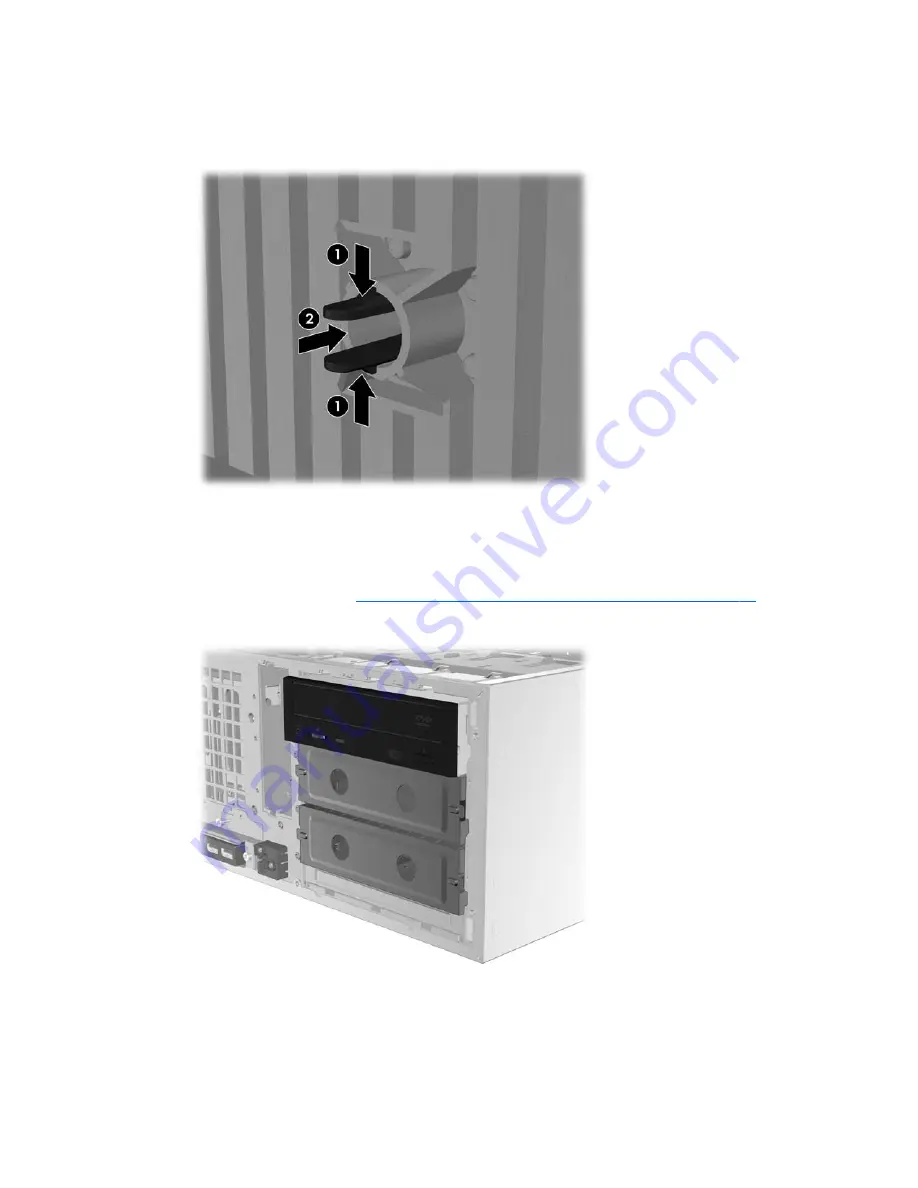
On the back of the front bezel, squeeze the HP logo mounting tabs (1) and press the logo
outward (2) as shown in the following figure.
Figure 3-6
Rotating the HP logo
Rotate the HP logo 90 degrees counterclockwise, and then release the logo and press it back
into place in the front bezel.
7.
Remove the EMI filler panels and remove the optical disk drive from the chassis.
8.
Rotate the EMI filler panels and the optical drive 90 degrees as shown in the figure below, and
then reinstall them (see
Installing an optical drive (desktop configuration) on page 62
.
Figure 3-7
Reinstalling the optical drive
9.
Replace the front bezel and the side access panel when finished.
ENWW
Converting to desktop configuration (Z400 only)
23
Содержание Z Workstation series
Страница 1: ...HP Z Workstation series User Guide ...
Страница 4: ...iv About this guide ENWW ...
Страница 8: ...viii ENWW ...
Страница 74: ...66 Chapter 10 Installing optical disk drives ENWW ...


