3.
Attach the rear mounting brackets to the rear
rack uprights.
•
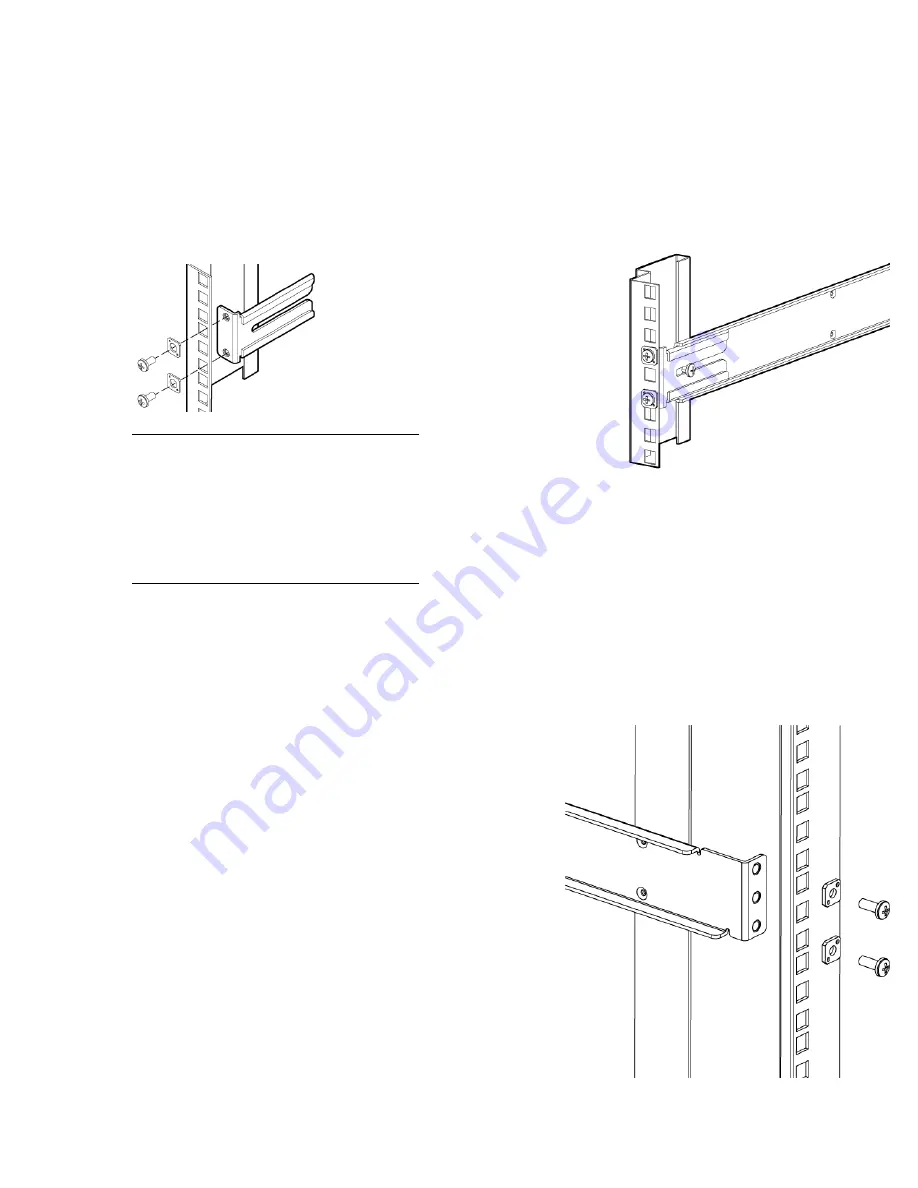
Assemble each of the brackets using two
#10-32 x 1/2-inch Phillips panhead screws
with captive star lock washers and two
#10 adapter washers, as shown in
Figure 2 (page 3).
Figure 2 Installing the rear mounting
brackets
NOTE:
The SAN Switch Rack Mount
Kit contains outer rails labeled Left and
Right to designate the left side and right
side of the device or cabinet as viewed
from the front of the cabinet. The inner
rails are interchangeable and can be
used on either side of the switch.
4.
Assemble the outer rails as follows:
a.
Attach the left outer rail and right outer rail
to the rear mounting brackets using the
#10-32 x 1/2-inch Phillips panhead screws
with captive star lock washers, as shown
in Figure 3 (page 3).Four screws are
required for attaching the outer rails.
Figure 3 Installing the outer rails
b.
Install two #10-32 x 1/2-inch Phillips
panhead screws with captive star lock
washers and two #10 adapter washers in
the upper and lower holes on the right rail.
Then install two #10-32 x 1/2-inch Phillips
panhead screws with captive star lock
washers and two #10 adapter washers in
the upper and lower holes on the left rail
(see Figure 4 (page 3)).
Figure 4 Assembling the outer rails


