background image

32

• 

 Date

• 

 Date & Time

• 

 Off

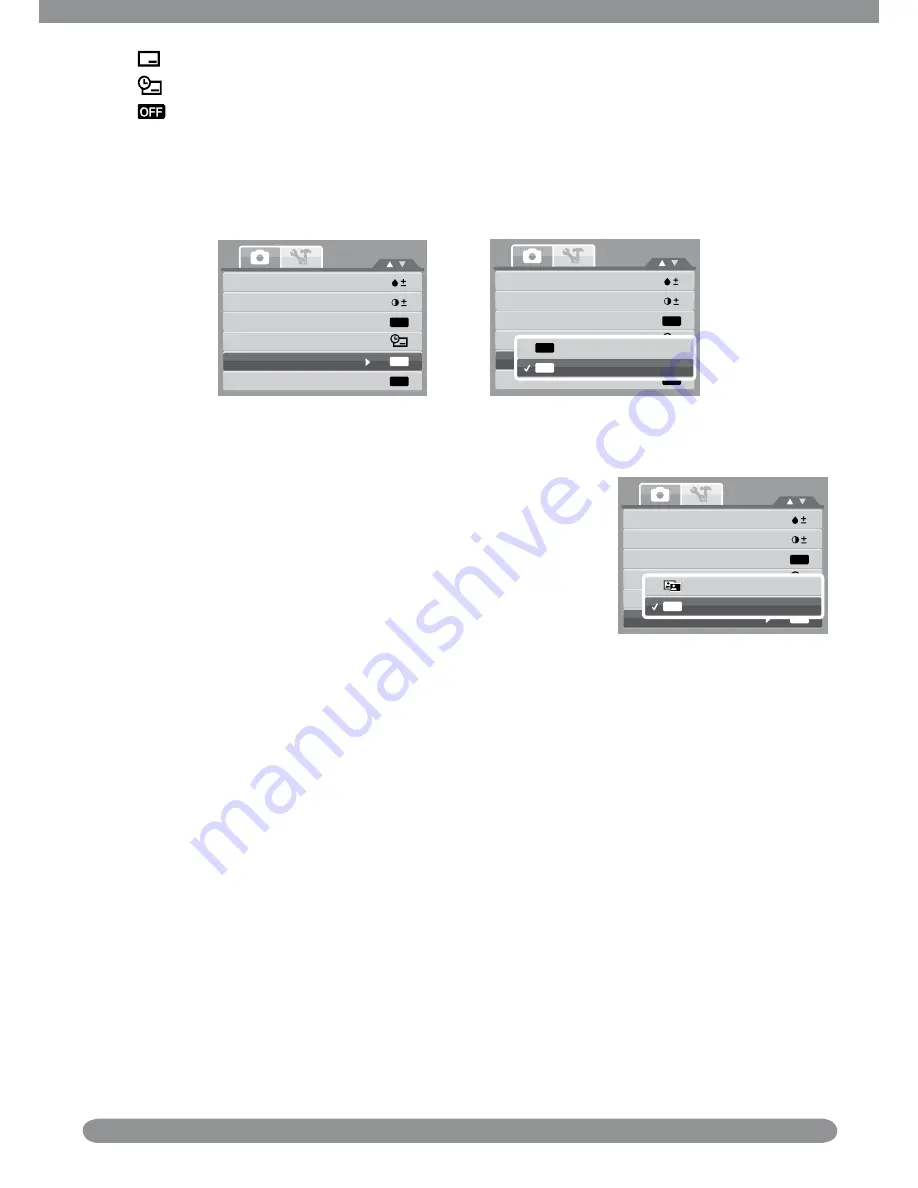
Setting Auto Review

The Auto Review function lets you view the captured image right after shooting it. If Auto 

review is On, the camera will display the captured image for 1 second on the LCD monitor.

Saturation
Contrast
Digital Zoom
Date Stamp

Auto Review

Active Z-Lighting

OFF

OFF

OFF

On

Off

OFF

ON

Saturation
Contrast
Digital Zoom
Date Stamp

Auto Review

Active Z-Lighting

OFF

OFF

OFF


Setting the Active Z-Lighting

The Active Z-Lighting adjusts the metering and applies the 

required Z-lighting according to shooting conditions. This function 

is only available for still images.

Available settings are: [Auto] and [Off].

Saturation
Contrast
Digital Zoom
Date Stamp
Auto Review

Active Z-Lighting

OFF

OFF

OFF

Auto

Off

OFF

Содержание SB360

Страница 1: ...HP SB360 Digital Camera User Manual ...

Страница 2: ...s vii Package Contents 1 Camera Views 1 Front View 1 Back View 2 Top View 2 Bottom View 2 Left View 2 Navigation Control 3 Attaching the Wrist Strap 3 Inserting the Battery 3 Inserting an SD SDHC Memory Card 4 Charging the Battery 5 Initial Settings 5 Setting the Language 5 Setting the Date Time 6 Modes 6 Shooting mode 6 Playback mode 6 Switching between Shooting mode and Playback Mode 6 Selecting...

Страница 3: ...ture Scene 24 Using Blink Detection Mode 26 Using Aperture Priority Mode 26 Using Manual Exposure Mode 27 Setting the Self Timer Burst 28 Setting the AEB 29 Setting the AF Area 29 Setting the AF Lamp 29 Setting Sharpness 30 Setting Saturation 30 Setting Contrast 30 Setting the Digital Zoom 31 Setting the Date Stamp 31 Setting Auto Review 32 Setting the Active Z Lighting 32 Recording Movies 33 Sett...

Страница 4: ...ng the Delete Button 38 Playback Menu 39 Slide Show 39 Delete 40 Protect 40 Red Eye Correction 40 Voice Memo 41 Photo Edit 42 Z Lighting 43 Rotate 43 Trim 43 Resize 44 Startup Image 45 DPOF 45 PictBridge 46 Using the Setup Menu 46 Making Connections 47 Connecting the Camera to a PC 47 Connecting the Camera to a Printer 47 Troubleshooting 48 Specifications 49 Getting Help 51 ...

Страница 5: ...orrect the interference by one or more of the following measures Reorient or relocate the receiving antenna Increase the distance between the equipment and the receiver Connect the equipment to an outlet on a circuit different from that to which the receiver is connected Consult the dealer or an experienced radio TV technician for help Warning A shielded type power cord is required in order to mee...

Страница 6: ... Download all pictures and remove the battery from the camera if you are going to store the camera for a long period of time The type of battery and the battery power level may cause the lens to not extend or retract properly Battery safety notice If the battery pack is mishandled the battery pack can burst cause a fire or even chemical burns Observe the following cautions Do not disassemble Do no...

Страница 7: ...der the temperatures between 0 C and 40 C 32 F and 104 F Shooting in extremely cold or hot places that exceed this range is not recommended Do not use store the camera in the following places In an extremely hot cold or humid place In places such as in a car parked in the sun the camera body may become deformed and this may cause a malfunction Under direct sunlight or near a heater The camera body...

Страница 8: ...gically group data objects according to some user defined criteria An album may or may not be a physical folder in a filesystem Analog to Digital Converter A D or ADC A circuit that converts an analog signal having a continuously varying amplitude to a digitally quantized representation using binary output signals aspect ratio cf image aspect ratio pixel aspect ratio auto white balance AWB With au...

Страница 9: ...uce specified camera output signal characteristics using the methods described in the referenced standard The ISO speed should correlate with the highest exposure index value that provides peak image quality for normal scenes JPEG Joint Photographic Experts Group An image compression method defined in ISO IEC 10918 1 memory card A specific type of memory module with a physical form factor approxim...

Страница 10: ...of your camera package It should contain Digital camera Li ion battery Battery charger Wrist strap USB cable Power cord CD ROM Quick Start guide Warranty card Camera Views Front View 1 Flash 2 Self timer LED AF Assist Lamp 3 Zoom Lens 4 Microphone ...

Страница 11: ... 4 way navigation control 5 LCD screen 6 Menu button 10 FUNC Delete button Top View 11 Shutter button 12 Stabilizer button 14 Power button 13 LED indicator Bottom View 15 Battery SD card compartment 16 USB 17 Speaker 18 Tripod Hole Left View 19 Strap ring ...

Страница 12: ...a chosen setting 2 Up Button 1 Macro Butto 5 SET Button 3 Flash Button 4 Down Button Attaching the Wrist Strap Insert the short loop of the strap in the strap 1 eyelet Thread the larger loop of the strap though the 2 short loop and pull tight to attach the strap to the camera Inserting the Battery Please read Battery Information on page v before inserting removing batteries Make sure the power is ...

Страница 13: ...en the battery compartment 1 at the bottom of the camera Insert the SD SDHC card into the memory 2 card slot with the metallic part facing the front side of the camera Push the SD SDHC card into the memory 3 slot until it clicks into place L O CK Close the battery compartment 4 To remove the SD SDHC card Open the battery compartment 1 Gently push the card until it pops out 2 Pull out the card care...

Страница 14: ...er cord to the battery 2 charger Plug the power cord to the main outlet 3 The battery charging time is 2 hours The battery icon on the LCD monitor indicates the battery level Initial Settings You will be prompted to set up the language and the date and time when the camera is turned on for the first time Setting the Language Press 1 or to move through the selection Select a language then press SET...

Страница 15: ...aptured images and playback videos and audio clips You can also attach voice memo to images in this mode When you turn on your camera using the Power button you are automatically turned on to Shooting mode Switching between Shooting mode and Playback Mode In Shooting mode press the Play button to switch to Playback mode In Playback mode press the Play button to switch back to Shooting mode Selecti...

Страница 16: ...Indicates Self Timer Burst settings 4 Zoom indicator Displays zoom 5 Shots remaining Indicates the remaining shots available 6 Battery Indicates battery level 7 Storage media Indicates current storage media in use 8 Date stamp Indicates date stamp is enabled 9 Stabilizer Indicates stabilizer function is enabled 10 Saturation Displays saturation settings 11 Contrast Displays contrast settings 12 Hi...

Страница 17: ... Displays white balance settings 23 Active Z Lighting Indicates Z lighting is enabled 24 Metering Displays metering settings 25 Sharpness Displays sharpness settings 26 Quality Displays quality settings 27 Resolution Displays resolution settings 28 AF lamp Indicates AF lamp is enabled Playback Mode Screen Layout The Playback mode display varies depending on the type of image being viewed Playback ...

Страница 18: ...age card 5 Battery Indicates battery level 6 Storage media Indicates used storage memory 7 Recording information Displays recording information of the file 8 Button intro Indicates the button to press on the camera to play a movie or audio file 9 DPOF Indicates the file is marked for printing 10 12M Resolution Displays the resolution settings Playback mode of videos PLAY 27 27 27 27 2009 01 01 01 ...

Страница 19: ... in the storage card 5 Battery Indicates battery level 6 Storage media Indicates used storage memory 7 Recording information Displays recording information of the file 8 Button intro Indicates the button to press on the camera to play a movie or audio file 9 Played time Indicates played time 10 Key indicator Indicates the buttons to press on the camera to apply the functions 11 Playing status Disp...

Страница 20: ...t Indicates file is protected 3 File no Total no Indicates the file number over the total number of files in the storage card 4 Battery Indicates battery level 5 Storage media Indicates used storage memory 6 Recording information Displays recording information of the file 7 Button intro Indicates the button to press on the camera to play a movie or audio file 8 Played time Indicates played time ...

Страница 21: ...hanged using the SET button In Shooting mode the LCD display can be changed into any four of the following 12M 307 307 12M 307 307 AUTO 0 0EV 0 0EV OSD on Guide lines on Full OSD on OSD off Note The OSD information may vary depending on the Shooting mode type The following icons if enabled are still displayed on the LCD even when OSD off or Guide lines on AEB Face tracking AF lamp Active Z lightin...

Страница 22: ...009 01 01 01 57 2009 01 01 01 57 AUTO 1 30 1 30 0 0EV 0 0EV 12M F 3 1 F 3 1 27 27 27 27 PLAY 2009 01 01 01 57 2009 01 01 01 57 PLAY Full OSD on OSD off Note LCD display cannot be changed in the following situations Manual exposure mode Recording movie or audio clips Playing movie or audio clips Playing slide show ...

Страница 23: ...he photo the frame bracket turns green the shutter speed and aperture value are displayed Fully press the 4 Shutter button to capture image F 3 1 F 3 1 1 30 1 30 AUTO Using the Stabilizer The Stabilizer function prevents blurred images caused by shaking Stabilizer button To activate Stabilizer Press the Stabilizer button on top of your camera to enable disable stabilizer If Stabilizer is enabled t...

Страница 24: ...on to optically zoom in to the maximum until it stops Release the button 3 Press the 4 T button again to switch to digital zoom automatically Zooming continues 307 307 AUTO 0 0EV 0 0EV x5 0 x5 0 12M 307 307 AUTO 0 0EV 0 0EV 12M Optical zoom Digital zoom Note Digital zoom is not activated in recording movies Using Flash When taking the picture in dim lighting condition use the Flash to get correct ...

Страница 25: ...is enabled Setting the Focus Mode To set the Focus mode Press the Macro button repeatedly until the desired focus mode icon is displayed on the lower left corner of the LCD monitor Macro button Your camera supports the four focus modes Normal With normal focus the focus range starts from 0 4m There is no icon displayed on the screen Macro This mode is designed for close up photography If Macro is ...

Страница 26: ...he SET button to save and apply changes Menu bar Program N 12M AWB ISO AUTO 0 EV Menu options Shooting Mode It shows the selected mode from Menu options bar Program N 12M AWB ISO AUTO 0 EV Resolution The Resolution setting is used to set the resolution before you capture the image The higher the resolution the more memory space is required A2 Size N 12M AWB ISO AUTO 12M 8M 3M 5M 3 2 16 9 0 EV Qual...

Страница 27: ...just the image color temperature according to the ambient light condition when recording the still images and movies Auto N 12M AWB ISO AUTO AWB 0 EV Icon Item Description Auto The camera automatically adjusts the white balance Daylight Ideally used for bright sunny conditions Cloudy Ideally used for cloudy conditions Tungsten Ideally used for indoor photos with tungsten or halogen lighting withou...

Страница 28: ...on lets you select the area of the subject or frame by which the camera measures light to record still images or movies Multi N 12M AWB ISO AUTO 0 EV Icon Item Description Multi The camera measures the exposure readings from multiple points in the subject area Center The camera measures the average light from the entire frame but gives more importance to the values near the center Spot The camera ...

Страница 29: ...ish Ideally used to record images like flowers and cars to make them more vivid G Vivid Green Captured image becomes greenish Ideally used to record images like mountains and lawns to make them more vivid B Vivid Blue Captured image becomes bluish Ideally used to record images like the sky and the ocean to make them look more vivid ...

Страница 30: ...nu Set the camera to Shooting mode 1 Press 2 to launch the Record Menu Use the 3 or keys to move through the menu selections To select an item press 4 Change the submenu settings using the 4 way 5 navigation control Press the 6 SET button to save and apply settings OFF OFF Shooting Mode Self Timer Burst AEB AF Area AF Lamp Sharpness Setting the Scene Mode Setting the Scene allows you to capture im...

Страница 31: ...utomatically switches to the appropriate scene mode Portrait The camera blurs the background to focus on the subject Landscape This feature is used to emphasize wide scenic views Sunset This feature enhances the red hue for recording sunset images Backlight This feature is used to capture the image of a backlight object by changing the metering Smile Capture This feature uses face tracking to auto...

Страница 32: ...his mode makes the captured image more enticing Building This feature enhances the edges of captured images Text This feature enhances the black and white contrast normally used when capturing text images Auction Pictures taken in Auction mode are automatically saved under a specific folder named _AUCT Blink Detection This feature detects if the subject blinked an eye when the image is captured an...

Страница 33: ... Capture Icon The camera displays a white frame when a face is detected Focus the camera on the subject to capture 2 Press the shutter button to start smile detection The smile capture icon blinks every 3 second and the white focus frame turns green to denote camera activity When a smile is detected the camera will automatically take a shot of the image It will 4 continuously take 6 shots whenever...

Страница 34: ...d To activate Intelligent Scene Select 1 from the Shooting Mode submenu Focus the camera on the subject to capture 2 The camera detects the shooting conditions and switches to an appropriate scene mode 3 12M 307 307 The camera displays a solid white frame when a face is detected Portrait Mode Icon Half press the shutter button to focus the subject The frame turns green to indicate focus 4 is set P...

Страница 35: ...etermines captured image that contain subjects with blinked eyes This feature saves time in managing photos to be stored or deleted from the memory To activate Blink Detection Select 1 from the Scene Mode submenu 12M 307 307 Detected faces are framed Blink Detection Icon Face tracking is automatically enabled Half press the shutter button to focus the subject The 2 frame turns green to indicate fo...

Страница 36: ...shutter speed value Shutter Priority Icon Use the 2 or keys to increase or decrease the shutter speed Press the shutter button to capture the image 3 Using Manual Exposure Mode To activate Manual Exposure Select 1 from the Scene Mode submenu 12M 307 307 F 3 1 F 3 1 1 125 1 125 SET Switch Displays the aperture and shutter speed values Manual Exposure Icon Use the 2 or keys to increase or decrease t...

Страница 37: ...Shoot Mode Self Timer Burst AEB AF Area AF Lamp Sharpness OFF OFF Shooting mode Self Timer Burst AEB AF Area AF Lamp Sharpness OFF OFF 10 sec 2 sec Double Burst Off 10 2 x2 OFF The table below shows the available Self Timer Burst settings Icon Item Description 10 10 Sec Self timer Sets a 10 second delay to capture image after pressing the shutter button 2 2 Sec Self timer Sets a 2 second delay to ...

Страница 38: ... OFF Face Tracking Wide Center Self Timer Burst The table below shows the available AF area settings Icon Item Description Face Tracking The camera automatically detects the position of a face and sets the focus Wide The camera automatically selects focus area within the wide frame Center The focus area is fixed on the center Setting the AF Lamp The AF Lamp function allows you to record images eve...

Страница 39: ...t the color saturation in your photos Use a higher saturation setting for rich colors and a lower saturation setting for more natural tones Saturation Contrast Digital Zoom Date Stamp Auto Review Active Z Lighting OFF OFF OFF High Normal Low The table below shows the available Saturation settings Icon Item Description High Enhances saturation Normal Normal saturation is applied Low Reduces saturat...

Страница 40: ... Smile Capture Video and Voice Recording modes The maximum Intellect zoom scale varies depending on the image type and resolution Setting the Date Stamp The Date Stamp function allows you to add the recorded date and time on your photos Once date and time are stamped on a photo they can no longer be edited or deleted Limitations of Date Stamp functions are as follows Available for still images onl...

Страница 41: ...uto Review Active Z Lighting OFF OFF OFF On Off OFF ON Saturation Contrast Digital Zoom Date Stamp Auto Review Active Z Lighting OFF OFF OFF Setting the Active Z Lighting The Active Z Lighting adjusts the metering and applies the required Z lighting according to shooting conditions This function is only available for still images Available settings are Auto and Off Saturation Contrast Digital Zoom...

Страница 42: ...ngle video has been reached simple press the shutter button again to continue recording The camera will automatically stop recording when the memory capacity is full Digital zoom is not available in movie recording Sound cannot be recorded while pressing the control Setting the Movie Size The Movie Size function icon appears only in Video Mode Use FUNC button to adjust the resolution and quality o...

Страница 43: ... movie select from the Movie Size function Available recording time for a YouTube movie is up to 10 minutes Recording Voices From the Shooting mode menu select 1 Voice REC The Voice Recording screen layout is displayed on the LCD monitor Press the Shutter button to start recording 2 Press the Shutter button again to stop recording 3 00 00 02 00 00 02 ...

Страница 44: ... 2009 01 01 01 57 PLAY 27 27 27 27 2009 01 01 01 57 2009 01 01 01 57 27 27 27 27 PLAY 2009 01 01 01 57 2009 01 01 01 57 Use the 3 or keys to view next previous image video audio To play a movie or audio clip press the 4 key Viewing thumbnails Press the 1 W button to view 9 image thumbnails Use the navigation controls to move through the items 2 Press the 3 SET button to select the image and view i...

Страница 45: ...on repeatedly until the desired zoom view The 4 arrows on the LCD monitor indicate that the image is zoomed in Press the Play button to close zoom view x2 0 Playing Movies x2 0 Set the camera to Playback mode 1 Use the navigation controls to scroll through the saved 2 images A movie clip has a movie icon displayed on screen See picture on the left Press the 3 key to play the movie During playback ...

Страница 46: ... 00 00 05 WT SHUTTER Note This feature does not function when the memory card is full or the folder cannot be created The SHUTTER icon does not appear on the screen either Playing Voice Recording Set the camera to Playback mode 1 Use the navigation controls to scroll through the saved 2 images When viewing a voice recording file the LCD monitor displays the screen layout of Audio clips See picture...

Страница 47: ...Use the 3 or keys to scroll the display When the desired image video audio clip is displayed on 4 the LCD monitor press the Delete button A confirmation selection appears on screen 5 Select 6 Delete Press the 7 SET button to delete The next image is displayed on the LCD monitor To delete 8 another file use the or to scroll through the images videos audio clips Then repeat steps 4 to 7 To close the...

Страница 48: ...t the Slide Show During Slide Show press the 4 SET button to pause Slide Show Use the 5 or keys to move through the options Select whether to Continue or Exit the Slide Show Select Slide Show OK Interval Transition Repeat Start Cancel 1 sec Horizontal Yes NO Press the 6 SET button to apply selected option To change Slide Show settings From the Slide Show menu use the 1 or keys to move through the ...

Страница 49: ...om the Playback menu select 1 Protect The Protect submenu is displayed on the LCD monitor 2 Select available settings Single Select one file to lock Multi Select multiple files from the thumbnail view to lock Lock All Lock all files Unlock All Unlock all files Slide Show Delete Protect Red eye Correction Voice Memo Photo Edit Single Multi Lock all Unlock all Red Eye Correction This function is onl...

Страница 50: ...ecord voice memo Set the camera to Playback mode 1 Press the 2 or keys to scroll and select an image to attach voice memo to Press the 3 MENU button to launch the Playback menu Select 4 Voice Memo Select 5 Start then press the SET button to start recording Slide Show Delete Protect Red eye Correction Voice Memo Photo Edit 30 sec 30 sec Start Cancel Time left n seconds for recording Select 6 Stop t...

Страница 51: ...you move through the selection the preview on the LCD monitor changes synchronously The succeeding table shows the available settings Icon Item Description N Normal No effect is added to the image S Sepia Image is saved with a sepia tone BW B W Image is saved in black and white Neg Negative Image appears to be the opposite of the original image Mosaic Image is saved with mosaic tiles R Vivid Red I...

Страница 52: ... Show Delete Protect Red eye Correction Voice Memo Photo Edit Normal orientation of image Image rotated at 90º clockwise Note Each time you press the SET button to rotate image the image is rotated at 90º clockwise Trim The Trim function allows you to trim an image to another image size To trim an image Set the camera to Playback mode 1 Use the 2 or keys to scroll and select an image to trim Press...

Страница 53: ...Press the 9 SET button to save cancel changes Trim Overwrite Save As Cancel Note Trim function is not available for photos with image size set to VGA Resize The Resize function allows you to change the image resolution of large images to smaller ones 1 Overwrite Save and replace the old file with the new one Save As Save the new file as a new one Cancel Cancel resize Press the 2 SET button to save...

Страница 54: ...allows you to mark image in your memory card for printing and allows you to specify the number of copies that you want to print at a later date When all images to be printed are marked take the memory card to a digital printing service or use a DPOF compatible printer Note You can specify up to 99 copies for DPOF If you specify 0 copies the DPOF setting of that image is automatically disabled ...

Страница 55: ...ration below Using the Setup Menu The Setup menu allows you to configure general camera settings To go to Setup Menu Press 1 to launch the Record Playback Menu Use the 2 or keys to change the menu tab to Setup menu Use the 3 or keys to move through the menu selections To select an item press the 4 SET button or Change the submenu settings using the 4 way 5 navigation control Press the 6 SET button...

Страница 56: ...y card display as removable drives in the file manager No image is displayed on the LCD monitor Note You can also use a card reader to access the memory card contents of your camera Connecting the Camera to a Printer You can print your photos directly using a PictBridge compatible printer Turn on your camera 1 Set PictBridge settings 2 Connect the camera to the printer using the USB cable 3 ...

Страница 57: ...with a new one or delete unnecessary images LCD screen displays File locked This file is locked Unlock the file See Protect on page 39 LCD screen displays Card locked The memory card is protected Remove the card and slide the write protect switch to its unlock position LCD screen displays Format error The memory card is protected Remove the card and slide the write protect switch to its unlock pos...

Страница 58: ... X 1536 HD 1920 x 1080 VGA 640 X 480 Resolution Video 16 9 640 X 480 320 X 240 YouTube Scene Mode Auto Program Aperture Priority Shutter Priority Manual Exposure Intelligent Scene Portrait Landscape Sunset Backlight Smile Detection Kids Night Scene Fireworks Snow Sports Party Candlelight Night Portrait Soft Skin Soft Flowing Water Food Building Text Auction Blink Detection Movie Voice Rec Sensitiv...

Страница 59: ...ish German French Italian Portuguese Dutch Czech Hungarian Polish Turkish Russian Swedish Greek Romanian Arabic Thai Japanese Korean Simplified Chinese Traditional Chinese Brazil Portuguese Croatian Finnish Danish Norwegian Malay Indonesia Slovene Bulgarian Slovak Interface USB AV OUT TV system NTSC PAL Battery Lithium Ion Battery Operating Temperature 0º C 40º C Operating Humidity 0 90 Microphone...

Страница 60: ...ss and you will also be responsible for any shipping charges to the warranty service center Once your product is received by this service center a replacement unit will be shipped back to you typically within 5 business days Email Support Language Email Address Dutch hollands hpodd com Chinese simp chinese hpodd com trad chinese hpodd com English english hpodd com Français francais hpodd com Deuts...

Страница 61: ...P N 7525C00060A ...

Отзывы: