


1.
Insert the replacement LAN core I/O card into slot 2.
CAUTION:
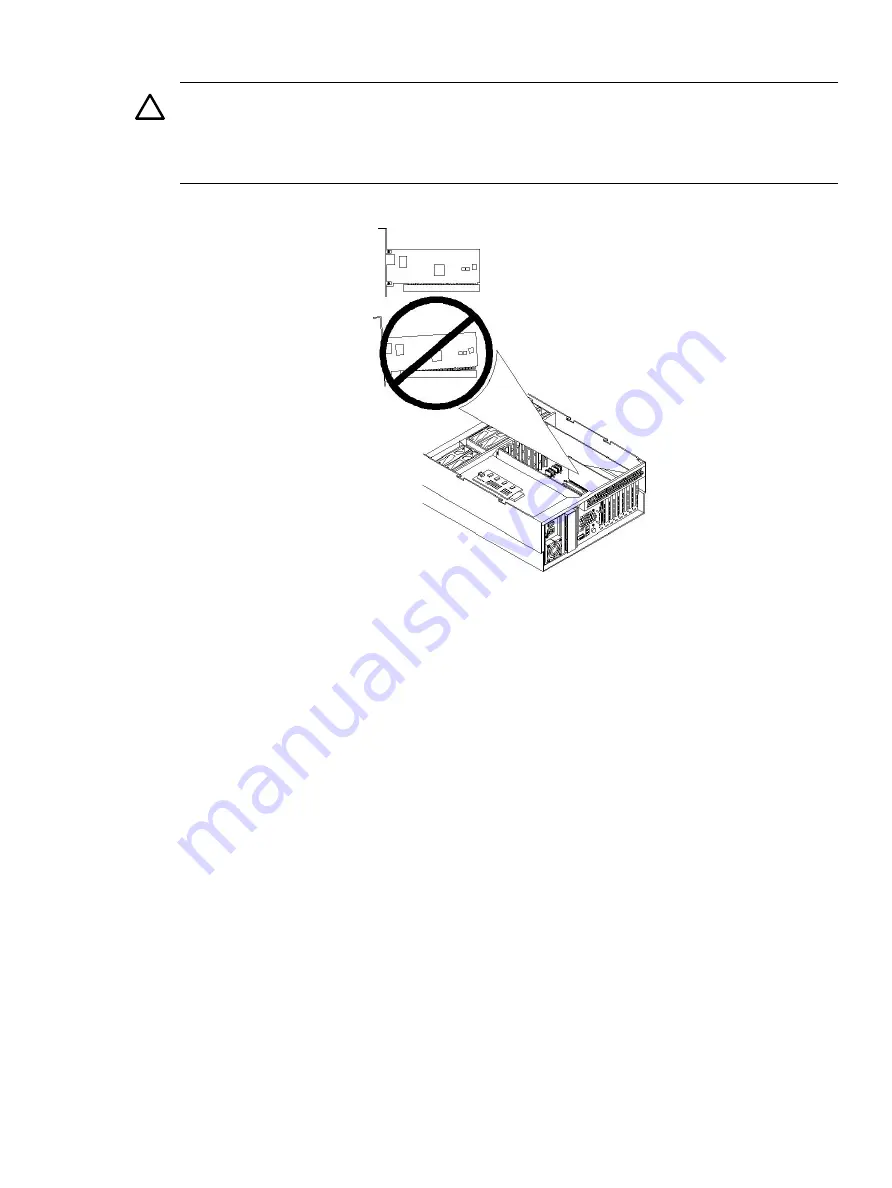
Always handle I/O cards by their edges. Failure to comply with this precaution
can result in damage to the card.
Ensure that you fully seat the card into the slot or the card can be damaged when power is
reapplied to the slot.
Figure 6-44 Installing the LAN I/O Card
2.
Close the blue PCI card latch for slot 2 by twisting it counterclockwise.
3.
Reconnect the LAN cables to the LAN core I/O card. Be sure to attach cables to their original
connectors.
4.
Replace the top cover. See
“Replacing the Top Cover” (page 154)
.
5.
Push the server back into the rack until it stops.
Removing the SCSI Core I/O Card
To remove the SCSI core I/O card in slot 1, follow these steps:
1.
If rack-mounted, slide the server out from the rack until it stops. See
Rack-Mounted Server” (page 149)
2.
Remove the top cover from the chassis. See
“Removing the Top Cover” (page 153)
3.
Disconnect any internal and external SCSI cables connected to the SCSI core I/O card.
Removing and Replacing Core I/O Cards
209
Содержание rp4410
Страница 16: ...16 ...
Страница 20: ...20 ...
Страница 42: ...42 ...
Страница 50: ...50 ...
Страница 128: ...128 ...
Страница 176: ...Figure 6 21 I O Baseboard Locking Lever 176 Removing and Replacing Components ...
Страница 230: ...230 ...
Страница 240: ...240 ...
Страница 242: ...242 ...


