8
Upgrading and Servicing Guide
Replacing an Optical Disc Drive
1
Complete the procedure “Removing an Optical Disc Drive“ on
page 6.
2
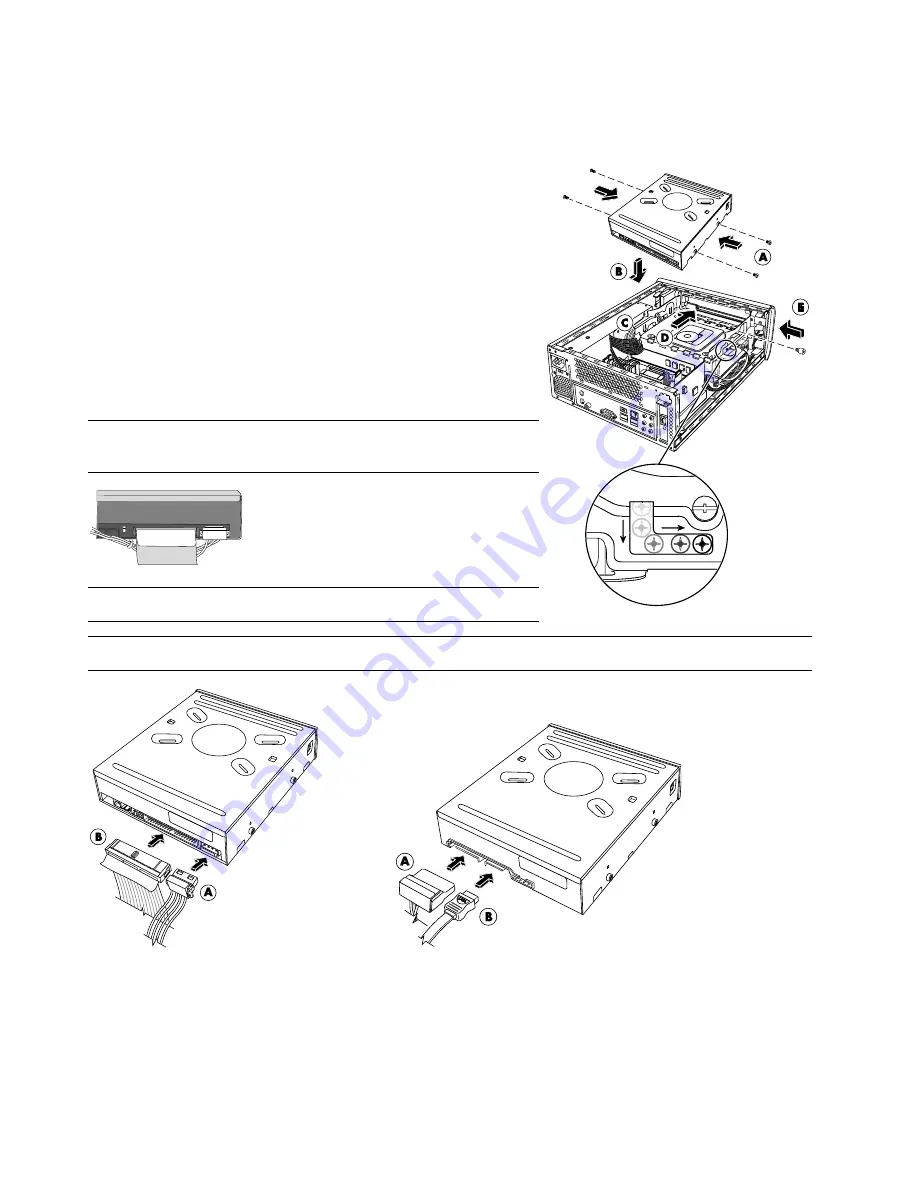
Screw all four guide screws into the sides of the new optical disc
drive (
A
).
3
Gently lower the new optical disc drive into the tray (
B
).
4
Hold the power supply cables against the power supply to clear the
optical disc drive (
C
) (as required) and slide the drive 2 cm
(3/4 inch) to the front of the PC (
D
).
5
Insert the thumbscrew on the side of the optical disc drive (
E
).
6
Connect the power cable (
A
) and data cable (
B
) firmly to the back
of the optical disc drive. Ensure that the cables are completely
inserted.
NOTE:
The optical drive model may have PATA cables or SATA
cables that use narrow data cables.
NOTE:
SATA cables may include a latch.
NOTE:
Route the PATA power cable under the data cable to prevent interference with the fan.
PATA Optical Disc Drive
SATA Optical Disc Drive
Содержание Pavilion Slimline s7200 - Desktop PC
Страница 1: ...Upgrading and Servicing Guide ...
Страница 4: ...iv Upgrading and Servicing Guide ...
Страница 23: ...Upgrading and Servicing Guide 19 ...
Страница 24: ......


