background image

4

Transferring and printing images

You can transfer images and video clips with or without the HP Photosmart Software that
came with your camera. However, the HP Photosmart Software has several features for
transferring and managing your images and also guides you through the transfer
process.

Transferring images with HP Photosmart Software

If you have installed the HP Photosmart Software (see 

Install the software

 on page 8

),

use this method to transfer images and video clips to your computer.
1.

If you have selected images for printing (see 

Selecting images for printing

on page 17

), verify that the computer is connected to a printer.

2.

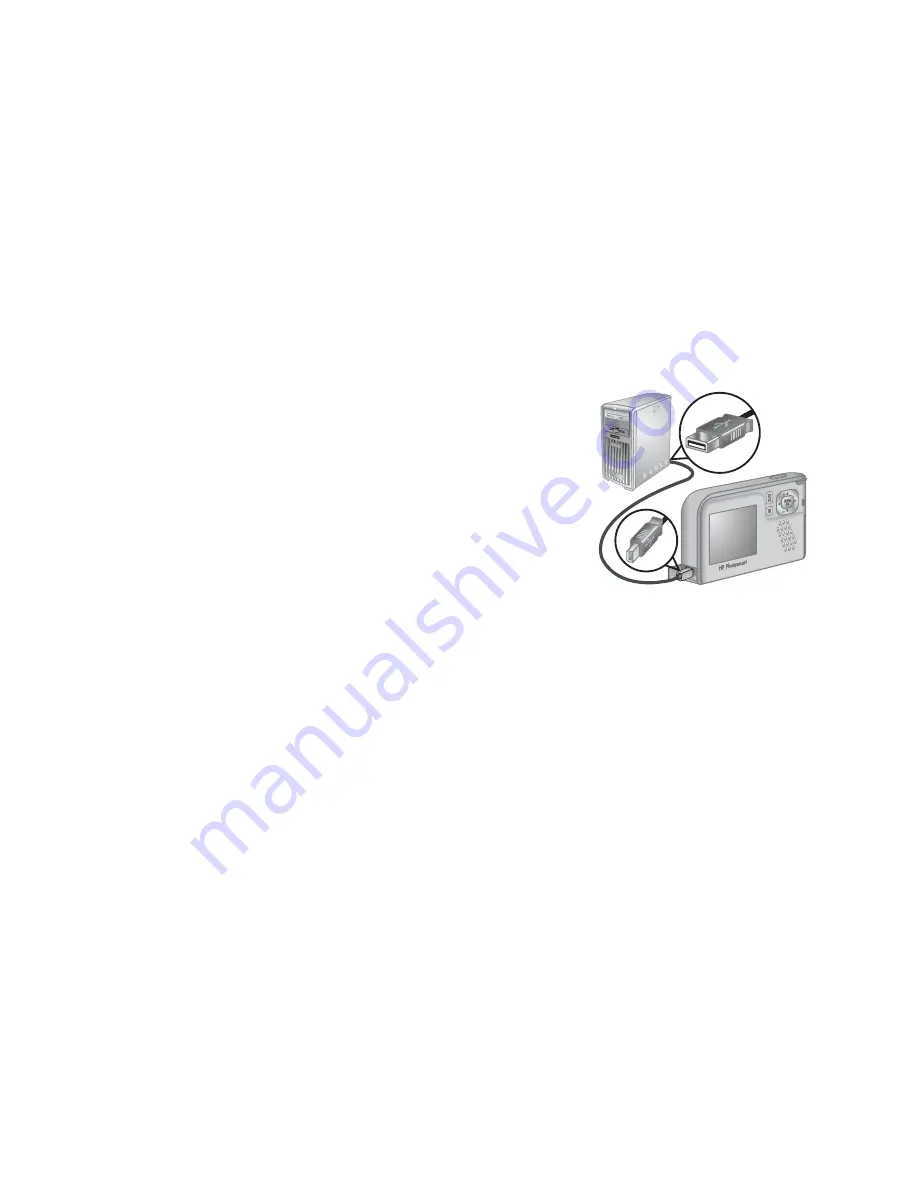
Connect the camera and computer using the USB
cable that came with your camera.

3.

Turn on the camera and follow the instructions on
the computer screen to transfer the images. For
more information, see the Help feature in the
HP Photosmart Software.

Transferring images without HP Photosmart Software

If you do not install the HP Photosmart Software, images marked for printing (see

Selecting images for printing

 on page 17

) do not automatically print when you connect

the camera to the computer. However, you can still transfer images and video clips to
your computer by:

Connecting your camera directly to the computer (see 

Connecting to the computer

on page 18

)

Using a memory card reader (see 

Using a memory card reader

 on page 19

)

Connecting to the computer

1.

Turn off the camera, connect the camera and computer using the USB cable that
came with your camera, then turn on the camera.

On Windows computers, the camera appears as a device in Explorer, allowing
you to copy images from the camera to the computer.

On Macintosh computers, either Image Capture or iPhoto starts automatically,
allowing you to transfer images to the computer.

2.

When you have finished transferring images, disconnect the camera from the
computer. If your computer is running Windows 2000 or XP and you get an 

Unsafe

Removal

 warning, disregard the warning.

If you encounter problems, set the camera’s 

USB Configuration

 to 

Disk Drive

 (see

USB Configuration

 under 

Using the Setup Menu

 on page 20

) and reconnect to your

computer.

18

Содержание L2437A

Страница 1: ...User Guide HP Photosmart E427 Digital Camera ...

Страница 2: ...HP products and services are set forth in the express warranty statements accompanying such products and services Nothing herein should be construed as constituting an additional warranty HP shall not be liable for technical or editorial errors or omissions contained herein Windows is a U S registered trademark of Microsoft Corporation SD Logo is a trademark of its proprietor ...

Страница 3: ... Flash Setting Red Eye 14 Exposure Compensation 14 White Balance 14 ISO speed 14 3 Reviewing images and video clips 15 Using Playback 15 Deleting images 16 Using the Playback Menu 16 Viewing thumbnails 16 Magnifying images 17 Selecting images for printing 17 Recording audio 17 4 Transferring and printing images 18 Transferring images with HP Photosmart Software 18 Transferring images without HP Ph...

Страница 4: ...ies 26 Extending battery life 26 Safety precautions for using batteries 26 Power indicators 27 Number of shots per battery type 27 Battery performance 27 Recharging NiMH batteries 28 B Specifications 29 Memory capacity 30 Image quality 30 Index 31 4 ...

Страница 5: ...tches between Live View and Playback see Taking pictures and recording video clips on page 10 and Reviewing images and video clips on page 15 3 and buttons Scroll through menus and images and access digital zoom While in Live View press to zoom in press to zoom out see Digital zoom on page 11 4 Power light 5 button Displays camera menus selects options and confirms actions 6 Delete button Accesses...

Страница 6: ...ects the lens while the camera is off Before taking pictures Complete the following procedures before taking pictures or recording video clips Install the batteries 1 Open the Battery Memory card door by sliding the Battery Memory card door toward the bottom of the camera 2 Insert the batteries 3 Close the Battery Memory card door Note Turn off the camera before removing the batteries If using rec...

Страница 7: ...ter use the Setup menu see Using the Setup Menu on page 20 Set the date and time Accurately setting the date and time will help you locate images once you have transferred them to your computer and will ensure that images are accurately marked if you use the date and time imprint feature See Date Time Imprint under Using the Capture Menu on page 12 1 Use to adjust the highlighted value 2 Use to mo...

Страница 8: ...se internal memory and view images stored there remove the memory card To transfer images from internal memory to an optional memory card see Move Images to Card under Using the Playback Menu on page 16 For information about supported memory cards see Storage on page 29 Install the software The HP Photosmart Software provides features for transferring images and video clips to your computer as wel...

Страница 9: ...P and x64 systems with at least 128MB of RAM This version of the software includes some extra features that let you pause a video and print a frame from it HP Photosmart Essential Software for Windows 2000 Windows XP and x64 systems with at least 128MB of RAM HP Photosmart Mac Software for Macintosh systems To learn more about the software features and how to use them see the Help feature in the H...

Страница 10: ...riefly in the upper right corner of the Image Display This indicates you are in Live View 2 If appears in the upper left corner of the Image Display switch to any other shooting mode For information about changing shooting modes see Using the Capture Menu on page 12 3 Frame the subject for your picture 4 Press the Shutter button all the way down to take the picture Recording video clips 1 Press un...

Страница 11: ...at which the scene will be captured When capturing images using digital zoom make sure that the MP value on the Image Display is appropriate for the size at which you want to print the captured image For MP values and their recommended print sizes see Image Quality under Using the Capture Menu on page 12 1 While in Live View press and hold until the image you want to capture fills the yellow frame...

Страница 12: ...ng outdoor scenes at sunset Video For recording video clips see Recording video clips on page 10 Flash Setting For selecting a flash setting Auto Flash Default The camera uses the flash if necessary Red Eye The camera uses the flash with red eye reduction if necessary to minimize the possibility of human eyes appearing red in the final image For information about red eye see Flash Setting Red Eye ...

Страница 13: ...ral picture taking Sun For outdoor scenes in sunny or cloudy conditions Shade For outdoor scenes in shade or at dusk Tungsten For indoor scenes with incandescent or halogen lighting Fluorescent For indoor scenes with fluorescent lighting ISO Speed Adjusts the camera s sensitivity to light For more information see ISO speed on page 14 Auto Default Camera selects the best ISO speed for the scene ISO...

Страница 14: ...ut gray without the use of Exposure Compensation For a scene with many light objects increase the Exposure Compensation to a positive number For a scene with many dark objects decrease the Exposure Compensation White Balance Different lighting conditions cast different colors This setting allows the camera to compensate for this reproducing colors more accurately and ensuring that whites appear wh...

Страница 15: ...to go to the Playback Menu 3 To switch to Live View press During Playback the Image Display also indicates additional information about each image or video clip 1 Battery indicator see Power indicators on page 27 2 Memory card indicator 3 3 Number of images to print see Selecting images for printing on page 17 4 0 15 Recorded length of this audio or video clip Audio clip attached Video clip indica...

Страница 16: ... Thumbnails See Viewing thumbnails on page 16 Magnify See Magnifying images on page 17 Print See Selecting images for printing on page 17 Rotate Rotates images in 90 degree increments Use to rotate the image clockwise or counter clockwise in 90 degree increments Press to save the image in the new orientation Record Audio See Recording audio on page 17 Move Images to Card Moves images from internal...

Страница 17: ...layback Menu and return to Playback For information about printing selected images see Printing images from the camera on page 19 Recording audio Record Audio allows you to record an audio clip and attach it to an existing image 1 From the Playback Menu select Record Audio to immediately start recording 2 To stop recording and attach the audio clip to the displayed image press If the currently dis...

Страница 18: ...HP Photosmart Software images marked for printing see Selecting images for printing on page 17 do not automatically print when you connect the camera to the computer However you can still transfer images and video clips to your computer by Connecting your camera directly to the computer see Connecting to the computer on page 18 Using a memory card reader see Using a memory card reader on page 19 C...

Страница 19: ...Either the HP Photosmart Software Image Capture or iPhoto starts automatically and guides you through the process of transferring images If no application starts automatically or if you want to copy the images manually look on the desktop for the disk drive icon for the memory card then copy the images to your local hard drive For more information about how to copy files visit Mac help Printing im...

Страница 20: ...g conditions High For very bright lighting conditions Camera Sounds Turns the camera sounds such as button presses and shutter clicks off and on On Default Off Date Time Sets the date and time See Set the date and time on page 7 USB Configuration Specifies how a computer recognizes the camera See Connecting to the computer on page 18 Digital Camera Default Recognizes the camera as a digital camera...

Страница 21: ... rechargeable Nickel Metal Hydride NiMH batteries Reset the camera see Resetting the camera on page 21 Ensure that the memory card is the proper type see Storage on page 29 If so remove the memory card and turn on the camera if the camera turns on format the memory card see Install and format an optional memory card on page 8 If the camera still does not turn on format the memory card using a memo...

Страница 22: ...ng The Image Display may have timed out Press any camera button to wake up the camera Replace the batteries If the Image Display still does not turn on reset the camera see Resetting the camera on page 21 My image is blurry Hold the camera steady when pressing the Shutter button use a tripod or improve lighting conditions Set the flash to Auto Flash or Flash On and set the shooting mode to Action ...

Страница 23: ...and Memory capacity on page 30 for tips about memory cards Video recording terminates abruptly The video is saved successfully but it is shorter than expected Replace your memory card with a faster card Look for cards marked High Performance Pro Ultra or High Speed Video recording terminates abruptly and the video will not play back Reformat the card see Install and format an optional memory card ...

Страница 24: ...the camera on page 21 Then restart the image transfer process see Transferring images with HP Photosmart Software on page 18 I am having a problem installing or using the HP Photosmart Software Make sure your computer meets the minimum system requirements see Install the software on page 8 Refer to the HP Customer Care website www hp com support How can I get professional quality prints if I don t...

Страница 25: ...a The HP Customer Care website is available to all HP customers The HP Customer Care website is the fastest source of up to date product information and expert assistance including Fast e mail access to qualified online support specialists Software and driver updates for your camera Valuable product and troubleshooting information for technical issues Proactive product updates support alerts and H...

Страница 26: ...the camera After five minutes of inactivity the camera turns off To further extend battery life Set Display Brightness to Low see Display Brightness under Using the Setup Menu on page 20 Set your camera to Auto Flash see Auto Flash under Using the Capture Menu on page 12 Safety precautions for using batteries Always use two identical batteries of the same chemistry brand and age Do not place batte...

Страница 27: ...ers four pictures are taken per session with at least a 5 minute break between sessions In addition The minimum number of shots is obtained with extensive use of Live View 30 seconds per picture Playback 15 seconds per picture and Flash On The maximum number of shots is obtained with minimal use of Live View 10 seconds per picture and Playback 4 seconds per picture Flash is used on 25 of the shots...

Страница 28: ... Fair Low temperature winter use Poor Good Fair Infrequent use Fair Good Fair Want to recharge battery No No Good Recharging NiMH batteries You can recharge optional NiMH batteries with an optional HP quick recharger For information about recharging NiMH batteries as well as safety precautions when recharging see the user s manual that came with your HP quick recharger Appendix A continued 28 ...

Страница 29: ...sh Yes 6 second typical recharge time Flash working range Maximum with ISO Speed set to Auto 5 m 16 5 ft Image Display 5 08 cm 2 0 in color LTPS TFT LCD with backlight 153 600 pixels 640 by 240 total pixel count Storage 32MB internal flash memory not all of which is available for storing images and video clips see Memory capacity on page 30 32MB SDRAM Slot for memory card This camera supports stan...

Страница 30: ...mory is available for storing images because some memory is used for internal camera operations The actual file sizes and number of still images that can be stored in internal memory or on a memory card will vary depending on the content of each still image and the length of any associated audio clip Image quality The following table lists the approximate number and average size of still images th...

Страница 31: ...ing 16 Image Quality 12 magnifying 17 number remaining 10 per battery 27 selecting for printing 17 transfer to computer 18 White Balance 13 install memory card 8 install software 8 Instant Review 11 interfaces 29 internal memory 10 30 ISO Speed 13 14 L Landscape mode 12 Language 7 20 LEDs 5 lights on camera 5 Live View Playback button 5 M Macro focus 11 magnifying images 17 memory capacity 30 card...

Страница 32: ... space remaining in memory 10 specifications 29 storage 29 Sunset mode 12 support process 25 T Thumbnails 16 Time Date 7 20 transfer images 18 troubleshooting 21 turn on off power 7 U USB configuration 18 20 USB connector 5 V video clips 10 viewing thumbnails 16 W weight 30 White Balance 13 14 Z zoom 11 32 ...

Отзывы: