


Chapter 1
27
Remove/Replace System Components
Removing/Replacing System Components
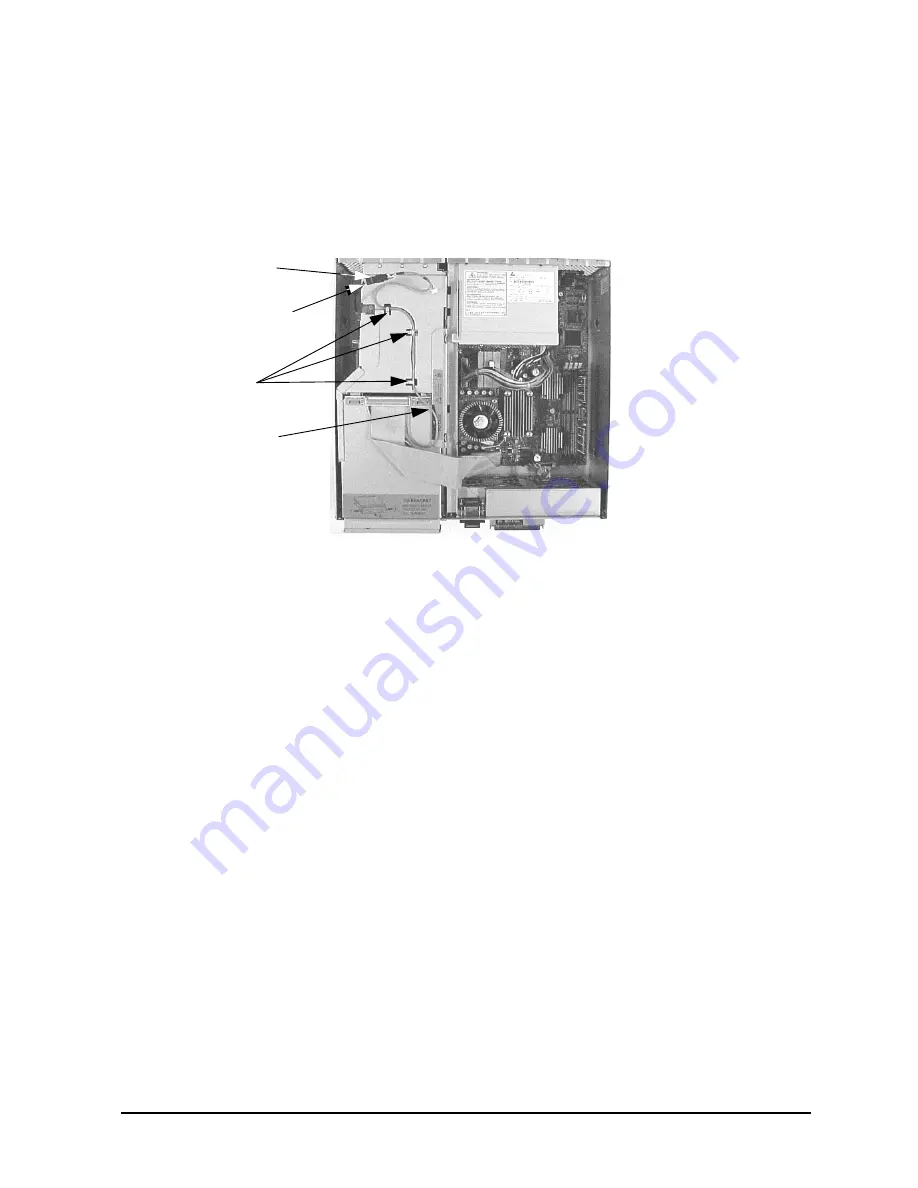
8. Connect the audio-extender cable and the CD drive audio cable. See Figure 1-21. Also,
lift up on the audio cable’s retainer tabs to replace the audio cable in its groove on the
PCI cage. Note that you can skip this step if your workstation does not have an audio
card.
Figure 1-21. Connecting the Audio-Extender Cable
9. Complete the procedure in the section “Replacing the Front Bezel and Top Cover”
found in this chapter.
10.Connect and turn on the power to your system.
11.Determine that your CD drive replacement was successful by executing the
sam
command as
root
. When the System Administration Manager window appears,
double click the Disk and File System icon and in the window that appears double
click the Disk Devices icon. In the next window that appears, you should see your CD
drive listed. If it is not listed, repeat this procedure. If your CD drive is still not listed,
contact your local HP Support Representative.
Retainer
Tabs
Audio-Extender
Cable
Connect
Audio Cable
Here
Audio Cable
Содержание b2600
Страница 5: ...Contents 5 Replacing the SCSI Cable 107 ...
Страница 6: ...6 Contents ...
Страница 72: ...72 AppendixA Regulatory Statements Declaration of Conformity according to ISO IEC Guide 22 and EN 45014 ...
Страница 76: ...76 AppendixA Regulatory Statements Optical and Acoustical Statements ...
Страница 96: ...Appendix C Remove Replace DAT Drives Replacing the DAT Drive 96 ...


