
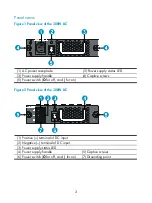
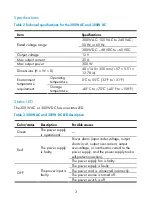


6
Removing a power supply
Follow these steps to remove a power supply:
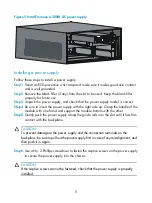
Step1
Prepare an antistatic mat to place the removed power supply.
Step2
Wear an ESD-preventive wrist strap and make sure it makes good skin contact
and is well grounded.
Step3
Turn off the switch on the power supply.
Step4
Remove the power cord from the power supply.
Step5
Use a No. 2 Philips screwdriver to loosen the captive screw on the power supply.
Step6
Holding the power supply handle with one hand and supporting the bottom of
the power supply with the other, gently pull the power supply out.
Step7
Put the removed power supply on the antistatic mat.
CAUTION:
•
The power supply is heavy. When pulling the power supply out of the slot, support
the bottom of the power supply with one hand and hold the handle of the power
supply with the other.
•
After removing the power supply, if you do not install a new power supply, install a
blank panel.
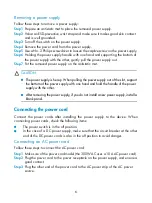
Connecting the power cord
Connect the power cords after installing the power supply to the device. When
connecting power cords, check the following items:
•
The power switch is in the off position.
•
In the case of a DC power supply, make sure that the circuit breaker at the other
end of the DC power cords is also in the off position to avoid danger.
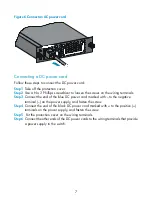
Connecting an AC power cord
Follow these steps to connect the AC power cord:
Step1
Make sure of the power cord model (the 300W AC uses a 10 A AC power cord).
Step2
Plug the power cord to the power receptacle on the power supply, and ensure a
good contact.
Step3
Plug the other end of the power cord to the AC power strip of the AC power
source.


