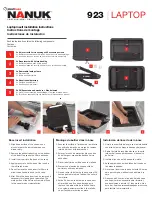
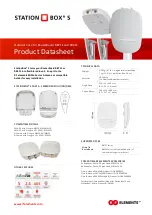
3.
While lifting up the power supply module latch (
1
), grasp the fan element and pull the defective
power supply assembly out of the chassis (
2
).
1
2
15557
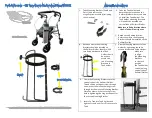
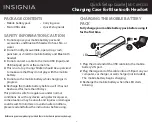
Installing the component
1.
Lift up on the power supply module latch (
1
) and slide the assembly into the chassis until it is fully
seated (
2
).
1
2
15558
2.
Connect the AC power cord to the power supply.
3.
Engage the cord lock.
Verifying proper operation
After replacing the power supply, verify that:
•
The power supply LED is solid green.
•
No new error messages are displayed on the array controller LCD panel.
maintenance and service guide
87
Содержание 201723-B21 - HP StorageWorks Modular SAN Array 1000 Hard Drive
Страница 8: ...8 ...
Страница 12: ...12 About this guide ...
Страница 18: ...18 Specifications ...
Страница 28: ...28 System components and LEDs ...
Страница 58: ...58 LCD panel and message descriptions ...
Страница 94: ...94 Customer replaceable components ...
Страница 98: ...98 Capacity expansion and extension ...
Страница 104: ...104 Hard drive failures and faulted LUNs ...
Страница 110: ...110 SCSI hard drive firmware ...