11
12.1
12.3
12.2
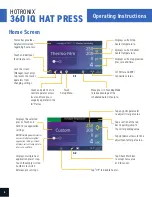
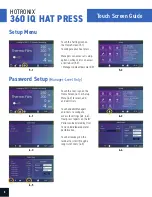
Touch the Settings icon on the Home Screen.
•
When a software update is available, an exclamation point appears after the
version number in the Setup Menu (5.2).
•
Touch Firmware, information displays on right of screen. An available online
update displays a Cloud icon (12.3).
•
Touch Update File on right of screen, then touch Check Mark icon on taskbar to
start download. A downloaded update displays a Memory Card icon.
•
Touch Downloaded Update File on right of screen, then touch Check Mark icon on
taskbar to start installation.
NOTE:
If a power failure occurs during installation, the heat press will attempt to install the previous
software version.
Updating Software
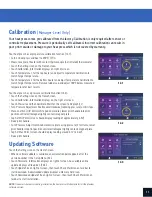
Your heat press has a temperature calibration function (12.1).
•
Turn on heat press and heat to 350°F/177°C.
•
Measure center of heater with contact thermocouple (not infrared) thermometer.
•
Touch the Settings icon on the Home Screen.
•
Touch Calibration, information displays on right of screen.
•
Touch Temperature 1 for the top heater and adjust Temperature Calibration to
match Target Temperature.
•
Touch Temperature 2 for the bottom heater and adjust Temperature Calibration to
match Target Temperature. Remove rubber cap and adjust 100°F below measured
temperature for best results.
Your heat press has a pressure calibration function (12.2).
•
Touch the Settings icon on the Home Screen.
•
Touch Calibration, information displays on the right of screen.
•
Touch Pressure and then Calibrate. Wait for the screen to display 2.5V.
•
Turn Pressure Adjustment Knob counterclockwise (reducing pressure) until it stops.
•
Place one thin (1/8" 3mm) white pad on mandrel, lower print handle into print
position until electromagnet lightly contacts magnet plate.
•
Tap Set Min Point (screen should display reading of approximately 2.5V).
•
Raise print handle.
•
Turn Pressure Adjustment Knob clockwise (increasing pressure) 3 full turns, lower
print handle into print position until electromagnet lightly contacts magnet plate.
•
Tap Set Max Point (screen should display reading around 2.1V to 2.4V).
•
Raise print handle.
Your heat press comes pre-calibrated from the factory. Calibration is only required after sensor or
controller replacement. Pressure is periodically self-calibrated. Incorrect calibration can result in
poor print results or damage to your heat press which is not covered by warranty.
Calibration
(Manager-Level Only)
Содержание 360 IQ HAT PRESS
Страница 1: ...OPERATOR S MANUAL 360 IQ HAT PRESS ...
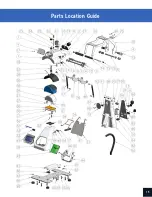
Страница 15: ...Parts Location Guide 15 Parts Location Guide ...
Страница 16: ......


