4
1. INSTALLATION
1.1. INSTALLING SINGLE APPLIANCE
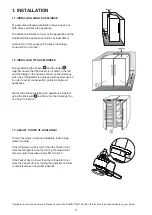
To guarantee adequate ventilation, leave a space on
both sides and above the appliance.
The distance between the rear of the appliance and the
wall behind the appliance should be at least 50mm.
A reduction of this space will increase the Energy
consumption of product.
1.2. INSTALLING TWO APPLIANCES
During installing the freezer 1 and the fridge 2
together ensure that the freezer is located on the left
and the fridge on the right (as shown on the drawing).
Left side of refrigerator is equipped with special device
in order to avoid condensation problems between
appliances.
We recommended installing two appliances together
using the linking-kit 3 (as shown on the drawing). You
can buy it in Service.
1.3. ADJUST DOORS (IF AVAILABLE)
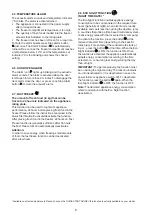
To level the doors using the adjustable lower hinge
(select models)
If the refrigerator door is lower than the freezer door,
raise the refrigerator door by turning the adjustment
screw counterclockwise using a M10 wrench.
If the freezer door is lower than the refrigerator door,
raise the freezer door by turning the adjustment screw
counterclockwise using a M10 wrench.
*Available on selected models only. Please check on the QUICK START GUIDE if this function is actually available on your model.
50mm
50mm
5 mm
max
Содержание UH6F1CW1
Страница 1: ...Instructions for use...
Страница 2: ...2 ENGLISH Instructions for use Page 3...
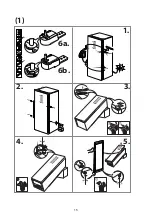
Страница 15: ...15 1 2 3 4 6a 6b 5 A 1 Others REVERSE DOOR SWING VERSION_1...
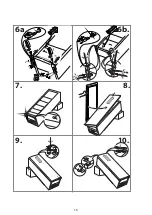
Страница 16: ...16 7 9 10 6a 6b 8...
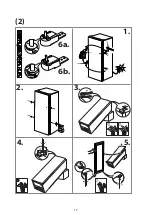
Страница 17: ...17 1 2 3 4 5 6a 6b A 2 REVERSE DOOR SWING VERSION_2...
Страница 18: ...18 7 8 9 10 6a 6b...
Страница 19: ...19 3 1 2 2 1 3 2 1 3 REMOVING INSERT THE FREEZER INTERIOR...
Страница 20: ...20 10mm click 1 2 3 4...
Страница 21: ......
Страница 22: ......
Страница 23: ......
Страница 24: ...Whirlpool is a registered trademark of Whirlpool Corporation USA 19514530100 04 16 GB 011...


