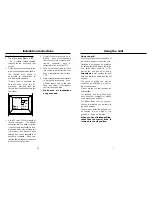
Hotpoint SY22K Скачать руководство пользователя страница 6

Glass door panels

To meet the relevant Standards of
Domestic cooking appliances, all the
glass panels on this appliance are
toughened to meet the fragmentation
requirements of BS3193.  This ensures
that, in the unlikely event that a panel
breaks, it does so into small fragments
to minimise the risk of injury.  
Please take care when handling, using
or cleaning all glass panels as any
damage to the surfaces or edges may
result in the glass breaking without
warning or apparent cause at a later
date.  Should any glass panel be
damaged, we strongly recommend
that it is replaced immediately.

Before using the appliance

for

the first time, remove any protective
polythene film and wash the oven
shelves in hot soapy water to remove
their protective covering of oil.  Even
so, when you first switch on the oven
or grill you may notice a smell and
some smoke.

Condensation

When hot and cold air meet,
condensation forms.  The outer door is air
cooled and the inner door gets hot, so some
condensation might form; this is normal
and will disappear within 10 - 15 minutes.

To replace a light bulb

(if fitted) 

Caution:

Switch off the electricity

supply to the appliance, to avoid the
possibility of electric shock.  
Wait until the oven is cool, then
remove the shelves.
Unscrew the lens cover (turn
anticlockwise).  Unscrew the bulb and
replace.  Replace lens cover.
Please note that light bulbs are not
covered by guarantee.

Environmental Protection

We are committed to protecting the
environment and operate an
Environmental Management System
which complies with BS EN ISO
14001:1996.

Disposal of packaging

All our packaging materials are
recyclable and environmentally
friendly.

Please help us to protect our
environment by disposing of all
packaging in an environmentally
friendly manner.

Please contact your local authority
for the nearest recycling centre.

Caution:

Packaging materials can

pose a risk of suffocation - keep away
from children.

4

Introduction

Step 5: Commissioning

Pressure test point

Use the oven burner.  From inside the
oven remove the burner cowl.  Remove
the small screw at the LHS of the
burner cradle.  Slide the burner to the
left to access the injector.  
Connect suitable T-piece
(incorporating a 1.25mm injector) to
the injector.  Connect manometer to
the T-piece, and turn oven control to
full on to check pressure.
Replace in reverse order.

Burner aeration

All burners have fixed aeration and no
adjustment is possible.

Pressure setting 

Cat

I

2H 

G20 Natural Gas @ - 20mbar

Electrical systems check

In the event of an electrical fault the
preliminary electrical system check
(earth continuity, short circuit, polarity
and resistance to earth) must be
carried out.

Oven

1. Push in and turn the control knob

anticlockwise to gas mark 9.

2. Adjust to the required setting.
3. The burner may not come on to a

full rate unless the oven door is
closed.
The oven burner operates at a low
rate for up to 60 seconds until the
flame supervision device opens
and full gas rate is obtained.

Grill

1. The door must be open for the grill

burner to ignite.

2. Push in and turn the control knob

clockwise to the grill symbol.

3. Close the door, and check that the

burner goes out.  
The grill burner will re-ignite when
the door is opened again.

Before leaving the installation

Show the customer how to ignite
the oven and grill and give them this
handbook.  Thank you.

29

Installation Instructions

Содержание SY22K

Страница 1: ...Merloni Elettrodomestici UK Ltd Morley Way Peterborough PE2 9JB 08 25378 00 10 2003 Users Instruction Installation Book for SY22W SY22K 60cm Gas Oven Grill...

Страница 2: ...anisation which protects the interests of gas users If you need advice you will find the telephone number in your local telephone directory under Gas The appliance must be installed and serviced by a...

Страница 3: ...mer Clock 14 Cleaning 19 Installation Instructions 21 27 Regulations Standards Ventilation requirements 21 Step 1 Prepare installation 22 Step 2 Connect to gas supply 24 Step 3 Connect to electricity...

Страница 4: ...e Regulations 1994 the The Gas Safety Installation Use Amendment Regulations 1996 Failure to comply with these Regulations is a criminal offence Corgi registered installers undertake to work to satisf...

Страница 5: ...tric supplies to various components in the event of fan failure If the minute minder and lights do not function and the ignition system stops working the safety device has operated Within an hour the...

Страница 6: ...ging All our packaging materials are recyclable and environmentally friendly Please help us to protect our environment by disposing of all packaging in an environmentally friendly manner Please contac...

Страница 7: ...e over the appliance or the edge of the worktop Keep all flammable materials such as curtains furnishings clothing away from the appliance Parts of the appliance may be hot during or immediately after...

Страница 8: ...grilling should be positioned centrally on the trivet 6 Using the Grill handle grill pan trivet handle position indicators 27 Installation Instructions Step 3 Connect to the electricity supply Warnin...

Страница 9: ...have a temperature rise less than 70 C 6 Rigid connections must be accessible to disconnect for servicing Cut a 150mm square hole in the right hand rear corner of the support shelf for the supply pip...

Страница 10: ...rozen or chilled food and we recommend preheating for yeast mixtures batters souffl s and whisked sponges If you are not preheating the oven the cooking times in the Baking Guide may need to be extend...

Страница 11: ...nto a standard 600mm wide housing unit with minimum internal dimensions as shown 591mm is to the underside of the worktop when the appliance is built under or to the underside of the panel above when...

Страница 12: ...ation regulation Particular attention shall be given to the relevant requirements regarding ventilation In your own interest and that of safety it is the law that all gas appliances be installed and s...

Страница 13: ...rmed skewer inserted into the centre of the cake If the skewer comes out clean then the cake is cooked Do not attempt to make Christmas cakes larger than the oven can cope with you should allow at lea...

Страница 14: ...om 15 20 mins Brandy snaps 4 middle to top 7 18 mins Flapjacks 4 middle to top 20 40 mins Ginger nuts 4 middle to top 10 20 mins Puddings 1l 2 pint dish Rice pudding 2 middle to top 2 21 2 hours Baked...

Страница 15: ...guide The times given in the roasting guide are only approximate because the size and age of the bird will influence cooking times as will the shape of a joint and the proportion of the bone Frozen me...

Страница 16: ...Warm food should never be placed in the oven if there is a delay period Stews prepared by frying the meat and vegetables first should be cooked as soon as possible or refrigerated prior to placing in...

Страница 17: ...lly switch on at the calculated start time of 16 00 hours 4 00 pm 7 A single press of the cook time button shows the cooking time remaining before the oven automatically switches off 8 A U T O A U T O...

Страница 18: ...time of day but you can press the minute minder button and the display will show the minutes remaining The tone will sound at the end of the time set to cancel the tone press the minute minder button...

Отзывы: