background image

16

GB

PLEASE PHONE US TO REGISTER YOUR APPLIANCE AND ACTIVATE YOUR PARTS GUARANTEE ON 08448 24 24 24

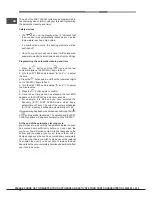
The end of the FAST CLEAN cycle may be programmed in 

the same way as a normal cooking cycle (see Programming 

the automatic cleaning end time).

Safety devices

•  The 

 icon on the display, when lit, indicates that 

the oven door was automatically locked as soon as the 

temperature reached a high value. 

•  If  a  malfunction  occurs,  the  heating  elements  will  be 

switched off.

•  Once the oven door has been locked, it will no longer be 

possible to modify the duration and end of cycle settings.

Programming the automatic cleaning end time

1. Press the 

 button until the 

 icon and the two 

numerical digits on the DISPLAY begin to flash.

2. Turn the SET TIME knob towards “

” and “ ” to adjust 

the time.
3. Press the 

 button again, until the other numerical digits 

on the DISPLAY begin to flash.

4. Turn the SET TIME knob towards “

” and “ ” to adjust 

the minute value.
5. Press the 

 button again to confirm.

6. Once the set time period has elapsed, the text END 

appears on the DISPLAY and a buzzer sounds.

•  For  example:  it  is  9:00  and  you  have  selected  the 

Economy (ECO) FAST CLEAN mode, which has a 

default time of 1 hour. The end of the cycle is scheduled 

for 12:30, meaning it will begin automatically at 11:30.

If programming has been scheduled and confirmed, the 


 buttons will be illuminated. The duration and the FAST 

CLEAN end time will appear alternately on the DISPLAY. 

At the end of the automatic cleaning cycle,

you will have to wait until the temperature inside the oven 

has  cooled  down  sufficiently  before  you  can  open  the 

oven door. You will notice some white dust deposits on the 

bottom and the sides of your oven; remove them with a 

damp sponge once the oven has cooled down completely. 

If, on the other hand, you wish to make use of the residual 

heat inside the oven, you do not have to remove the dust 

deposits as they are completely harmless and will not affect 

your food in any way.

Содержание OS 897D P /HP S

Страница 1: ...D P HP S OS 897D P IX HP S English Operating Instructions OVEN Contents Operating Instructions 1 Warnings 2 Description of the appliance 3 Description of the appliance 4 Installation 5 Oven structure...

Страница 2: ...en shall not play with the appliance Cleaning and user maintenance shall not be made by children without supervision Do not use harsh abrasive cleaners or sharpmetalscraperstocleantheovendoor glass si...

Страница 3: ...8 24 24 24 Description of the appliance Overall view 1 POSITION 1 2 POSITION 2 3 POSITION 3 4 POSITION 4 5 POSITION 5 6 DIVIDER D POSITION 7 POSITION 6 8 POSITION 7 9 GUIDES for the sliding racks 10 D...

Страница 4: ...1 SMALL SPACE FUNCTION knob 2 DISPLAY 3 SET TIME button 4 EXTRALARGE SPACE FUNCTION knob 5 SET TEMPERATURE TIMER knob 6 SELECT RECESS button 7 MAIN SPACE FUNCTION knob Display 8 TEMPERATURE and TIME...

Страница 5: ...he following dimensions 595 mm 595 mm 24 mm 545 mm 5 mm 576 mm 23 mm 593 mm 45 mm 558 mm 547 mm min The appliance must not come into contact with electrical parts once it has been installed The indica...

Страница 6: ...regulations Before connecting the appliance to the power supply make sure that The appliance is earthed and the plug is compliant with the law The socket can withstand the maximum power of the applia...

Страница 7: ...ARGE SPACE ExtraLarge Space cooking on 4 shelf levels RACK or DRIPPING PAN DRIPPING PAN cooking on 3 shelves Divider D fixed position RACK cooking on 3 shelves RACK cooking on 3 shelves SMALL SPACE MA...

Страница 8: ...ExtraLarge Space Do not use position D for racks Starting the oven 1 Select the desired cooking function by turning the EXTRALARGE SPACE FUNCTION knob If the icon on the display is lit this indicates...

Страница 9: ...uld be placed in position 7 Place the food inside the oven while it is still cold If you wish to place the food in the oven after it has been preheated immediately following a high temperature cooking...

Страница 10: ...t will appear on the display these range between 5 and 100 The high and direct temperature of the grill is recommended for food which requires a high surface temperature This function is particularly...

Страница 11: ...below a certain level The clock and programmed cooking modes which have not yet started will not be restored and must be reprogrammed Programming cooking A cooking function must be selected before pro...

Страница 12: ...to 2 1 1 3 to 5 3 3 5 5 6 Yes Yes Yes Yes 180 180 180 180 15 25 15 25 20 30 20 30 Pastries 1 2 3 2 or 3 2 1 5 4 6 Yes Yes Yes 200 200 200 30 40 35 45 40 50 Cr me caramel bain marie 1 2 3 2 or 3 2 1 5...

Страница 13: ...D Yes 160 60 75 Sponge cake 1 2 2 1 3 D D Yes Yes 190 190 30 35 35 40 Small roasting joints 1 2 3 D Yes 210 30 60 The cooking times listed above are intended as guidelines only and may be modified in...

Страница 14: ...he product These individuals should at the very least be supervised by someone who assumes responsibility for their safety or receive preliminary instructions relating to the operation of the applianc...

Страница 15: ...replaced Replacing the light bulb To replace the oven light bulb 1 Remove the glass cover of the lamp holder 2 Remove the light bulb and replace it with a similar one halogen lamp voltage 230 V watta...

Страница 16: ...SET TIME knob towards and to adjust the minute value 5 Press the button again to confirm 6 Once the set time period has elapsed the text END appears on the DISPLAY and a buzzer sounds For example it i...

Страница 17: ...d and functioning efficiently throughout its life UK 08448 225 225 Republic of Ireland 0818 313 413 www hotpointservice co uk Appliance Registration We want to give you additional benefits of Hotpoint...

Страница 18: ...rtation improper use neglect or interference or as a result of improper installation Replacement of any consumable item or accessory These included but not limited to plugs cables batteries light bulb...

Страница 19: ...GB 19 PLEASE PHONE US TO REGISTER YOUR APPLIANCE AND ACTIVATE YOUR PARTS GUARANTEE ON 08448 24 24 24...

Страница 20: ...20 GB PLEASE PHONE US TO REGISTER YOUR APPLIANCE AND ACTIVATE YOUR PARTS GUARANTEE ON 08448 24 24 24 195102581 00 05 2012 XEROX FABRIANO...

Отзывы: