background image

EN


Rinse aid and refined salt

Only use products which have been

specifically  designed  for  dishwashers.

Do not use table salt or industrial salt, or

washing  up  liquid.

Follow  the  instructions  given  on  the  packaging.

If using a multi-functional product it is not necessary to add

rinse aid; however, 

we recommend that you add salt,

especially if you live in an area where the water is hard or

very hard.

 Follow the instructions given on the packaging.

If you do not add salt or rinse aid, the LOW

SALT

*

 and LOW RINSE AID

*

 indicator lights

remain  lit.

Measuring out the rinse aid

Rinse aid makes it easier for the crockery to dry, as water

runs off surfaces more readily and therefore does not leave

streaks or marks.

The rinse aid dispenser should be filled:
• When the LOW RINSE AID

*

 indicator light on the control

panel is illuminated;

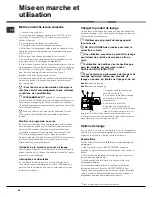
1. Open the dispenser by turning

the lid (G) in an anticlockwise

direction.

2. Pour in the rinse aid, making

sure it does not overflow from the

dispenser. If this happens, clean

the spill immediately with a dry

cloth.

3. Screw the lid back on.

NEVER pour the rinse aid directly into the appliance tub.

Adjusting the amount of rinse aid

If you are not completely satisfied with the drying results, you

may adjust the quantity of rinse aid used. Use a screwdriver

to turn the dosage adjuster (F) to one of the 6 pre-set

positions (the default position is set to 4):

• If there are streaks on the crockery, set the adjustment

device to a lower number (1-3).

• If drops of water remain on the crockery or if there are

limescale marks present after the cycle has finished, set the

adjuster to a higher number (4-6).

Setting the water hardness

Every dishwasher is equipped with a water softener which, by

using refined salt designed especially for this type of

appliance, supplies water without limescale which is then used

to wash the crockery.

This dishwasher offers a setting which helps to reduce

pollution and optimises washing performance in accordance

with the water hardness level in your area. This information can

be obtained from the organisation which supplies your

household with water.

Open the door

 and switch on the machine by pressing the

ON/OFF

 button.

- Press the 

P

 button and hold for approximately 5 seconds;

two short beeps will sound and the set hardness number will

flash slowly on the display (the water softening system is set

to number 3).

- Press the 

P

 button repeatedly until the desired hardness

level has been reached (1-2-3-4-5

*


see Water hardness

table

).

- To exit the function, wait approximately few seconds or press
another option

*

 button, or switch off the machine using the 

ON/

OFF

 button.

Even if using multi-functional tablets, the salt dispenser should
still be filled.

(°dH = hardness measured in German degrees - °f =

hardness measured in French degrees - mmol/l = millimoles
per litre)

Measuring out the refined salt

In order to achieve the best possible results using a wash

cycle, make sure that the dispenser is never empty. Refined

salt removes limescale from the water, thus avoiding the

formation of deposits on crockery.

The salt dispenser is located in the lower part of the

dishwasher (

see Description

) and should be filled:

• When the green float

*

 cannot be seen by simply looking at

the cap of the salt dispenser.

• When the LOW SALT

*

 indicator light on the control panel is

illuminated;

1. Remove the lower rack and unscrew the

container cap (anticlockwise).

2. The first time you do this: fill the water tank

right up to its edge.
3. Position the funnel

*

 (

see figure)

 and fill the

salt container right up to its edge (this should hold

approximately 1 kg); it is not unusual for a little water to leak

out.
4. Remove the funnel

*

 and wipe any salt residue away from

the opening; rinse the cap under running water and then

screw it on, the head facing downwards so as to let the water

flow out of the four cracks which are arranged in a star shape
on the lower part of the cap. (Salt cap with green float

*

)

It is advisable to perform this procedure every time you

add salt to the container.

Make sure the cap is screwed on tightly, so that no detergent

can get into the container during the wash cycle (this could
damage the water softener beyond repair).

When necessary, measure out the salt before a wash

cycle so that any saline solution which has leaked out of the
salt dispenser is removed.

Only available in selected models.

G

F

Water Hardness Table


°dH °fH 

mmol/l 

level 

0 6 0  10 0 1 

6 11 11  20 1.1  2 

12  17  21 

30  2.1 

17 34 31  60 3.1  6 

34 50 61  90 6.1  9 

5

*


For values between 0°f and 10°f, we do not 
recommend the use of salt. 
* this setting may cause a slight increase in the 
duration of the cycle. 

Содержание LFTA+ 2284

Страница 1: ...ogrammi 8 Tabella dei programmi Brillantante e sale rigenerante 9 Caricare il brillantante Caricare il sale rigenerante Manutenzione e cura 10 Escludere acqua e corrente elettrica Pulire la lavastovig...

Страница 2: ...irla vedere foglio istruzioni incasso allegato alla documentazione Collegamenti idraulici ed elettrici L adattamento degli impianti elettrici e idraulici per l installazione deve essere eseguito solo...

Страница 3: ...i Il cavo non deve subire piegature o compressioni Se il cavo di alimentazione danneggiato deve essere sostituito dal costruttore o dal suo Servizio di Assistenza Tecnica in modo da prevenire ogni ris...

Страница 4: ...totale Presente solo su alcuni modelli Il numero e il tipo di programmi ed opzioni variano in base al modello di lavastoviglie Pannello comandi Tasto Selezione Programma Tasto opzione Short Time Tasto...

Страница 5: ...ervizio posizionarli sulle ribaltine Ribaltine ad inclinazione variabile L inclinazione consente di acquistare maggiore spazio nel cesto superiore di posizionare calici con steli di lunghezza diversa...

Страница 6: ...attenzione alla fuoriuscita di vapore e inserire le stoviglie Chiudere la porta il ciclo riprende Interruzioni accidentali Se durante il lavaggio si apre la porta o si verifica un interruzione di cor...

Страница 7: ...re l opzione ripremere sullo stesso tasto Opzione Short Time Questa opzione permette di ridurre la durata dei principali programmi mantenendo le stesse performance di lavaggio ed asciugatura Dopo aver...

Страница 8: ...male 29 gr A 6 gr B 29 ml A 6 ml B 1 A Si A B C D E 1 50 Sporco quotidiano in quantit limitata 4 coperti 1 pentola 1 padella 3 Quotidiano 25 gr A 25 ml A 1 A No A B C 1 00 Lavaggio preliminare in atte...

Страница 9: ...di regolazione di durezza impostato Il decalcificatore impostato di fabbrica sul n 3 Premere il tasto P in successione fino al raggiungimento della durezza desiderata 1 2 3 4 5 Vedi tabella durezza a...

Страница 10: ...l allacciamento far scorrere l acqua fino a che diventi limpida e sia priva di impurit Senza questa precauzione c il rischio che il punto dove entra l acqua si intasi danneggiando la lavastoviglie Pe...

Страница 11: ...oviglie solo a pieno carico In attesa che la macchina sia piena prevenire i cattivi odori con il ciclo Ammollo vedi Programmi Selezionare un programma adatto al tipo di stoviglie e al grado di sporco...

Страница 12: ...enza asciugatura Il brillantante esaurito o il dosaggio insufficiente vedi Brillantante e sale La regolazione del brillantante non adeguata Le stoviglie sono in materiale antiaderente o in plastica Le...

Страница 13: ...s Wash cycles 20 Table of wash cycles Rinse aid and refined salt 21 Measuring out the rinse aid Measuring out the refined salt Care and maintenance 22 Shutting off the water and electricity supplies C...

Страница 14: ...exagonal spanner red color with an opening of 8 mm in a clockwise direction to increase the height or in an anticlockwise direction to decrease the height Connecting the water and electricity supplies...

Страница 15: ...order to prevent all potential hazards See As sistance The Company shall not be held responsible for any incidents that occur if these regulations are not observed Anti condensation strip After insta...

Страница 16: ...h cycles and options may vary depending on the dishwasher model Control panel Option button Short Time Half load button Delayed start button ON OFF Reset button ON OFF indicator light Low salt indicat...

Страница 17: ...ace these on the tip up compartments Tip up compartments with adjustable tilt The tilt feature can be used to increase the space in the upper rack to position wine glasses with different stem lengths...

Страница 18: ...se the door the cycle starts from the point at which it was interrupted Accidental interruptions If the door is opened during the wash cycle or if there is a power cut the cycle stops It starts again...

Страница 19: ...deselect the option press the same button again A B C D E Table of options Delayed Start Half Load Tabs Short Time Good Night 1 Auto Intensive Yes Yes Yes Yes No 2 Auto Normal Yes Yes Yes Yes Yes 3 Da...

Страница 20: ...sitive to high temperatures Run cycle immediately after use glasses upper rack delicate plates lower rack 7 Crystal 35 g A 35 ml A 1 A Yes A B C 1 30 Wash spread over the two racks delicate for crysta...

Страница 21: ...approximately 5 seconds two short beeps will sound and the set hardness number will flash slowly on the display the water softening system is set to number 3 Press the P button repeatedly until the de...

Страница 22: ...od of time let the water run to make sure it is clear and free of impurities before performing the necessary connections If this precaution is not taken the water inlet could become blocked and damage...

Страница 23: ...nd to public health The crossed out dustbin is marked on all products to remind the owner of their obligations regarding separated waste collection For further information relating to the correct disp...

Страница 24: ...The rinse aid has been used up or the dosage is too low see Rinse aid and salt The rinse aid dispenser setting is not suitable The crockery is made from non stick material or plastic The dishes are n...

Страница 25: ...lavage Programmes 32 Tableau des programmes Produit de rin age et sel r g n rant 33 Charger le produit de rin age Charger le sel r g n rant Entretien et soin 34 Coupure de l arriv e d eau et de coura...

Страница 26: ...du personnel qualifi Le lave vaisselle ne doit pas craser les tuyaux ou le c ble d alimentation lectrique Utiliser des tuyaux neufs pour effectuer le raccordement de l appareil au r seau de distributi...

Страница 27: ...selle ouvrir la porte et coller le ruban adh sif transparent sous le plan en bois pour le prot ger contre la formation de condensation Conseils pour le premier lavage Une fois l installation termin e...

Страница 28: ...t uniquement sur certains mod les Le nombre et les types de programmes et des options varient selon le modele de lave vaisselle Tableau de bord Touche option Economie de temps Touche Demi charge Touch...

Страница 29: ...abattables inclinaison variable L inclinaison permet de gagner de la place dans le panier sup rieur de ranger des verres pied de longueur diff rente et d am liorer les performances de s chage Soulever...

Страница 30: ...peur chaude qui s chappe et introduire la vaisselle Fermer la porte le cycle red marre Interruptions accidentelles En cas d ouverture de la porte en cours de lavage ou de coupure de courant le program...

Страница 31: ...e touche Demi charge dans le panier sup rieur ou inf rieur Le programme demi charge permet de laver une petite vaisselle et de faire des conomies d eau d lectricit et de produit de lavage S lectionner...

Страница 32: ...t de suite apr s l usage verres pied panier sup rieur assiettes fragiles panier inf rieur 7 Cristal 35 g A 35 ml A 1 A Oui A B C 1 30 Lavage diff renci dans les deux paniers d licat dans celui du haut...

Страница 33: ...ent et le num ro correspondant au degr de duret s lectionn clignote lentement sur l afficheur l adoucisseur d eau est r gl sur le n 3 Appuyer sur la touche P plusieurs reprises jusqu ce que le degr de...

Страница 34: ...st s longtemps inutilis s avant d effectuer le raccordement faire couler l eau jusqu ce qu elle devienne limpide et d pourvue d impuret s Faute de quoi un engorgement pourrait se produire au point d a...

Страница 35: ...de la poubelle barr e est appos sur tous les produits pour rappeler les obligations de collecte s par e Pour de plus amples renseignements sur la mise au rebut des lectrom nagers les possesseurs peuve...

Страница 36: ...sans s chage a t s lectionn Il n y a plus de produit de rin age ou son dosage est insuffisant voir Produit de rin age et sel Le r glage du produit de rin age n est pas appropri La vaisselle est en mat...

Страница 37: ...gramme 44 Sp lprogrammtabelle Klarsp ler und Regeneriersalz 45 Einf llen des Klarsp lers Einf llen des Regeneriersalzes Reinigung und Pflege 46 Abstellen der Wasser und Stromversorgung Reinigung des G...

Страница 38: ...irrsp lers Durch Drehen nach rechts wird die H he erh ht durch Drehen nach links wird sie herabgesetzt siehe beigef gtes Einbaublatt Wasser und Elektroanschl sse Die Anpassung der Elektro und Wasseran...

Страница 39: ...digt sein muss es vom Hersteller oder seiner technischen Kundendienststelle ausgetauscht werden um Unfallrisiken vorzubeugen Siehe Kundendienst Der Hersteller bernimmt keinerlei Haftung sollten diese...

Страница 40: ...p lprogramme und optionen ist abh ngig vom jeweiligen Geschirrsp lermodell Bedienblende Optionstaste Short Time Taste Halbe F llmenge Taste Startzeitvorwahl Taste EIN AUS Reset Kontrollleuchte EIN AUS...

Страница 41: ...iedlicher Neigungseinstellung Die Neigung schafft mehr Platz im Oberkorb sie erm glicht das Einstellen von Stielgl sern unterschiedlicher H he und verbessert die Trockenleistung Heben Sie die hochklap...

Страница 42: ...Ger tet r vorsichtig da hei er Dampf austreten k nnte ohne den Geschirrsp ler auszuschalten und r umen Sie das Geschirr ein Schlie en Sie die Ger tet r das Sp lprogramm startet daraufhin erneut Unbeab...

Страница 43: ...tensive Ja Ja Ja Nein Nein 10 G ste Ja Ja Nein Nein Nein 11 Zyklus f r Babygeschirr Ja Nein Nein Nein Nein Option Good Night Durch diese Zusatzfunktion wird das Betriebsger usch noch weiter herabgeset...

Страница 44: ...t nach dem Gebrauch gesp ltes Geschirr 2 Teller 2 Gl ser 4 Bestecke 1 Topf 1 kleine Pfanne 6 Kurz 25 g A 25 ml A Nein Nein A C 0 25 Kurzes Sparprogramm f r temperaturempfindliches sofort nach dem Gebr...

Страница 45: ...gnalt ne Die dem eingestellten Wasserh rtegrad entsprechende Kontrollleuchte schaltet auf G F langsames Blinklicht Der Entkalker ist auf den Wert 3 eingestellt Dr cken Sie die Taste P mehrmals hintere...

Страница 46: ...uch klar und frei von Verunreinigungen ist Lassen Sie es hierzu einige Zeit lang flie en Es kann n mlich ansonsten passieren dass die Anschlussstelle verstopft wird und Ihr Geschirrsp ler dadurch Scha...

Страница 47: ...enf rdieGesundheitunddieUmweltzu verh ten DasdurchgestricheneAbfalleimersymbol dassichauf allenProduktenbefindet weistdaraufhin dasseinegetrennte Entsorgungvorgeschriebenist F rweitereInformationenhin...

Страница 48: ...ingestellt Es fehlt Klarsp lmittel oder es wird unzureichend dosiert siehe Klarsp ler und Regeneriersalz Die Klarsp ler Dosiereinstellung ist nicht angemessen Das Geschirr besteht aus Antihaftmaterial...

Страница 49: ...56 Programmatabel Glansmiddel en onthardingszout 57 Het glansmiddel toevoegen Het onthardingszout toevoegen Onderhoud en verzorging 58 Water en elektrische stroom afsluiten Reinigen van de afwasautoma...

Страница 50: ...leen door erkende technici worden uitgevoerd De afwasautomaat mag niet bovenop de buizen of de elektrische voedingskabel worden geplaatst Het apparaat dient aangesloten te zijn op de waterleiding met...

Страница 51: ...n niet worden nageleefd Anticondensstrip Nadat u de afwasautomaat heeft ingebouwd opent u de deur en plakt u de doorzichtige plakstrip onder het houten werkvlak zodat u het beschermt tegen eventuele c...

Страница 52: ...rt programma s en opties verschilt aan de hand van het model afwasautomaat Bedieningspaneel Toets opties Short Time Toets Halve lading Toets Uitgestelde Start Toets ON OFF Reset Controlelampje ON OFF...

Страница 53: ...linatiehoeken M b v de verschillende inclinaties van het rekje verkrijgt u meer ruimte in het bovenrek U kunt zo beter wijnglazen van verschillende hoogtes plaatsen en ook de droogprestaties verbetere...

Страница 54: ...dt hervat Onvoorziene onderbrekingen Als tijdens het wassen de deur wordt geopend of er een stroomonderbreking plaatsvindt wordt het programma onderbroken Het zal worden hervat op het punt waar het we...

Страница 55: ...st Ja Ja Nee Nee Nee 11 Baby Cyclus Ja Nee Nee Nee Nee Optie Good Night Met deze optie wast de afwasautomaat stiller De duur van de programma s wordt iets verlengd maar u kunt wel gebruik maken van he...

Страница 56: ...2 25 Normaal vuile vaat en pannen Standaard programma dagelijks 2 Auto Normaal 29 g A 6 g B 29 ml A 6 ml B 1 A Ja A B C D E 1 50 Dagelijks vuil beperkte hoeveelheid 4 couverts 1 pan 1 steelpan 3 Dage...

Страница 57: ...knippert langzaam het nummer van de ingestelde hardheid de ontharder staat standaard op stand n 3 Druk net zolang op de P toets tot u de gewenste hardheid bereikt 1 2 3 4 5 Zie tabel Hardheid van het...

Страница 58: ...open totdat het helder is en vrij van vuildeeltjes Als u dit niet doet loopt u het risico dat het punt waar het water binnenkomt verstopt raakt en uw afwasautomaat beschadigt Reinig geregeld het water...

Страница 59: ...enti le schade voor de gezondheid en het milieu te voorkomen Het symbool van de afvalemmer met een kruis staat op alle producten om de consument eraan te herinneren dit product gescheiden in te zamele...

Страница 60: ...a zonder droogcyclus geselecteerd Het glansmiddel is op of de dosering is ontoereikend zie Glansmiddel en zout De regeling van het glansmiddel is niet correct Het vaatwerk is van plastic of voorzien v...

Страница 61: ...iones de lavado Programas 68 Tabla de programas Abrillantador y sal regeneradora 69 Cargar el abrillantador Cargar la sal regeneradora Mantenimiento y cuidados 70 Interrumpir el agua y la corriente el...

Страница 62: ...horario para disminuirla ver la hoja de instrucciones para empotramiento anexada a la documentaci n Conexiones hidr ulicas y el ctricas La adaptaci n de las redes el ctricas e hidr ulicas para la inst...

Страница 63: ...ci n est da ado deber ser cambiado por el fabricante o por su servicio de asistencia t cnica a fin de prevenir riesgos Ver Asistencia La Empresa declina toda responsabilidad cuando no se hayan respeta...

Страница 64: ...total Presente s lo en algunos modelos La cantidad y el tipo de programas y opciones var an seg n el modelo de lavavajillas Panel de control Bot n opci n Short Time Bot n Media carga Bot n Comienzo R...

Страница 65: ...onales Cestos adicionales con inclinaci n variable La inclinaci n permite obtener mayor espacio en el cesto superior colocar copas con pies de diferentes longitudes y mejorar las prestaciones de secad...

Страница 66: ...de vapor e introduzca la vajilla Cierre la puerta el ciclo se reanudar Interrupciones accidentales Si durante el lavado se abre la puerta o se produce una interrupci n de corriente el programa se inte...

Страница 67: ...o 11 Ciclo Baby Si No No No No Opci n Good Night Esta opci n aumenta el silencio y la duraci n de los programas es ideal porque permite aprovechar la tarifa energ tica nocturna Despu s de haber selecc...

Страница 68: ...uciedad diaria en cantidad limitada 4 cubiertos 1 olla 1 sart n 3 Cotidiano 25 g A 25 ml A 1 A No A B C 1 00 Lavado preliminar a la espera de completar la carga en la comida sucesiva 4 Remojo No No No...

Страница 69: ...har n dos sonidos breves y centellear lentamente en el display el n mero de regulaci n de dureza fijado El ablandador est configurado en el n 3 Presione el bot n P varias veces hasta alcanzar la durez...

Страница 70: ...haga correr el agua para verificar que sea l mpida y que no contenga impurezas Sin esta precauci n existe el riesgo de que el lugar por donde entra el agua se obstruya da ando el lavavajillas Peri dic...

Страница 71: ...medio ambiente El s mbolo del cesto tachado se encuentra en todos los productos para recordar la obligaci n de recolecci n separada Para mayor informaci n sobre la correcta eliminaci n de los electro...

Страница 72: ...abrillantador se ha terminado o la dosis es insuficiente ver Abrillantador y sal La regulaci n del abrillantador no es la adecuada La vajilla es de material antiadherente o de pl stico La vajilla no...

Страница 73: ...lavagem Programas 80 Tabela dos programas Abrilhantador e sal regenerante 81 Carregar o abrilhantador Carregar o sal regenerante Manuten o e cuidados 82 Excluir a gua e a corrente el ctrica Limpar a m...

Страница 74: ...diminui la veja a folha de instru es para o encaixe em anexo documenta o Liga es hidr ulicas e el ctricas A adapta o das instala es el ctricas e hidr ulicas para a instala o deve ser efectuada somente...

Страница 75: ...ricante ou pelo Servi o de Assist ncia T cnica para evitar qual quer tipo de risco Veja a Assist ncia A Empresa declina qualquer responsabilidade no caso em que estas normas n o sejam respeitadas Fita...

Страница 76: ...O n mero e o tipo de programas e as op es variam conforme o modelo de m quina de lavar lou a Painel de controlo Tecla op o Short Time Tecla Meia carga Tecla In cio Retardado Tecla ON OFF Reset Indica...

Страница 77: ...ontiagudas talheres de cozinha posicione as sobre as pe as basculantes Pea articulada de inclinao varivel A inclinao possibilita obter mais espao no cesto superior para colocar clices com hastes de co...

Страница 78: ...r e colocar a lou a dentro Feche a porta o ciclo recome ar Interrup es acidentais Se durante a lavagem for aberta a porta ou houver uma interrup o da corrente el ctrica o programa ir interromper se Re...

Страница 79: ...p o Short Time Esta op o consente reduzir a dura o dos principais programas mantendo as mesmas performances de lavagem e secagem Ap s ter seleccionado o programa carregue na tecla Op o Short Time o in...

Страница 80: ...al 29 g A 6 g B 29 ml A 6 ml B 1 A Sim A B C D E 1 50 Sujidade quotidiana em quantidade limitada 4 pessoas 1 panela 1 frigideira 3 Lavagem Quotidiana 25 g A 25 ml A 1 A N o A B C 1 00 Lavagem prelimin...

Страница 81: ...ay pisca lentamente o n mero de regula o da dureza configurado o dispositivo para descalcificar est configurado no n 3 Carregue na tecla P v rias vezes at alcan ar a dureza desejada 1 2 3 4 5 Veja a t...

Страница 82: ...realizar a liga o deixe escorrer gua para certificar se que seja l mpida e isenta de impurezas Sem esta precau o h riscos de que o ponto de entrada da gua se entupa causando danos m quina de lavar lou...

Страница 83: ...dos materiais que os comp em e impedir potenciais danos sa de e ao meio ambiente O s mbolo da lixeira cancelada est indicado em todos os produtos para lembrar o dever de colecta selectiva Para maiores...

Страница 84: ...hantador acabou ou a dosagem insuficiente veja Abrilhantador e sal A regula o do abrilhantador n o adequada As lou as s o de material antiaderente ou de pl stico As lou as n o est o limpas Os cestos e...

Отзывы: