EN
5
LOADING THE RACKS
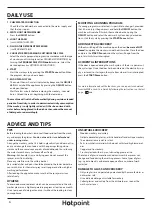
LOWER RACK
For pots, lids, plates, salad bowls, cutlery
etc... Large plates and lids should ideally
be placed at the sides to avoid interferen-
ces with the spray arm.
(loading example for the lower rack)
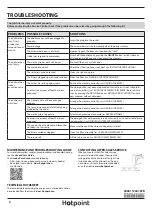
CUTLERY BASKET
It is fi tted with top grids for improved cutlery arrangement. It must
only be positioned at the front of the lower rack.
Knives and other utensils with sharp edges must be placed in the
cutlery basket with the points facing downwards or they must be
positioned horizontally in the tip-up compartments on the upper
rack
.
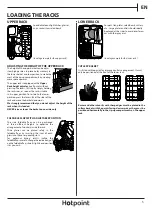
UPPER RACK
Load delicate and light dishes: glasses,
cups, saucers, low salad bowls.
(loading example for the upper rack)
ADJUSTING THE HEIGHT OF THE UPPER RACK
The height of the upper basket can be adju-
sted: high position to place bulky crockery in
the lower basket and low position to make the
most of the tip-up compartments by creating
more space upwards.
The upper rack is equipped with a
Upper
Rack height adjuster
(see fi gure), without
pressing the levers, lift it up by simply holding
the rack sides, as soon as the rack is stable
in its upper position. To restore to the lower
position, press the levers (
A
) at the sides of the
rack and move the basket downwards.
We strongly recommend that you do not adjust the height of the
rack when it is loaded.
NEVER raise or lower the basket on one side only.
FOLDABLE FLAPS WITH ADJUSTABLE POSITION
The side foldable fl aps can be positioned
at three diff erent heights to optimize the
arrangement of crockery inside the rack.
Wine glasses can be placed safely in the
foldable fl aps by inserting the stem of each
glass into the corresponding slots.
For optimum drying results incline the
foldable fl aps more. To change the inclination, pull
up the foldable fl ap, slide it slightly and position
it as you wish.


