background image

17

EN

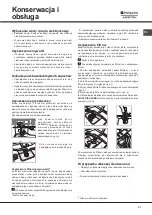
Detergent and 
dishwasher use

Measuring out the detergent

Good washing results also depend on the correct amount of 
detergent being used. Exceeding the stated amount does not 
result in a more effective wash and increases environmental 
pollution.

The amount can be adjusted to the soil level.
In the case of normally soiled items, use approximately either 
25g (powder detergent) or 25ml (liquid detergent). If tablets 
are used, one tablet will be enough.

If the crockery is only lightly soiled or if it has been rinsed 
with water before being placed in the dishwasher, reduce 
the amount of detergent used accordingly. 

For good washing results also follow the instructions shown 
on the detergent box.

For further questions please ask the detergent producers.

Open the detergent dispenser using button 

D

 and measure out 

the detergent according to the Table of wash cycles:

• powder or liquid: compartments 

A

 (wash detergent) and 

B

 (pre-

wash detergent) 
• tablets: when the cycle requires 

1 tablet, place it in compartment 

A

 and close cover 

C

; when it 

requires  2  tablets,  place  the 

second tablet on the bottom of 
the appliance.
Remove detergent residues from 

the edges of the compartment and close cover 

C

 until it clicks. 

The detergent dispenser automatically opens up at the right time 
according to the wash cycle. 

If all-in-one detergents are used, we recommend using the TABS 
option, because it adjusts the cycle so that the best washing and 
drying results are always achieved.

Only use detergent which has been specifically designed 

for dishwashers.

DO NOT USE washing up liquid.

Using excessive detergent may result in foam residues 
remaining in the machine after the cycle has ended. 

To achieve the best washing and drying results, the combined 
use of detergent, rinse aid liquid and refined salt is required.

We recommend using detergents that do not contain 
phosphates or chlorine, as these products are harmful 
to the environment.

Starting the dishwasher

1. Turn the water tap on. 

2. Open the door and press ON-OFF button.
3. Measure out the detergent. 

(see detergent information).

4. Load the racks 

(see Loading the racks)

.

5. Select the wash cycle in accordance with the type of crockery 
and its soil level 

(see table of wash cycles)

 by pressing the 

button.
6. Select the wash options

*

(see  Special  wash  cycles  and 

options)

.

7. Start the wash cycle by shutting the door.
8. The end of the wash cycle is indicated by beeps and by the 
flashing of the wash cycle number on the display. Open the 

door, switch off the appliance by pressing the ON/OFF button.

9. Wait for a few minutes before removing the crockery, in order 

to avoid burns. Unload the racks, beginning with the lower level.

- The machine will switch off automatically during 

certain extended periods of inactivity, in order to 
minimise electricity consumption.

AUTO WASH CYCLES

*

:some models of dishwashers are 

equipped with a special sensor which can be used to assess 

the level of soiling and automatically setting the most efficient 
and economic wash cycle accordingly.
The duration of the Auto wash cycles may vary due to the
operation of the sensor. 

If the crockery is only lightly soiled or if it has been rinsed

with water before being placed in the dishwasher, reduce the
amount of detergent used accordingly. 

Modifying a wash cycle in progress

If a mistake was made during the wash cycle selection process, 
it is possible to change the cycle, provided that it has only just 
begun: open the door taking care to avoid the escaping steam, 

by pressing and holding the ON/OFF button, the machine will 
switch off. Switch the machine back on using the ON/OFF button 

and select the new wash cycle and any options desired; start 
the cycle by closing the door. 

Adding extra crockery

Without switching off the machine, open the door, taking care 
to avoid the escaping steam, and place the crockery inside the 
dishwasher. Shut the door and the cycle will begin from the point 
at which it was interrupted.

Accidental interruptions

If the door is opened during the wash cycle, or if there is a power 
cut, the cycle stops. It starts again from the point at which it 
was interrupted once the door has been shut or the electricity 
supply is restored.

*

 Only available in selected models.

Содержание LSTF 9H114

Страница 1: ...roubleshooting 21 35 36 37 38 39 40 41 42 43 44 45 PL Polski Instrukcja obsługi ZMYWARKA Spis tre ci Instrukcja obsługi 1 Zalecenia i rodki ostro no ci 3 4 Karta produktu 9 Serwis Techniczny 10 Instalacja 22 23 Opis urz dzenia 24 Sól regeneracyjna i rodek nabłyszczaj cy 25 Ładowanie koszy 26 27 rodek myj cy i obsługa zmywarki 28 Programy 29 Programy specjalne i opcje 30 Konserwacja i obsługa 31 Ni...

Страница 2: ...and storms Donottouchtheappliancewhenbarefoot When unplugging the appliance always pull the plug from the mains socket Do not pull on the cable The water supply tap must be shut off and the plug should be removed from the electrical socket at the end of every cycle and before cleaning the appliance or carrying out any maintenance work The maximum number of place settings is shown in the product sh...

Страница 3: ... być u ywane przez dzieci powy ej 8 roku ycia oraz osoby o ograniczonych zdolno ciach fizycznych zmysłowych i umysłowych lub nie posiadaj ce jego odpowiedniej znajomo ci lub do wiadczenia pod warunkiem eznajduj si onepod cisłym nadzorem odpowiedzialnej za nie osoby b d te otrzymały instrukcje dotycz ce bezpiecznego u ytkowania urz dzenia orazzrozumiałyzwi zaneznimzagro enia Dzieci nie powinny bawi...

Страница 4: ...ele mog si zwrócić do wła ciwych słu b publicznych lub do sprzedawców tych urz dze Oszcz dno ć i ochrona rodowiska Oszcz dno ć wody i energii Uruchamiać zmywark tylko z pełnym ładunkiem W oczekiwaniu na napełnienie maszyny zapobiegać przykrym zapachom przy pomocy cyklu namaczania je li jest on dost pny zob Programy Wybieraćprogramyodpowiedniedorodzaju naczy i stopnia zabrudzenia stosuj c si do Tab...

Страница 5: ...5 UA i i i i 2012 19 RAEE ...

Страница 6: ...6 i i i 8 i i i i i i i i i i i i i i i i i 2012 19 EU WEEE i i i i i i i i i i i i i i c i ...

Страница 7: ...7 i i i i i KZ 8 ...

Страница 8: ...8 WEEE 2012 19 EU ...

Страница 9: ...ends on how the appliance is used EN Product Data product fiche Karta produktu Marka HOTPOINT ARISTON Nazwa modelu LSTF 9H114 Pojemno ć znamionowa wyra ona liczb standardowych kompletów naczy 1 10 Klasa efektywno ci energetycznej skla od A niskie zu ycie do D wysokie zu ycie A Zu ycie energii w kWh rocznie 2 237 Zu ycie energii w standardowym cyklu zmywania w kWh 0 83 Zu ycie energii w trybie wył ...

Страница 10: ...r S N This information can be found on the appliance data plate see Description of the appliance PL Serwis Techniczny Przed zwróceniem si do Serwisu Technicznego Sprawdzić czy problemu nie mo na rozwi zać samodzielnie patrz Nieprawidłowo ci w działaniu i sposoby ich usuwania Ponownie uruchomić program aby przekonać si czy usterka nie ust piła W przeciwnym wypadku skontaktować si z autoryzowanym Se...

Страница 11: ...thed and complies with current regulations the socket can withstand the maximum load of the appliance as shown on the data plate located on the inside of the door see chapter Description of the appliance The power supply voltage falls within the values indicated on the data plate on the inside of the door The socket is compatible with the plug of the appliance If this is not the case ask an author...

Страница 12: ...ons width 44 5 cm height 82 cm depth 55 cm Capacity 10 standard place settings Water supply pressure 0 05 1MPa 0 5 10 bar 7 25 psi 145 psi Power supply voltage See appliance data plate Total absorbed power See appliance data plate Fuse See appliance data plate This dishwasher conforms to the following European Community Directives 2006 95 EC Low Voltage 2004 108 EC Electromagnetic Compatibility 20...

Страница 13: ...ower rack 6 Lower spray arm 7 Cutlery basket 8 Washing filter 9 Salt dispenser 10 Detergent and rinse aid dispensers 11 Data plate 12 Control Panel Low Salt indicator light Low Rinse Aid indicator light Half Load Option indicator lights Multi functional Tablets Option button and indicator light Tabs Delayed Start Option indicator light Wash Cycle number and Remaining Time indicator Select Wash Cyc...

Страница 14: ...e dishwasher see Description and should be filled When the LOW RINSE AID indicator light in the control panel is lit When the green float on the cap of the salt dispenser is no longer visible See autonomy in the water hardness table 1 Remove the lower rack and unscrew the container cap anticlockwise 2 Only the first time you do this fill the water dispenser up to the edge 3 Position the funnel see...

Страница 15: ...nnot move After loading the appliance make sure that the spray arms can rotate freely Lower rack The lower rack can hold pans lids dishes salad bowls cutlery etc Large plates and lids should ideally be placed at the sides Several dishwasher models are fitted with tip up sectors They can be used in a vertical position when arranging dishes or in a horizontal position lower to load pans and salad bo...

Страница 16: ...he sides of the rack and follow the rack down Unsuitable crockery Wooden crockery and cutlery Delicate decorated glasses artistic handicraft and antique crockery Their decorations are not resistant Parts in synthetic material which do not withstand high temperatures Copper and tin crockery Crockery soiled with ash wax lubricating grease or ink The colours of glass decorations and aluminium silver ...

Страница 17: ...N OFF button 3 Measure out the detergent see detergent information 4 Load the racks see Loading the racks 5 Select the wash cycle in accordance with the type of crockery and its soil level see table of wash cycles by pressing the P button 6 Select the wash options see Special wash cycles and options 7 Start the wash cycle by shutting the door 8 The end of the wash cycle is indicated by beeps and b...

Страница 18: ... start Half Load Tabs 02 50 17 0 1 45 Instructions on wash cycle selection and detergent dosage 1 The ECO wash cycle is the standard cycle to which the energy label data refers It can be used to wash crockery with a normal soil level and is the most efficient cycle in terms of energy and water consumption for this type of crockery 4 gr ml 21 gr ml 1 Tab Quantity of pre washing detergent 2 Heavily ...

Страница 19: ...eriod of time between 1 and 12 hours 1 Press the DELAYED START button the corresponding symbol appears on the display each time you press the button the time 1h 2h etc up to max 12h from the start of the selected wash cycle will be increased 2 Select the cycle and close the door the timer will begin counting down 3 Once this time has elapsed the indicator light switches off and the wash cycle begi...

Страница 20: ...for an extended period of time let the water run to make sure it is clear and free of impurities before performing the necessary connections If this precaution is not taken the water inlet could become blocked and damage the dishwasher Clean the water inlet filter at the tap outlet regularly Turn off the water tap Unscrew the end of the water inlet hose remove the filter and clean it carefully und...

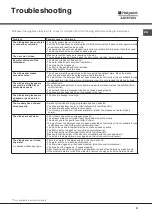
Страница 21: ...d Salt and Rinse Aid The salt and rinse aid dispenser cap has not been closed properly The rinse aid has been used up or the dosage is too low The dishes and glasses are streaked or have a bluish tinge The rinse aid dosage is too high The crockery has not been dried properly A wash cycle without a drying programme has been selected The rinse aid has been used up See Reined Salt and Rinse Aid The r...

Страница 22: ...zenie do sieci elektrycznej Przed wło eniem wtyczki do gniazdka nale y si upewnić czy gniazdko ma uziemienie i jest zgodne z obowi zuj cymi przepisami gniazdko jest w stanie wytrzymać obci enie maksymalnej mocy urz dzenia wskazane na tabliczce znamionowej umieszczonej na drzwiach wewn trznych zob Opis zmywarki napi cie zasilania zawiera si w przedziale warto ci podanych na tabliczce znamionowej um...

Страница 23: ...e napełnienia zbiornika zmi kczacza nale y wyko nać przy u yciu wody a nast pnie wsypać około 1 kg soli przelanie si wody jest normalnym zjawiskiem Natychmiast po napełnieniu zbiornika nale y wł czyć cykl mycia Stosować wył cznie sól przeznaczon do zmywarek Po wsypaniu soli kontrolka BRAK SOLI zga nie Nienapełnienie pojemnika soli mo e doprowadzić do uszkodzenia zmi kczacza wody i elementu grzewcz...

Страница 24: ...wacz dolny 7 Kosz na sztućce 8 Filtr zmywania 9 Pojemnik na sól 10 Pojemniki na rodek myj cy i nabłyszczaj cy 11 Tabliczka znamionowa 12 Panel sterowania przycisk i kontrolka ON OFF Reset przycisk Startu z Opó nieniem przycisk i kontrolka Opcji Pastylki Wielofunkcyjne Tabs przycisk Wyboru Programu przycisk Opcji Połowy Wsadu kontrolka Start z Opó nieniem kontrolka Opcji Połowy Wsadu Kontrolka soli...

Страница 25: ...cy 2 6 11 11 20 1 1 2 5 miesi cy 3 12 17 21 30 2 1 3 3 miesi cy 4 17 34 31 60 3 1 6 2 miesi cy 5 34 50 61 90 6 1 9 2 3 tygodnie Od 0 f do 10 f zaleca si nie stosować soli Przy ustawieniu 5 czas potrzebny na zu ycie soli mo e si wydłu yć Stosować wył cznie produkty przeznaczone do zmywarek Nie stosować soli jadalnej lub przemysłowej Stosować zgodnie z zaleceniami podanymi na opakowaniu W przypadku ...

Страница 26: ... kosza Zaleca si uło enie bardzo brudnych naczy w koszu dolnym poniewa w tej cz ci zmywarki strumie wody jest mocniejszy i umo liwia osi gni cie lepszych wyników mycia Niektóre modele zmywarek wyposa one s w pochylne półki które mo na ustawić w pozycji pionowej celem uło enia talerzy lub w pozycji poziomej obni onej celem uło enia garnków i salaterek N i e k t ó r e m o d e l e s wyposa one w Vert...

Страница 27: ...Stosować delikatne rodki myj ce do naczy Jak najszybciej wyj ć kieliszki i sztućce ze zmywarki po zako czeniu programu Regulowanie wysoko ci górnego kosza 45 cm Wysoko ć kosza górnego mo na regulować umieszczenie kosza w pozycji górnej umo liwia uło enie w koszu dolnym niewymiarowych naczy umieszczenie kosza w pozycji dolnej umo liwia wykorzystanie pochylnych półeczek i uzyskanie wi kszej przestrz...

Страница 28: ...tawy pr du nast pi jego ponowne uruchomienie w miejscu w którym został przerwany Napełnianie dozownika detergentu Dobry rezultat mycia zale y równie od wła ciwego dozowania rodka myj cego jego nadmierna ilo ć nie zwi ksza skuteczno ci mycia powoduje natomiast zanieczyszczenie rodowiska Dozowanie mo na dostosować do stopnia zabrudzenia naczy Zazwyczaj w przypadku normalnych zabrudze stosuje si okoł...

Страница 29: ... Wskazówki dotycz ce wyboru programów i dozowania detergentu 1 Cykl zmywania EKO to program standardowy do którego odnosz si dane etykiety energetycznej cykl ten jest odpowiedni do mycia rednio zabrudzonych naczy i jest najbardziej wydajnym programem pod wzgl dem zu ycia energii elektrycznej i wody dla tego rodzaju naczy 4 g ml 21 g ml 1 Tab Ilo ć rodka zmywaj cego w zmywaniu wst pnym 2 Mocno zabr...

Страница 30: ...a i suszenia W przypadku stosowania tabletek wielofunkcyjnych nacisn ć przycisk TABLETKI WIELOFUNKCYJNE kontrolka za wieci si kolejne naci ni cie przycisku wył cza opcj Wł czenie opcji Pastylki wielofunkcyjne powoduje wydłu enie czasu trwania programu Opcji Połowa wsadu w koszu górnym lub dolnym Je li naczy jest niewiele mo na napełnić kosz cz ciowo oszcz dzaj c wod energi i rodek myj cy Nale y wy...

Страница 31: ...dł czeniem zmywarki nale y odkr cić wod i odczekać a b dzie ona przejrzysta i wolna od zanieczyszcze Ostro no ć ta zapobiega zbieraniu si nieczysto ci w punkcie w którym zmywarka pobiera wod i w nast pstwie tego uszkodzeniu zmywarki Od czasu do czasu czy cić iltr dopływu wody znajduj cy si na wyj ciu zaworu Zamkn ć zawór wody Po zamkni ciu zaworu nale y odkr cić ko cówk przewodu doprowadzaj cego w...

Страница 32: ...i zob Sól regeneracyjna i rodek nabłyszczaj cy Korek zbiornika soli i rodka nabłyszczaj cego nie jest dobrze zamkni ty rodek nabłyszczaj cy sko czył si lub jego ilo ć jest niewystarczaj ca Na naczyniach i szklankach tworz si zacieki lub niebieskawe smugi Dozowana ilo ć rodka nabłyszczaj cego jest zbyt du a Naczynia nie s całkiem suche Wybrany został program bez suszenia rodek nabłyszczaj cy sko cz...

Страница 33: ...RU 33 3 4 60 C 2 A 40 80 NewAcquaStop 1 2 MIN 40 cm MAX 80 cm ...

Страница 34: ...RU 34 1 3 4 8 ...

Страница 35: ...27018 12 1 LSTF 9H114 Indesit Company POLAND 10 44 5 82 55 220 240 V 50 Hz 0 05 1MPa 0 5 10 bar 7 25 145 psi A A A 0 83 9 I 2006 95 EC 2004 108 2009 125 EC Comm Reg 1016 2010 Ecodesign 2012 19 U 97 17 EC S N XXXXXXXXX XXXXXXXXXXX 1 S N 2 3 S N 4 5 S N cert rus indesit com ...

Страница 36: ...RU 36 1 2 3 4 5 6 7 8 9 10 11 12 bs ...

Страница 37: ...RU 37 1 2 3 1 4 P 5 P 1 G 2 3 F 4 1 2 3 4 1 dH fH 1 0 6 0 10 0 1 7 2 6 11 11 20 1 1 2 5 3 12 17 21 30 2 1 3 3 4 17 34 31 60 3 1 6 2 5 34 50 61 90 6 1 9 2 3 settimane 0 f 10 f 5 dH fH ...

Страница 38: ...RU 38 ...

Страница 39: ...RU 39 Lift Up ...

Страница 40: ...RU 40 1 2 3 4 5 P 6 7 8 9 озобновится с того момента в который она была прервана 25 25 D A B 1 2 3 TABS ...

Страница 41: ...02 20 13 5 14 5 1 00 1 15 4 01 40 9 0 0 85 5 EXPRESS Отложенный запуск Таблетки 00 25 8 0 0 45 6 Good Night 03 30 13 0 0 85 7 00 10 4 0 0 01 8 Short Time 01 20 15 5 1 10 9 Ultra Intensive 02 50 17 0 1 45 1 4 21 1 2 25 1 3 4 21 1 4 25 1 5 2 21 1 6 25 1 7 8 25 1 9 4 25 1 1 left on 5 0 5 ...

Страница 42: ...сов время отложенного запуска выбранной программы 2 Выберите программу и закройте дверцу начинается обратный отсчет времени 3 По окончании обратного отсчета индикатор гаснет и цикл мойки запускается Для изменения и сокращения времени отложенного запуска нажмите кнопку ОТЛОЖЛЕННЫЙ ЗАПУСК Для отмены отложенного запуска нажмите эту кнопку несколько раз до тех пор пока индикатор заданного времени отло...

Страница 43: ...RU 43 1 1 2 2 3 3 4 4 C 1 A 3 ...

Страница 44: ...RU 44 ...

Страница 45: ...RU 45 Indesit Professional Indesit Professional www hotpoint ariston ru 350 www hotpoint ariston ru S N www hotpoint ariston ru ...

Страница 46: ...46 UA i i i i i i i 3 4 60 C i i i i i i i 2 A 40 80 B i i i i i i i New Acqua Stop i i i i i i i i i i i i i i i i i i 1 i i i i i i i 2 3 i 4 i i i i 8 i i i i i i MIN 40 cm MAX 80 cm ...

Страница 47: ...UA 47 i 44 5 82 55 i i 10 0 05 1 0 5 10 7 25 145 psi i 2006 95 2004 108 EC 2009 125 EC 1016 2010 97 17 EC 2012 19 EU RAEE 1 i i i i I i i i i ...

Страница 48: ...48 UA 1 2 i 3 i i 4 5 6 i 7 i 8 i 9 i 10 i 11 i 12 i On Off Reset i Tabs ...

Страница 49: ... i i 2 3 i i 1 i 4 i i c i i i i P 5 P 1 dH fH 1 0 6 0 10 0 1 7 2 6 11 11 20 1 1 2 5 3 12 17 21 30 2 1 3 3 4 17 34 31 60 3 1 6 2 5 34 50 61 90 6 1 9 2 3 i i 0 f 10 f i 5 dH i fH i i i i i i i i I I I E 1 i i G i 2 i i i i i i 3 i i i i i i i i F 4 i 1 2 i i i 3 4 ...

Страница 50: ...50 UA i i i i i i i i i Vertical Zone i i i i ...

Страница 51: ...UA 51 i 45 i i I Lift Up A ...

Страница 52: ...9 i i i i З метою заощадження електроенергії за деяких умов тривалого НЕВИКОРИСТАННЯ машина вимикається автоматично PROGRAMMI AUTO i i i i i i i i i i i i i 25 25 i i i D A B i 1 A i 2 i i i i TABS i i i i i i i i i i i i i i i i i i ...

Страница 53: ...13 5 14 5 1 00 1 15 4 Tabs Half Load 01 40 9 0 0 85 5 Tabs 00 25 8 0 0 45 6 Good Night Tabs 03 30 13 0 0 85 7 Half Load 00 10 4 0 0 01 8 Short Time Tabs 01 20 15 5 1 10 9 Ultra Intensive Tabs Half Load 02 50 17 0 1 45 EN 50242 i i i i i 1 4 21 1 Tab 2 i i 25 1 3 i i 4 21 1 Tab 4 25 1 5 2 21 1 6 25 1 7 i 8 25 1 9 4 25 1 1 Tab 5 0 0 5 ...

Страница 54: ...54 UA i i i i i i i i i EN i assistenza_en_lvs indesitcompany com i i i i i i Tabs i Delayed Start 1 12 1 1 2 12 2 3 Half Load i i i i i START 2END LIGHT a P a b c P P ...

Страница 55: ... i i i i i i i i i i i i i i i i i i i i i i i i i i i i i i i i i i i i i i i i i i i i i i i i i i i i i i i i i i i i i i i i i i i i 1 i i i i C i 1 2 i i B i i 2 3 A 3 4 i i 4 i i i i i i i i i i i C 1 A 3 ...

Страница 56: ...56 UA o i i i i i i i i i i i i i i i i i i i i i è i i i i i i i i i ...

Страница 57: ...KZ 57 3 4 60 2 40 80 New Acqua Stop 1 2 3 4 8 MIN 40 cm MAX 80 cm ...

Страница 58: ...58 KZ 1 ...

Страница 59: ... 10 7 25 145 A A A 0 83 9 I cert rus indesit com 2006 95 EC 2004 108 2009 125 EC Comm Reg 1016 2010 97 17 EC 2012 19 U S N XXXXXXXXX XXXXXXXXXXX 1 2 3 4 5 Indesit Company S p A Viale A Merloni 47 60044 Fabriano AN Indesit RUS 01 01 2011 46 129223 01 01 2011 1 12 127018 ...

Страница 60: ...60 KZ 1 2 3 4 5 6 7 8 9 10 11 12 Tabs ...

Страница 61: ...KZ 61 1 2 3 1 4 1 dH fH 1 0 6 0 10 0 1 7 2 6 11 11 20 1 1 2 5 3 12 17 21 30 2 1 3 3 4 17 34 31 60 3 1 6 2 5 34 50 61 90 6 1 9 2 3 0 f 10 f 5 dH f P 5 P E 1 G 2 3 F 4 1 2 3 4 ...

Страница 62: ...62 KZ ...

Страница 63: ...KZ 63 A ...

Страница 64: ...64 KZ 1 2 3 4 5 P 6 7 8 9 25 25 D A B 1 2 TABS ...

Страница 65: ...2 20 13 5 14 5 1 00 1 15 4 Delay Start Half Load Tabs 01 40 9 0 0 85 5 Delay Start Tabs 00 25 8 0 0 45 6 Good Night Delay Start Tabs 03 30 13 0 0 85 7 Delay Start Half Load 00 10 4 0 0 01 8 Short Time Delay Start Tabs 01 20 15 5 1 10 9 Ultra Intensive Delay Start Half Load Tabs 02 50 17 0 1 45 1 4 21 1 2 25 1 3 4 25 1 4 25 1 5 2 21 1 6 25 1 7 8 25 1 9 4 25 1 1 5 0 5 ...

Страница 66: ...66 KZ 3 Tabs EN assistenza_en_lvs indesitcompany com Half Load Delayed Start 1 12 1 1 2 12 2 3 START 2END LIGHT a b c b c P a b c P P ...

Страница 67: ...KZ 67 1 C 1 2 B 2 3 3 4 4 A 3 1 C ...

Страница 68: ...68 KZ 195124069 00 NC 05 2014 jk Xerox Fabriano www hotpoint ariston com Indesit Company Spa Viale Aristide Merloni 47 60044 Fabriano AN Italy ...

Отзывы: