-
5
-
e) Setting the ON and OFF Times
1. If the 24 hour clock has previously been set (as detailed above) then press the ‘Time’
button 3 times so that the ‘Time ON’ symbol is displayed and the hours digits are flashing.
If setting the ‘ON’ time at the same time as setting the 24 hour clock, then just pressing
the ‘Time’ button once will enter this mode.
2. Press the ‘Set’ button repeatedly to increment the hours until the required digits are
displayed.
3. Press the ‘Time’ button again and the minutes digits with start to flash on the display.
4. Press the ‘Set’ button repeatedly to increment the minutes until the required digits are
displayed.
5. Press the ‘Time’ button again so that the ‘Time OFF’ symbol is displayed and the hours
digits are flashing.
6. Press the ‘Set’ button repeatedly to increment the hours until the required digits are
displayed.
7. Press the ‘Time’ button again and the minutes digits with start to flash on the display.
8. Press the ‘Set’ button repeatedly to increment the minutes until the required digits are
displayed.
9. Press the ’Time’ button again to return to standby mode.
10. Pressing the ‘Set’ button repeatedly will scroll through the operating modes: Timer ON,
Timer OFF, Timer ON & OFF and Standby.
Timer ON mode
: The Ice Maker will automatically start the ice making cycle when the
set ON time is reached. The ‘Off’ button will then need to be pressed when the user
wants to stop the appliance making ice.
Timer OFF mode
: The Ice Maker will automatically stop the ice making cycle when the
set OFF time has been reached. The Ice Maker must have previously been started
manually for this mode to function.
Timer ON & OFF mode
: The Ice Maker will automatically start the ice making cycle
when the set ON time is reached and automatically stop the ice making cycle when the
set OFF time is reached.
Standby Mode
: The Ice maker can be started by pressing the ON button or the SET
button can be pressed to select the Timer ON or Timer ON & OFF modes.
f) Ice Full Indicator
When the Ice Drawer is full of ice the Ice Full Indicator
will come on, the buzzer will
sound and the ice making cycle will stop. The ice needs to be removed before the Ice Maker
can make any more ice. Once the ice is emptied, the Ice Maker will automatically restart
within a few minutes.
g) Water Low Indicator
When there is insufficient water left in the Water Tank then the Water Low Indicator
will
come on, the buzzer will sound and the ice making cycle will stop. Water needs to be added
and the ON button pressed to allow the ice making cycle to continue.
Содержание IM03A
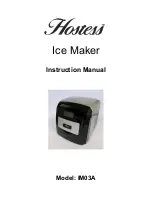
Страница 1: ...Ice Maker Instruction Manual Model IM03A...


