4
ENGLISH
5) Remove the protective plastic film from the panels. If the icemaker is exposed to the sun or to heat, remove the film after the
icemaker cools.
4. LOCATION
WARNING
This icemaker is not intended for outdoor use.
The icemaker should not be located next to ovens, grills or other high heat producing equipment.
This appliance is not suitable for installation in an area where a water jet could be used.
CAUTION
The location should provide a firm and level foundation for the icemaker.
NOTICE
Do not place anything on top of the icemaker or in front of the louver.
IMPORTANT
Normal operating ambient temperature should be within 5°C to 40°C. Water connection is cold water only. Operation of the
icemaker, for extended periods, outside of these normal temperature ranges may affect production capacity.
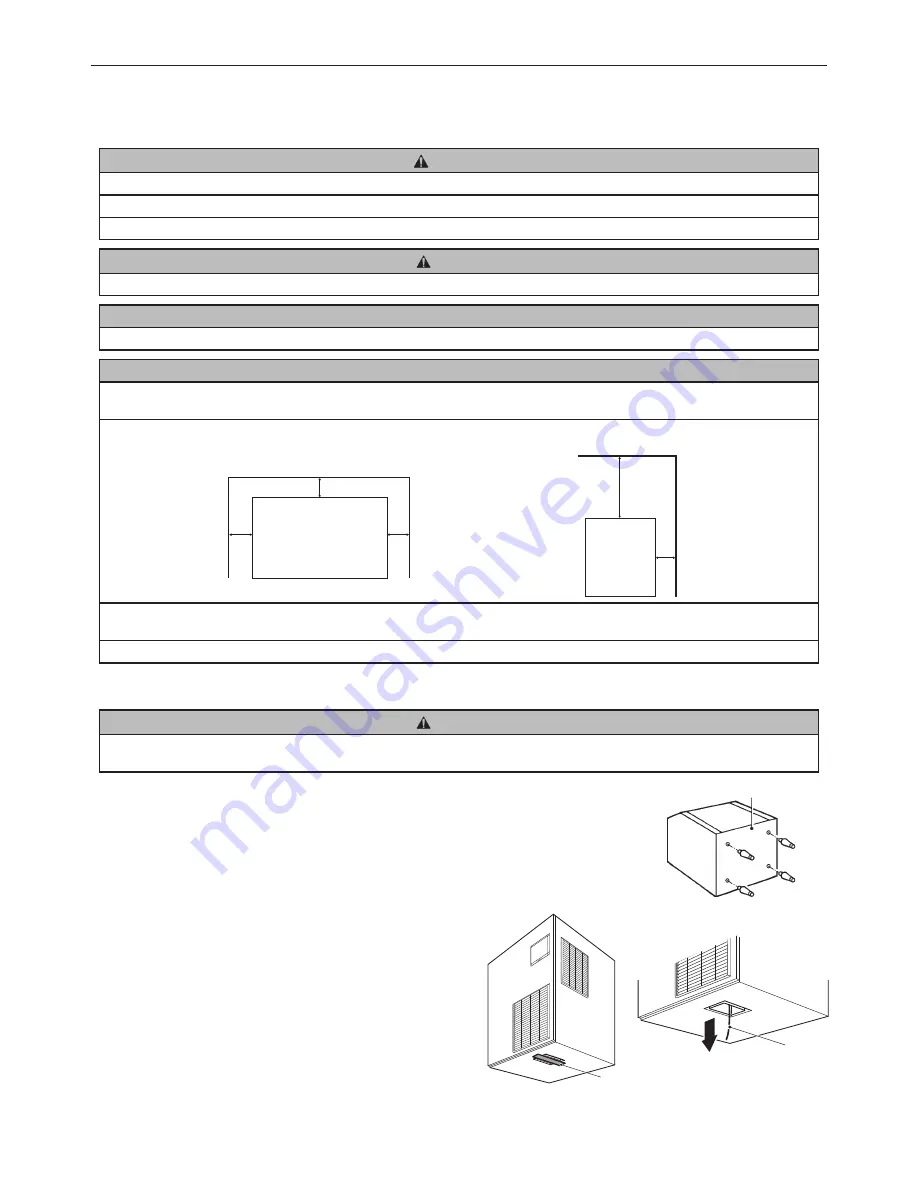
Allow the clearance specified below for proper air circulation and ease of maintenance and/or service should they be required.
Top View
Side View
Rear
ICEMAKER
Front
Left
Right
Rear
Front
Top
ICEMAKER
15cm
15cm
15cm
15cm
60cm
In some high humidity environments, condensation may form inside the machine and drip onto the floor. Do not install where
the floor can be affected by water.
Avoid prolonged exposure of the appliance to direct sunlight.
5. INSTALLATION
CAUTION
Incorrect installation can cause harm to people, animals or other items, for which the manufacturer cannot be held
responsible.
1) Fully screw in the four legs provided (bin accessory) into the storage bin underside.
2) Position the storage bin in the selected permanent side.
3) Remove the tape from the chute opening at the bottom of the icemaker.
4) Pull down the end of the string coming out of the chute opening to remove the cushion.
Note: If the power supply is turned on with the cushion left inside,
the icemaker will not start showing “BIN FULL” in the
display.
5) Place the icemaker on top of the storage bin by holding the
bottom.
Bottom Plate
Adjustable Legs
Tape
String


