13
G:
Cross the cords of the mesh cassette and click the cord on the
top of the pull bar guides. The top and bottom of the pull bar
guids look the same. The top can be determined by checking
how the guide fits onto the pull bar.
H:
Fasten the pull bar guids on the pull bar of both cassettes. Use
screw A for this. There are two screw holes in every pull bar
guide. Use the screw guide that is furthest from the blackout
or the mesh, Make sure that the cord does not get stuck
between the pull bar and the guide.
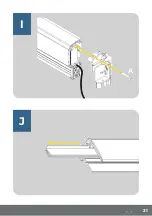
I:
Fasten a corner cap on both sides of every cassette. Use screw
A for this.
J:
Pull the brushes out of the side profiles.
K:
Cut both side profiles to the right size. The right size is
calculated under the header “cutting height”, in the
table on page 11. Use a hacksaw and, optionally, a miter box for
a straight result. The side profiles can be cut on one side.
L:
Place the brushes back into the side profiles and cut them to
the same size.
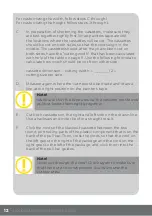
In case of the product being too small, please contact the
supplier of the product.
Info
Horrex is not liable if the product is too small due to
incorrectly carrying out the measuring and/or cutting
instructions.
Содержание Resizeable UCS
Страница 1: ...Montagehandleiding Resizeable UCS Installation Manual...
Страница 2: ...4 HORREX MONTAGEHANDLEIDING...
Страница 15: ...17 B A...
Страница 16: ...18 HORREX MONTAGEHANDLEIDING C D...
Страница 17: ...19 E F...
Страница 18: ...20 HORREX MONTAGEHANDLEIDING G H A...
Страница 19: ...21 I J A...
Страница 20: ...22 HORREX MONTAGEHANDLEIDING K L...
Страница 21: ...23 M N...
Страница 22: ...24 HORREX MONTAGEHANDLEIDING O P A...
Страница 23: ...25 Q...
Страница 24: ...26 HORREX MONTAGEHANDLEIDING R RK AK 1 2 1 2 1 3 1 3 1 3 B B...
Страница 25: ...27 S T B...
Страница 26: ...28 HORREX MONTAGEHANDLEIDING U...
Страница 29: ...31...
Страница 30: ...32 HORREX MONTAGEHANDLEIDING...
Страница 31: ...33...


