background image

CAUTION

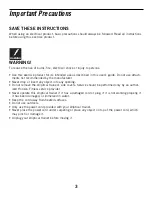
Read all precautions and instructions in this manual before using this equipment. 
Save this manual for future reference.

CAUTION

!

Table of Contents

IMPORTANT PRECAUTIONS  . . . . . . . . . . . . . . . . . . . . . . . . . . . . . . . . . . . . . . . .3
BEFORE YOU BEGIN  . . . . . . . . . . . . . . . . . . . . . . . . . . . . . . . . . . . . . . . . . . . . .6
ASSEMBLY (2.1E) . . . . . . . . . . . . . . . . . . . . . . . . . . . . . . . . . . . . . . . . . . . . . . . .7
ASSEMBLY (4.1E) . . . . . . . . . . . . . . . . . . . . . . . . . . . . . . . . . . . . . . . . . . . . . . .10
ELLIPTICAL OPERATION & ADJUSTMENT  . . . . . . . . . . . . . . . . . . . . . . . . . . . . .13
CONSOLE FEATURES & DISPLAY (2.1E & 4.1E)  . . . . . . . . . . . . . . . . . . . . . . . . .15
PROGRAM PROFILES  . . . . . . . . . . . . . . . . . . . . . . . . . . . . . . . . . . . . . . . . . . . .22
PROGRAM CHARTS  . . . . . . . . . . . . . . . . . . . . . . . . . . . . . . . . . . . . . . . . . . . . .23
USING YOUR RACE PROGRAM  . . . . . . . . . . . . . . . . . . . . . . . . . . . . . . . . . . . . .25
USING YOUR THR ZONE PROGRAMS 1 & 2 . . . . . . . . . . . . . . . . . . . . . . . . . . . .26
USING YOUR CUSTOM USER PROGRAMS 1 & 2  . . . . . . . . . . . . . . . . . . . . . . . .27
TROUBLESHOOTING & MAINTENANCE PROCEDURES  . . . . . . . . . . . . . . . . . . . .28
COMMON PRODUCT QUESTIONS  . . . . . . . . . . . . . . . . . . . . . . . . . . . . . . . . . . .31
CONDITIONING GUIDELINES  . . . . . . . . . . . . . . . . . . . . . . . . . . . . . . . . . . . . . .32
MONITORING YOUR HEART RATE  . . . . . . . . . . . . . . . . . . . . . . . . . . . . . . . . . . .34
HEART RATE CHART  . . . . . . . . . . . . . . . . . . . . . . . . . . . . . . . . . . . . . . . . . . . . .35
DEVELOPING A FITNESS PROGRAM  . . . . . . . . . . . . . . . . . . . . . . . . . . . . . . . . .36
WARM UP & COOL DOWN  . . . . . . . . . . . . . . . . . . . . . . . . . . . . . . . . . . . . . . . . .37
ACHIEVING YOUR FITNESS GOALS  . . . . . . . . . . . . . . . . . . . . . . . . . . . . . . . . . .38
WEEKLY LOG SHEETS  . . . . . . . . . . . . . . . . . . . . . . . . . . . . . . . . . . . . . . . . . . .39
MONTHLY LOG SHEETS  . . . . . . . . . . . . . . . . . . . . . . . . . . . . . . . . . . . . . . . . . .40
LIMITED WARRANTY  . . . . . . . . . . . . . . . . . . . . . . . . . . . . . . . . . . . . . . . . . . . .41

2

Содержание ELITE 2.1E

Страница 1: ...ELITE SERIES 2 1E 4 1E Elliptical User s Guide...

Страница 2: ...LE FEATURES DISPLAY 2 1E 4 1E 15 PROGRAM PROFILES 22 PROGRAM CHARTS 23 USING YOUR RACE PROGRAM 25 USING YOUR THR ZONE PROGRAMS 1 2 26 USING YOUR CUSTOM USER PROGRAMS 1 2 27 TROUBLESHOOTING MAINTENANCE...

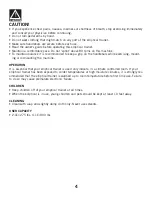
Страница 3: ...o any opening Do not remove the elliptical trainer s side covers Service should be performed only by an author ized Horizon Fitness service provider Never operate this elliptical trainer if it has a d...

Страница 4: ...lebars while exercising mount ing or dismounting the machine OPERATION It is essential that your elliptical trainer is used only indoors in a climate controlled room If your elliptical trainer has bee...

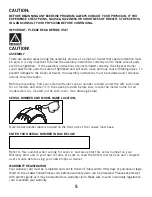
Страница 5: ...oceeding find your elliptical trainer s serial number located under the left side cover for all models and enter it in the space provided below Also locate the model name for all models which is locat...

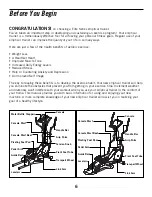
Страница 6: ...ise habit Your new elliptical trainer will help you eliminate the obstacles that prevent you from getting in your exercise time Inclement weather and darkness won t interfere with your workout when yo...

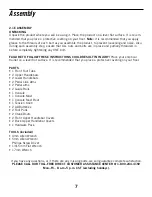
Страница 7: ...Place your elliptical trainer on a level flat surface It is recommended that you place a protective covering on your floor PARTS 1 Front Foot Tube 2 Upper Handlebars 2 Lower Handlebars 2 Pedal Link Ar...

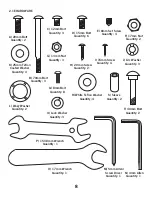
Страница 8: ...tity 3 E 8mm Set Screw Quantity 4 B 70mm Bolt Quantity 3 O 17mm Wrench Quantity 1 P 15 13mm Wrench Quantity 1 N 4mm Allen Quantity 1 M 5mm Allen Screw Driver Quantity 1 U Lock Washer Quantity 3 D 15mm...

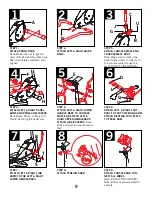
Страница 9: ...AND PEDAL ARM COVERS Note Black Teflon surface of K should be facing the pedal arm STEP 5 ATTACH LEFT RIGHT LOWER HANDLE BARS TO CONSOLE MAST AND ATTACH LEFT RIGHT UPPER HANDLEBARS ATTACH H BAR COVER...

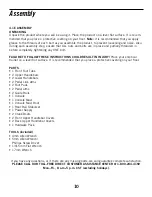
Страница 10: ...e your elliptical trainer on a level flat surface It is recommended that you place a protective covering on your floor PARTS 1 Front Foot Tube 2 Upper Handlebars 2 Lower Handlebars 2 Pedal Link Arms 2...

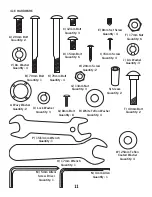
Страница 11: ...mm Bolt Quantity 1 O 17mm Wrench Quantity 1 P 15 13mm Wrench Quantity 1 N 4mm Allen Quantity 1 M 5mm Allen Screw Driver Quantity 1 U Lock Washer Quantity 3 D 15mm Bolt Quantity 6 C 12mm Bolt Quantity...

Страница 12: ...ATTACH LEFT RIGHT GUIDE RAILS AND REAR RAIL STABILIZER Note Make sure all the levelers are leveled STEP 3 ATTACH CONSOLE MAST AND CONSOLE MAST BOOT Note Make sure to loosen the water bottle screws in...

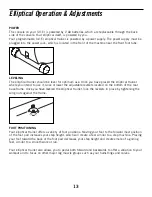
Страница 13: ...n the bottom of the rear base frame Once you have leveled the elliptical trainer lock the levelers in place by tightening the wing nuts against the frame Elliptical Operation Adjustments FOOT POSITION...

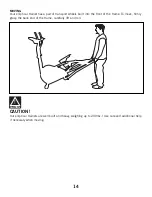
Страница 14: ...rt wheels built into the front of the frame To move firmly grasp the back end of the frame carefully lift and roll CAUTION Our elliptical trainers are well built and heavy weighing up to 200lbs Use ca...

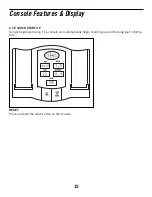
Страница 15: ...2 1E QUICK START UP Simply begin exercising The console will automatically begin counting up and tracking your informa tion RESET Press and hold the reset button on the console Console Features Displ...

Страница 16: ...ge your resistance by adjusting the tension knob locat ed on the console mast The resistance levels vary from 1 15 1 being the easiest 15 being the most difficult Turn the tension knob clockwise to in...

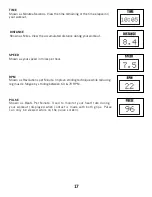
Страница 17: ...orkout RPM Shown as Revolutions per Minute Improve striding technique while reducing leg muscle fatigue by striding between 60 70 RPM PULSE Shown as Beats Per Minute Used to monitor your heart rate du...

Страница 18: ...ress the Start button to begin exercising The console will automatically default to the Manual program unless another program is selected RESET Press and hold the Stop button to reset the elliptical t...

Страница 19: ...ing your workout 10 00 8 4 Distance Speed Distance Speed 310 CALORIES Shown as total accumulated calories burned during your work out 60 RPM Shown as Revolutions per Minute Improve striding technique...

Страница 20: ...the most difficult WATTS A measurement of your energy expenditure May be used to evaluate and quantify your fitness progress over time 160 PULSE Shown as Beats per Minute You can monitor your heart ra...

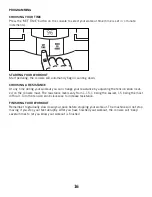
Страница 21: ...stance level flashing press the quick resistance or up down buttons to adjust your resistance level Press Select to choose the Time FINISHING YOUR WORKOUT Press the Stop button to pause your workout p...

Страница 22: ...g zone P5 TOUR Simulates a gradual hill climb to strengthen your leg muscles and improve your cardiovascular health P6 RACE A great motivational program for competitive individuals that allows the use...

Страница 23: ...10 4 10 4 10 4 10 4 10 4 10 4 3 2 Level 7 2 3 5 11 5 11 5 11 5 11 5 11 5 11 5 11 5 3 2 Level 8 3 3 5 12 5 12 5 12 5 12 5 12 5 12 5 12 5 3 3 Level 9 3 3 6 13 6 13 6 13 6 13 6 13 6 13 6 13 6 3 3 Level...

Страница 24: ...339 179 368 548 349 376 166 125 332 Level 3 Resistance 3 4 5 6 5 7 5 6 7 6 7 5 7 5 6 6 5 4 3 distance 169 253 337 308 142 484 97 389 441 413 349 187 376 560 373 383 172 129 344 Level 4 Resistance 3 5...

Страница 25: ...be broken up into 16 segments The first segment will be dedicated to a WARM UP which will be half of the selected pace Speed The middle segments will consist of the Race with the last segment dedicate...

Страница 26: ...ce levels to get you to your target pulse zone 4 After the 5 minute warm up period the resistance levels will increase gradually to get the user to the selected target THR zone Once the user is at the...

Страница 27: ...or Down button and press Select You will need to select a speed for all 16 segments pressing Select after each segment 4 Once you have chosen your desired resistance level for all 16 segments press S...

Страница 28: ...ptical the power cord must be disconnected from the wall outlet 4 1E Wipe down the elliptical trainer with a damp cloth Never use solvents as they can cause damage to the elliptical Inspect the power...

Страница 29: ...PROBLEM Roller wheels appear to be leaving particles on the guiderails SOLUTION This is considered normal wear of the elliptical wheels To remove simply wipe off the roller wheels and guide rails with...

Страница 30: ...nstantly holding the heart rate grips while exercising When you are breathing heavily during a workout When your hands are constricted by wearing a ring When your hands are dry or cold Try moistening...

Страница 31: ...lso there will be less reverberation on a carpeted concrete floor than on a wood overlay floor Sometimes a heavy rubber mat will help reduce reverberation through the floor If a fitness product is pla...

Страница 32: ...s that it s a time that allows you to keep a schedule and a time when you won t be inter rupted If you are to be successful with your fitness program you have to make it a priority in your life So dec...

Страница 33: ...s by monitoring your heart rate and the second is by evaluating your perceived exer tion level this is simpler than it sounds Note Always consult your physician before beginning an exercise program PE...

Страница 34: ...adout if consistently holding the handlebars TELEMETRIC CHEST TRANSMITTER 4 1E only Prior to wearing the chest transmitter on your chest moisten the two rubber electrodes with water Center the chest s...

Страница 35: ...he American Heart Association recommends working out at a Target Heart Rate Zone of between 60 and 75 of your maximum heart rate See the chart below for convenient reference EXAMPLE for a 42 year old...

Страница 36: ...ls flat and hold this position for a count of 15 seconds Make sure that you do not bounce while stretching Alternate positions of your feet and repeat for a total of 8 repetitions STANDING QUADRICEPS...

Страница 37: ...trenuous exercise Make sure that you warm up on your Horizon Fitness product at a slow pace COOL DOWN Never stop exercising suddenly A cool down period allows your heart to readjust to the decreased d...

Страница 38: ...rable terms and then put your goals in writing The more specific you can be the easier it will be to track your progress If your goals are long term divide them up into monthly and weekly segments Lon...

Страница 39: ...39 Weekly Log Sheets...

Страница 40: ...Monthly Log Sheets 40...

Страница 41: ...the elliptical trainer as sold The warranty does not apply to damage or failure due to accident abuse corrosion discoloration of paint or plastic or neglect Horizon Fitness shall not be responsible f...

Страница 42: ...HORIZON FITNESS 800 BURTON BOULEVARD DEFOREST WI 53532 Phone 1 800 244 4192 Fax 1 608 842 1660 www horizonfitness com Elite Series Rev 1 3...

Отзывы: