background image

Note:

 if you cannot complete this step now, touch 

I’ll do it later

. The thermostat will display the home 

screen. When you do want to connect, select   

MENU> Wi-Fi Setup

 and then continue with Step 5.2.

After the initial setup, walk the homeowner through 
connecting to a Wi-Fi network. Alternatively,  
refer them to the online User Guide at: 
www.getconnected.honeywell.com 
so the homeowner can connect the thermostat  
to a Wi-Fi network at a later time. 

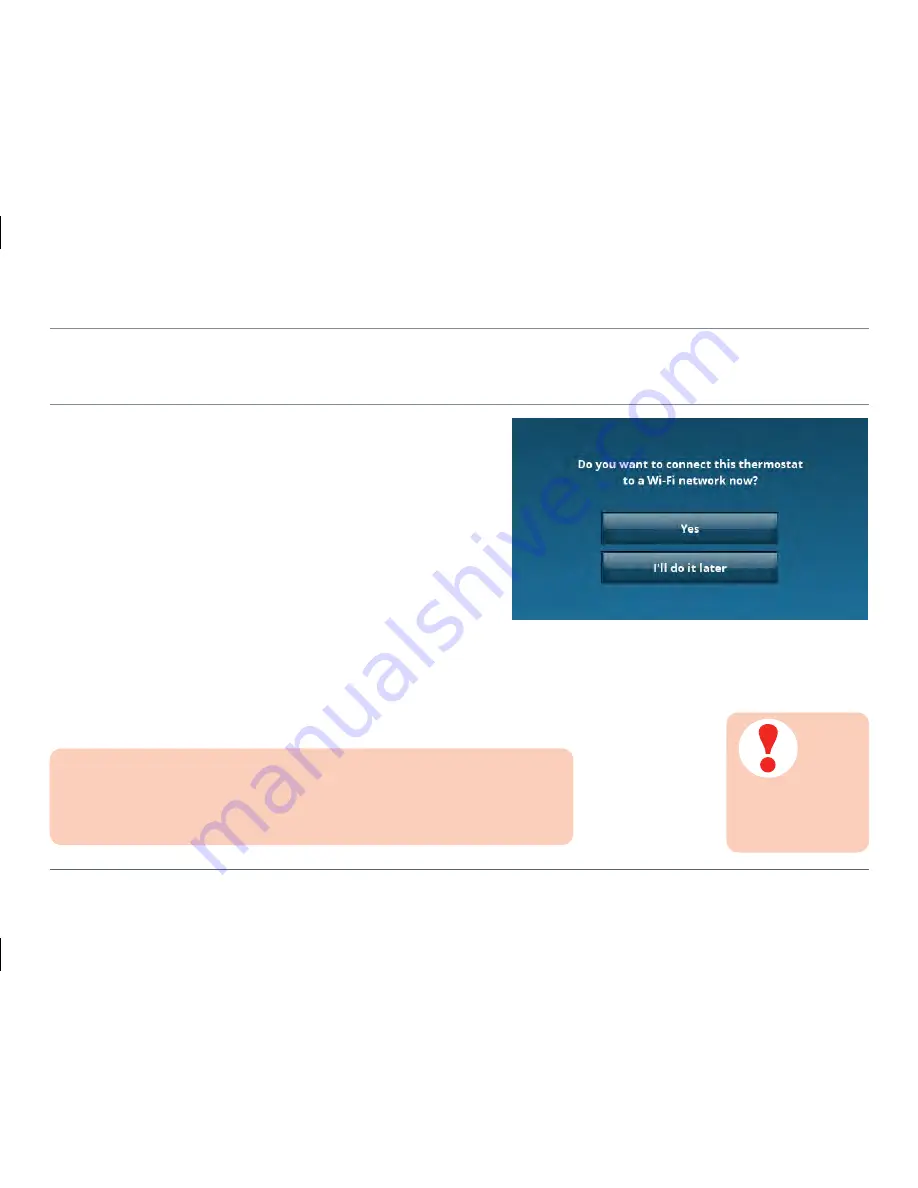
5.1  Connect to the Wi-Fi network.

After completing the initial setup, the thermostat 
offers the option to connect to a Wi-Fi network. 
Touch 

Yes

 and the screen displays the message 

“Searching for wireless networks. Please wait…” 
Then it displays a list of all Wi-Fi networks it can find 
along with an indication of signal strength for each.

Note: 

Voice control 

will NOT work 
without a Wi-Fi 
connection.

Step 5: Connecting to a Wi-Fi network

P19

Содержание TH9320WFV

Страница 1: ...Installation Guide Voice Controlled Thermostat TH9320WFV ...

Страница 2: ...ns Start here to set a programme schedule 4 Current Schedule Change temperature setting and select temporary or permanent hold 5 Indoor Conditions Shows indoor temperature 6 Current Date and Time 7 Outdoor Conditions Outdoor temperature and humidity appears after registration 8 Current Status Shows system mode heat on or off 1 2 3 4 5 7 8 6 P2 ...

Страница 3: ...e range of voice commands which is constantly being expanded and improved Registering the thermostat with Honeywell and downloading the Total Connect Comfort Europe smartphone or tablet app allows access to the thermostat from anywhere A Wi Fi connection is required for voice control so the thermostat should be installed in a location with a good Wi Fi signal If signal strength is poor a Wi Fi ran...

Страница 4: ...pe of installation a length of mains cable may also be required The thermostat MAC ID and MAC CRC number which can be found on either a label on the back of the thermostat the Register Online screen on the thermostat during the registration process the screen at Menu Wi Fi Setup after the thermostat has been connected to your Wi Fi system P4 ...

Страница 5: ...All wiring must be in accordance with IEE regulations This unit is for fixed wiring only A switch having contact separation of at least 3mm in all poles must be incorporated in the fixed wiring as a means of disconnecting the supply The system must be appropriately fused A fuse rating of no more than 5Amps should be installed The unit is Class II double insulated so device earthing is not required...

Страница 6: ...rolled Thermostat requires a 4 wire connection Live and Neutral power supply from the fused spur and a 2 wire contact closure output to operate the boiler 1 2b If insufficient wires are present an extra cable will have to be run to the thermostat This should be rated for 230Vac operation Use of a junction box in the system wiring is recommended to avoid confusion Now go to Step 1 5 Connect wires S...

Страница 7: ...4 Run wiring from fused spur to new thermostat location 1 4a Your Voice Controlled Thermostat requires a 4 wire connection Live and Neutral power supply from the fused spur and a 2 wire contact closure output to operate the boiler 1 4b Run cables to new thermostat location These should be rated for 230Vac operation Use of a junction box in the system wiring is recommended to avoid confusion Now go...

Страница 8: ... wiring terminals The wires will be gripped by the internal mechanism 1 5c Check each wire is securely connected by giving it a gentle pull 8mm N L C B A Note to disconnect any wire press on the tab next to it then pull the wire out from the terminal hole See Step 2 Wiring schematics for details Earth Step 1 Wallplate installation and wiring continued P8 ...

Страница 9: ...any of the wires or wiring connections 1 7 Attach thermostat to wallplate Align the thermostat with wallplate and snap into place 1 8 Switch heating system on Switch heating system on at fused spur and verify that the thermostat display lights up Now go to Step 3 Set initial thermostat configuration options Thermostat Wallplate Wallbox P9 ...

Страница 10: ...Internal wiring N L C B A 230V 50 60Hz 5 3 A 24 230V TH9320WFV HEATING COM 5A N L Step 2 Wiring schematics P10 ...

Страница 11: ...Typical wiring connections Basic Boiler TH9320WFV N L N L E C B A 5A 230V 50 60Hz L N BOILER JUNCTION BOX 230V 5 3 A 1 2 3 4 5 6 7 8 9 10 P11 ...

Страница 12: ...Typical wiring connections Combi Boiler JUNCTION BOX 24 230V 5 3 A TH9320WFV N L N L T1 T2 E C B A 5A 230V 50 60Hz L N BOILER 1 2 3 4 5 6 7 8 9 10 Step 2 Wiring schematics continued P12 ...

Страница 13: ...Typical wiring connections Zone Valve JUNCTION BOX 230V 5 3 A TH9320WFV N L N L E C B A 5A 230V 50 60Hz L N BOILER 1 2 3 4 5 6 7 8 9 10 G Y BL BR GR 0 M V4O43 P13 ...

Страница 14: ...l S Plan 5A L N 230V 50 60Hz BOILER PUMP TH9320WFV N L C B A V4043H 2 PORT VALVE HOT WATER GR BL G Y BR O ST9100C TIMER N L 1 2 3 4 V4043H 2 PORT VALVE HEATING GR BL G Y BR O L641 2 C 1 N L L N E E 1 2 3 4 5 6 7 8 9 10 JUNCTION BOX P14 ...

Страница 15: ...30V 50 60Hz BOILER PUMP ST9100C TIMER N L 1 2 3 4 N L L N E E 1 2 3 4 5 6 7 8 9 10 TH9320WFV N L C B A L641 2 C 1 V4073 MID POSITION VALVE BL G Y W GR O JUNCTION BOX Typical wiring connections Sundial Y Plan P15 ...

Страница 16: ... be customised later Follow prompts on the screen to select appropriate options HELP buttons are available to provide assistance 3 1 Touch the language you want the thermostat to display then touch Next 3 2 Choose the appropriate Cycles Per Hour for the installation for guidance see table in Step 4 System set up options Use the arrows to select the value then touch Next Step 3 Initial setup P16 ...

Страница 17: ...e Minimum On Off Time for the installation Use the arrows to select the value then touch Done 3 4 The thermostat now displays an option to connect to the Wi Fi network For details go to Step 5 Connecting to a Wi Fi network P17 ...

Страница 18: ...tions Defaults Cycles Per Hour 1 12 6 Minimum On Time Off 1 15 minutes 1 See table below for guidance on what setting to use for different applications Application Settings What to change Cycles per hour Minimum on off Time Gas Boiler 30kW 6 1 No changes required Oil Boiler 3 4 Set cycles per hour 3 Set minimum on time 4 Zone Valve 6 1 No changes required Step 4 System setup options P18 ...

Страница 19: ...connected honeywell com so the homeowner can connect the thermostat to a Wi Fi network at a later time 5 1 Connect to the Wi Fi network After completing the initial setup the thermostat offers the option to connect to a Wi Fi network Touch Yes and the screen displays the message Searching for wireless networks Please wait Then it displays a list of all Wi Fi networks it can find along with an indi...

Страница 20: ...till does not display the home network signal strength may be poor at this location and a Wi Fi range extender may be required 5 2b Ask the homeowner to enter the home network password using the keyboard displayed 5 2c Touch Done The thermostat displays Connecting to your network Please wait then shows a Connection Successful screen Step 5 Connecting to a Wi Fi network continued P20 ...

Страница 21: ...ywell 5 2e Touch Done and the End User License Agreement will be displayed Ask the homeowner to scroll down to read the whole text and then touch Yes to signify agreement If the agreement is not accepted the voice recognition feature will be switched off If accepted voice control is now active 5 2f The thermostat now provides some options on How to use Voice Touch Next from this screen to return t...

Страница 22: ...istered the Total Connect Comfort Europe smartphone or tablet app can be downloaded to give the homeowner access to the Voice Controlled Thermostat from anywhere 6 1 Create an account Have the homeowner go to www mytotalconnectcomfort com and follow the instructions to create an account Step 6 Registering the thermostat with Honeywell P22 ...

Страница 23: ...required for this process If not already noted they can be found on the label on the back of the thermostat or on the screen at Menu Wi fi Setup 6 3 Download the app To get the most out of the Voice Controlled Thermostat and access it from anywhere download the Total Connect Comfort Europe app from www mytotalconnectcomfort com Select your store Download the App P23 ...

Страница 24: ...g I ll do it myself View Schedule Summary Today Previous Day Next Day Weather Voice Control Voice On Off Volume Sensitivity How to use Voice Colour Themes A range of menu options are available to customise the Voice Controlled Thermostat for the homeowner Touch MENU to view these options Step 7 Menu options P24 ...

Страница 25: ...esponse Technology Advanced Preferences Number of Schedule Periods Maximum Heat Limit Keypad Lockout Clock Format Daylight Saving Time Indoor Temperature Display Offset Restore Default Schedule Restore Factory Defaults Equipment Status Date Time Set Time Set Date P25 ...

Страница 26: ...t Schedule Changes Holiday Mode Stay Home From Work Return Home Early Return Home Late Wake Up Early Stay Up Late Clean Screen Security Settings Change Lock Mode Create Password Wi Fi Setup System Setup Heat Cycles Per Hour Minimum On Time Step 7 Menu options continued P26 ...

Страница 27: ...nu Date Time 6 On the Home screen change the set temperature to 32 C and confirm the following Status shows Heat On Controlled equipment eg boiler switches on 7 Turn the set temperature down to a normal comfort setting 8 Show homeowner how to set a schedule Menu Create Edit Schedule 9 Configure any other preferences to match the lifestyle and needs of the homeowner 10 Check the voice commands are ...

Страница 28: ... with the homeowner and remind them to keep them in a safe place 4 The thermostat has an intuitive interface and has Help text throughout to assist with use A User Guide is available to download or view at www getconnected honeywell com along with more information about the Honeywell Voice Controlled Thermostat Installation Data Installation Date Installer Contact Details Step 9 Completion checkli...

Страница 29: ... Controlled Thermostat should be installed in an open space with a good Wi Fi signal for best performance as it is a radio frequency device Leave at least 30cm distance from any metal objects and at least 1 metre from any other electrical equipment eg radio TV PC etc Avoid mounting onto metal wall boxes where possible It is recommended testing the Wi Fi single strength of your chosen location is t...

Страница 30: ...usly issued instructions and is only applicable to the product s described This product has been designed for applications as described within this document For use outside of the scope as described herein refer to Honeywell for guidance Honeywell cannot be held responsible for misapplication of the product s described within this document Please respect your environment Take care to dispose of th...

Страница 31: ...d ETSI EN 300 328 Environmental Specification Operating temperature 0 to 40 C Storage temperature 20 to 50 C Humidity 10 to 90 relative humidity non condensing IP Protection Class IP30 Mechanical Dimensions Width 115mm Height 89mm Depth from wall 34mm Wallplate protrudes 25mm into wallbox Technical data P31 ...

Страница 32: ...well International Inc Manufactured for and on behalf of the Environmental and Combustion Controls Division of Honeywell Technologies Sàrl ACS ECC EMEA Z A La Pièce 16 1180 Rolle Switzerland by its Authorised Representative Honeywell Inc Need help For assistance with this product please visit www getconnected honeywell com ...

Отзывы: