Honeywell PGF3 Скачать руководство пользователя страница 3

-- 3 --

462 06 1211 00

3/17/06

Disassembly

Refer to

Figure 1

and the following steps.

Disassembly

Figure 1

1. After shutting off gas supply and electric power to the unit

remove the access door, exposing gas valve and burner

compartment.

2. Disconnect gas line from gas valve so manifold assembly

can be removed.

3. Disconnect wiring at gas valve. Be sure to note the proper

location of any and all electrical wiring disconnected.

4. If converting from Propane Gas to Natural Gas, remove the

pilot supply line from the gas valve.

5. Remove the four (4) screws holding the manifold and gas

valve to the manifold supports. Do Not discard any screws.

6. Carefully remove the manifold assembly.
7. If converting from Propane Gas to Natural Gas in the state of

California, NOx baffles must be installed to comply with

California law. NOx baffles can be ordered from Fast Parts.

Remove the two (2) screws holding the burner assembly in

place. Install the correct NOx baffle for the unit, if required,

and replace the Burner Assembly using the original two

screws,

Figure 2

.

Installing NOx Baffles

Figure 2

or

Changing Main Burner Orifices

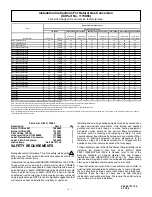
1. Remove the gas burner orifices from the manifold assembly

using a box end wrench or socket wrench,

figure 3

, and re-

place them with the proper orifice size for the specific fur-

nace model, input size, and altutude from

table 1

.

Changing Orifices

Figure 3

2. Tighten the orifices so they are 1

3

/

16

from the face of the

orifice to the backside of the manifold

(See Figure 4)

. Make

sure orifice is installed straight so that it forms a right angle

(90

°

) to the manifold.

Содержание PGF3

Страница 1: ...ied Model Number Orifice Drill Kit Number Orifice Drill Field Supplied PGC K060F GPCM K060 PGC K080F GPCM K080 PGC K100F GPCM K100 PGC K120F GPCM K120 Natural Gas Orifice Kits and Sizes Table 1 PGF K140F GPFM K140 PGAA PGMD All Sizes PGAD PGME All Sizes PGC K040F GPCM K040 Orifice Drill Field Supplied 0 to 2000 ft Elevation Above Sea Level PGF K080F GPFM K080 Parts List Kit 1173865 Description Par...

Страница 2: ...arting installation EXPLOSION HAZARD Failure to follow this warning could result in personal injury death and or property damage If unit is still running allow 2 5 minutes after gas shut off before turning off power Shut Off electric power at unit disconnect and service panel D Disconnect electric power supply to the furnace before starting installation D Check for gas leaks after installation of ...

Страница 3: ...erting from Propane Gas to Natural Gas in the state of California NOx baffles must be installed to comply with California law NOx baffles can be ordered from Fast Parts Remove the two 2 screws holding the burner assembly in place Install the correct NOx baffle for the unit if required and replace the Burner Assembly using the original two screws Figure 2 Installing NOx Baffles Figure 2 or Changing...

Страница 4: ...erting from Propane Gas to Natural Gas Conversion of Honeywell VR8200 SV9500 SV9501 and VR8204M Gas Valves using Natural Gas Conversion Kit 396222 1 Remove the regulator cap screw and pressure regulator ad justing screw See Figure 10 2 Remove the existing regulator spring from the regulator housing 3 Insert the replacement spring stainless steel contained in this kit into regulator housing Typical...

Страница 5: ...a soapy solution All leaks must be repaired immediately Start up and Check out 1 Remove the plug from the Inlet Pressure Tap on gas valve and install a manometer See Figures 7 8 9 10 2 Open manual gas line valve to unit Check for gas leaks and correct as necessary Check supply pressure Refer to Table 2 for proper supply pressure values If not within these limitations DO NOT OPERATE UNIT contact ga...

Страница 6: ... complete 1 revolution 2 3600 38 94 7 3 94 7 x 1 94 7 4 94 7 x 10²⁰ 96 632 Btu hr For this example the nameplate input is 100 000 Btu hr so only a minor change in manifold pressure is required In no case should the final manifold pressure vary more than 3 water column from the values in Table 2 Never exceed the required input rate Table 3 Table 3 0 2000 2001 3000 3001 4000 4001 5000 5001 6000 6001...

Страница 7: ...crease clockwise to decrease 3 Replace the cap on the pilot adjusting screw Pilot Burner HSP 10 11 65 Sensor Tip Proper Flame Adjustment Hot Surface Igniter Figure 11 Main Burner Flame Check Check for the following D Stable and blue flames See Figure 12 Dust may cause orange tips or wisps of yellow but flames MUST NOT have solid yellow tips D Flames extending directly from burner into heat exchang...

Отзывы: