background image

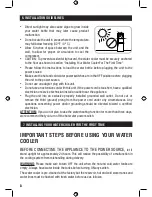
• 

Direct sunlight may also cause algae to grow inside 
your  water  bottle  that  may  later  cause  product 
malfunction.

• 

Do not locate the unit in areas where the temperature 
may fall below freezing (32º F / 0º C).

• 

Allow  6  inches  of  space  between  the  unit  and  the 
wall,  to  allow  for  proper  air  circulation  to  cool  the 
compressor.

• 

CAUTION: To prevent accidental tip hazard, the water cooler must be securely anchored 
to the floor as shown in section “Installing Your Water Cooler For The First Time” 

• 

Please follow the instructions to load the water bottle before plugging the unit to the 
power source.

• 

Make sure the hot and cold water power switches are in the OFF position before plugging 
the unit to the power source.

• 

Do not use an adapter plug with this unit.

• 

Do not use an extension cord with this unit. If the power cord is too short, have a qualified 
electrician or service technician install an outlet near the appliance.

• 

Plug  the  unit  into  an  exclusive  properly  installed  grounded  wall  outlet.  Do  not  cut  or 
remove  the  third  (ground)  prong  from  the  power  cord  under  any  circumstances.  Any 
questions  concerning  power  and/or  grounding  should  be  directed  toward  a  certified 
electrician.

ATTENTION:

 If you do not plan to use the water heating function for more than three days, 

we recommend that you turn off the hot water power switch.

6. INSTALLATION GUIDELINES

8

IMPORTANT STEPS BEFORE USING YOUR WATER 

COOLER

BEFORE CONNECTING THE APPLIANCE TO THE POWER SOURCE,


let it 

stand upright for approximately 24 hours. This will reduce the possibility of a malfunction in 
the cooling system from mishandling during delivery.

WARNING:

 Please make sure to turn OFF the unit when the hot and cold water tanks are 

empty. Always have water inside the tanks before turning ON any switch.
The water cooler is pre-cleaned at the factory but the reservoir, hot and cold water tanks and 
water lines must be flushed with fresh water before use as follows:

7. INSTALLING YOUR WATER COOLER FOR THE FIRST TIME

Содержание HWB1033S

Страница 1: ... MANUAL Read and save these instructions before use MANUAL DE INSTRUCCIONES Lea y guarde estas instrucciones antes de usar el producto Model Modelo HWB1033S For customer service please contact 1 855 687 2223 Paraservicioalconsumidorfavorcontactar 1 855 687 2223 ...

Страница 2: ...structions 5 4 Function Buttons 6 5 Indicator Lights 7 6 Installation Guidelines 7 7 Installing Your Water Cooler For The First Time 8 8 Instructions For Loading The Water Bottle 10 9 Maintenance 12 10 Technical Specification 12 11 Troubleshooting Guide 13 CONTENTS 2 ...

Страница 3: ... Keep proof of the original purchase date with this guide to establish the warranty period Keep a copy of the sales receipt Write down the model and serial numbers which can be found on a label located on the side of the water cooler Please write the information here Date of Purchase __________________________ Model Number HWB1033S Color Silver Serial Number ____________________________ WARNING BE...

Страница 4: ...l 2 Hot and Cold Power Switches 3 Indicator Lights 4 Faucets 5 Cold Water Tap 6 Room Temperature Water Tap 7 Hot Water Tap 8 Safety Lock 9 Drip Tray 10 Power Cord 11 Drain Cap 12 Storage Cabinet 13 Rating Label 14 Bracket Kit No Name 2 PARTS AND FEATURES 4 ...

Страница 5: ...replaced by an authorized service center 115V AC 60Hz 3 IMPORTANT SAFETY INSTRUCTIONS 5 DO NOT run power cord under carpeting or cover it with rugs or runners Keep the cord away from areas where it may be tripped over Always unplug the appliance from the power source before cleaning servicing or relocating the unit Make sure to turn OFF the unit when the hot and cold water tanks are empty Always h...

Страница 6: ...securely anchored to the floor as shown in section Installing Your Water Cooler For The First Time Keep this instructions handy for future reference POWER Press on the hot or cold switches on the back of the unit to turn on the hot and cold functions DO NOT turn on both switches at the same time Please refer to INSTALLING YOUR WATER COOLER FOR THE FIRST TIME section WATER TAPS Push in the hot or c...

Страница 7: ...his will reduce the possibility of a malfunction in the cooling system from mishandling during delivery This unit is for indoor use only and must be installed in a cool ventilated area Place the unit on a level surface that is strong enough to support the dispenser Keep area around the unit free of dust and dirt Locate the unit away from direct sunlight and sources of heat stove heater radiator et...

Страница 8: ...n outlet near the appliance Plug the unit into an exclusive properly installed grounded wall outlet Do not cut or remove the third ground prong from the power cord under any circumstances Any questions concerning power and or grounding should be directed toward a certified electrician ATTENTION If you do not plan to use the water heating function for more than three days we recommend that you turn...

Страница 9: ...e by pushing on the hot and cold levers until no more water remains 9 Turn counterclockwise to open the drain cap and drain the water from the tanks Do not tilt the unit to drain the water Fig 4 10 Close the drain cap by turning it clockwise 11 Installing the floor Bracket Kit Fig 5 Note All hardware is included Set up requires a drill and a Phillips screwdriver not included 1 Place the L shaped b...

Страница 10: ...unit and gently let the neck of the bottle slide into the funnel making sure the spill proof cap slides down into the prong The prong will break the spill proof cap allowing the water from the bottle to go down into the funnel and into the main reservoir without any spills Allow the water to fill all tanks of the unit for approximately one minute Push in on all water levers to make sure water flow...

Страница 11: ...n on all water levers to make sure water flows from all faucets Plug the unit back into the electrical outlet Turn ON the hot water switch wait a couple of minutes and turn ON the cold water switch Allow the unit to reach the minimum cold and hot water temperatures This will take approximately 45 minutes and the indicator lights will turn OFF Test the water temperatures by pushing once again on th...

Страница 12: ...lean the back of the machine clean with a duster such as a micro fiber cloth and or vacuum the coils using the duster attachment of the vacuum please refer to your vacuum cleaner owner s manual Storing your Water Cooler Please follow these instructions to store the water cooler when it will not be used for an extended period of time Turn OFF the hot and cold water switches Unplug the power cord fr...

Страница 13: ...ere is water inside the tank Contact customer service No cold water Cold switch is OFF The unit may have overheated Cold switch is damaged Turn ON the cold switch Check the temperature 45 minutes later Turn OFF the hot and cold switches and allow the unit to rest for 1 hour Turn ON both switches again make sure there is water inside the tank Contact customer service Water leaking from the unit Dri...

Страница 14: ...may apply Or visit www honeywellwatercoolers com Imported and Distributed by SCA Imports LLC 18851 NE 29th Ave Suite 706 Aventura Fl 33180 Tel 1 855 687 2223 2013 Mitrana Group Inc All rights reserved IM01 HWB1033S 2013 04 The Honeywell Trademark is used under license from Honeywell International Inc Honeywell International Inc makes no representations or warranties with respect to this product Th...

Отзывы: