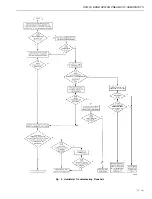

HP970A, BAND HP972B PNEUMATIC
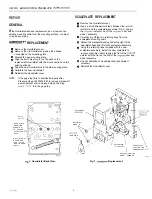
REPAIR
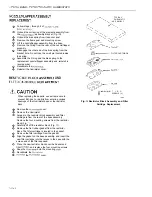
SCALEPLATE REPLACEMENT
GENERAL
If
the Humidistat requires replacement, do not remove the
existing mounting plate from the mounting surface, or adjust
or repair any piping.
REPLACEMENT
Remove the Humidistat cover.
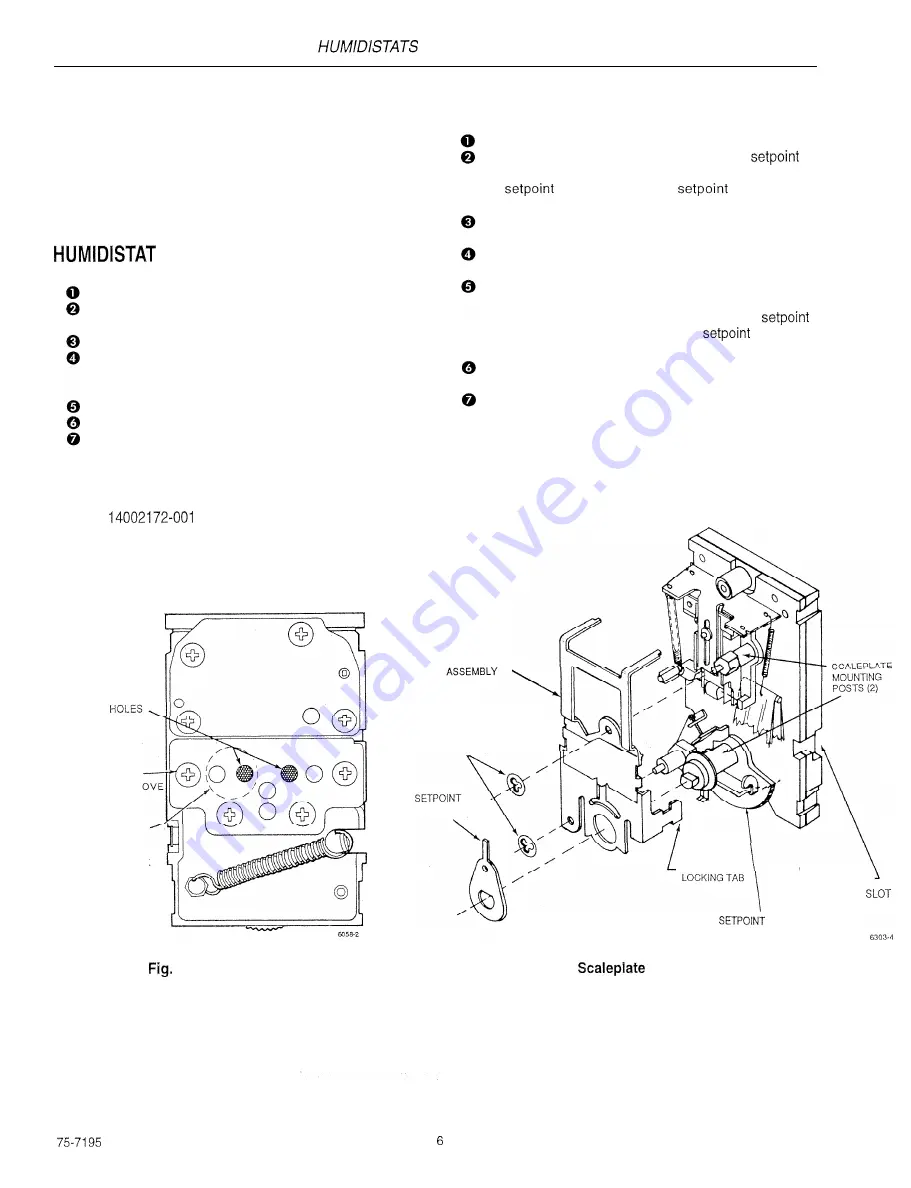
Insert a small screwdriver blade between the
indicator and the scaleplate assembly (Fig. 7) and pry
the
indicator up off the
cam and
wheel assembly.
Carefully pry off the two retaining rings from the
scaleplate mounting posts.
Detach the scaleplate locking tab at the right of the
Humidistat base and lift off the scaleplate assembly.
Using the retaining rings included with the new
scaleplate assembly, install the new scaleplate in
reverse order. Be certain to align the flat of the
pointer with the flat on the hub of the
cam and
wheel assembly.
Check calibration of Humidistat and recalibrate if
necessary.
Remove the Humidistat cover.
Remove the old Humidistat, leaving the airhead
connected to the mounting plate.
Discard the new mounting plate.
Align the port holes (Fig. 6) on the back of the
replacement Humidistat with the air connections on the
existing airhead.
Snap the new Humidistat onto the old mounting plate.
Calibrate the new Humidistat.
Reinstall the Humidistat cover.
NOTE: If the gage tap fails to seal itself properly after
Pressure Gage 14003519-001 is removed, bleed off
a small amount of air and insert Gage Tap Plug
into the gage tap.
Reinstall the Humidistat cover.
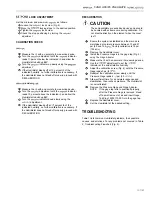
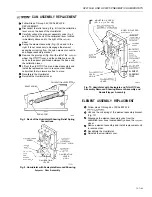
PORT
BACK PLATE
M O U N T I N G
SCREWS (4)
TO CHANGE
FILTER REM
B A C K
MULTI STAGE
C A R T R I D G E
TYPE FILTER
(UNDER BACK
PLATE)
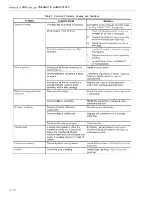
SCALEPLATE
RETAINING
RINGS (2)
INDICATOR
SCALEPLATE
SCALEPLATE
LOCKING TAB
ENGAGEMENT
CAM AND
WHEEL ASSEMBLY
6.
Humidistat Back View. Fig. 7.
Replacement.