background image

58

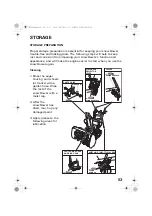
STORAGE

STORAGE PRECAUTIONS

If your snowblower will be stored with gasoline in the fuel tank and 

carburetor, it is important to reduce the hazard of gasoline vapor 

ignition. Select a well-ventilated storage area away from any appliance 

that operates with a flame, such as a furnace, water heater, or clothes 

dryer. Also avoid any area with a spark-producing electric motor, or 

where power tools are operated.

If possible, avoid storage areas with high humidity, because that 

promotes rust and corrosion.

Unless all fuel has been drained from the fuel tank, leave the fuel valve 

in the OFF position to reduce the possibility of fuel leakage.

Place the snowblower on a level surface. Tilting can cause fuel or oil 

leakage.

With the engine and exhaust system cool, cover the snowblower to 

keep out dust. A hot engine and exhaust system can ignite or melt 

some materials. Do not use sheet plastic as a dust cover. A nonporous 

cover will trap moisture around the engine, promoting rust and 

corrosion.

REMOVAL FROM STORAGE

Check your snowblower as described in the 

BEFORE OPERATION


chapter (see page 18) of this manual.

If the fuel was drained during storage preparation, fill the tank with 

fresh gasoline. If you keep a container of gasoline for refueling, be sure 

that it contains only fresh gasoline. Gasoline oxidizes and deteriorates 

over time, causing hard starting.

If the cylinder was coated with oil during storage preparation, the 

engine may smoke briefly at startup. This is normal.

31V416010.book  58 ページ  2014年5月19日 月曜日 午後2時50分

Содержание HS1332

Страница 1: ...V41601 HS928 1332 OM表紙 31V41601 C 2014 Honda Motor Co Ltd All Rights Reserved Owner s Manual SNOWBLOWER HS928 HS1332 Printed in Japan 英 N AH HC Hi EM3 DIC F101 PF BK 31V41601 00X31 V41 6010 2000 2014 06 Click to Save As ...

Страница 2: ...r Co Ltd reserves the right however to discontinue or change specifications or design at any time without notice and without incurring any obligation whatsoever The engine exhaust from this product contains chemicals known to the State of California to cause cancer birth defects or other reproductive harm California Proposition 65 This product contains or emits chemicals known to the state of Cali...

Страница 3: ... intended to help you avoid damage to your snowblower other property or the environment We suggest you read the warranty policy to fully understand its coverage and your responsibilities of ownership The warranty policy is a separate document that should have been given to you by your dealer When your snowblower needs scheduled maintenance keep in mind that your Honda servicing dealer is specially...

Страница 4: ...own good judgment You will find important safety information in a variety of forms including Safety Labels on the snowblower Safety Messages preceded by a safety alert symbol and one of three signal words DANGER WARNING or CAUTION These signal words mean Safety Headings such as IMPORTANT SAFETY INFORMATION Safety Section such as SNOWBLOWER SAFETY Instructions how to use this snowblower correctly a...

Страница 5: ...e Lever 16 FEATURES 17 Work Light 17 Snow Clearing Bar 17 BEFORE OPERATION 18 ARE YOU READY TO GET STARTED 18 IS YOUR SNOWBLOWER READY TO GO 18 Check the General Condition of the Snowblower 19 Check the Engine 19 CHECK YOUR WORK AREA 20 OPERATION 21 SNOWBLOWING PRECAUTIONS 21 STARTING THE ENGINE 21 STOPPING THE ENGINE 26 CLEARING SNOW 29 SNOW CLEARING TIPS 32 REMOVING OBSTRUCTIONS 33 SERVICING YOU...

Страница 6: ... 57 Tires 57 STORAGE PRECAUTIONS 58 REMOVAL FROM STORAGE 58 TRANSPORTING 59 BEFORE LOADING 59 LOADING 60 TAKING CARE OF UNEXPECTED PROBLEMS 62 ENGINE PROBLEMS 62 DRIVE PROBLEMS 64 SNOWBLOWER PROBLEMS 65 TECHNICAL INFORMATION 67 Serial Number Locations 67 Carburetor Modification for High Altitude Operation 68 Emission Control System Information 69 Air Index 71 Specifications 72 CONSUMER INFORMATION...

Страница 7: ...m the impeller and auger whenever the engine is running If you need to work around the snowblower to clear snow for any reason always shut off the engine If the snow discharge chute becomes clogged stop the engine and disconnect the spark plug cap Use the snow clearing bar or a wooden stick to remove the obstructions Never put your hand into the snow discharge chute while the engine is running ser...

Страница 8: ...vapor can explode Allow the engine to cool if the snowblower has been in operation Refuel only outdoors in a well ventilated area with the engine OFF Do not overfill the fuel tank Never smoke near gasoline and keep other flames and sparks away Always store gasoline in an approved container Make sure that any spilled fuel has been wiped up before starting the engine Turn Engine OFF When Not Operati...

Страница 9: ...wblower quickly in case of emergency Understand the use of all snowblower controls Never permit anyone to operate the snowblower without proper instruction Do not let children operate the snowblower If people or pets suddenly appear in front of the snowblower while it is in operation immediately release the auger and drive clutch levers to stop the snowblower and avoid possible injury from rotatin...

Страница 10: ...ONS These labels warn you of potential hazards that can cause serious injury Read them carefully If a label comes off or becomes hard to read contact your Honda snowblower dealer for a replacement 31V416010 book 8 ページ 2014年5月19日 月曜日 午後2時50分 ...

Страница 11: ...GER AUGER CLUTCH LEVER FUEL TANK CAP DISCHARGE DEFLECTOR LEVER THROTTLE LEVER DRIVE CLUTCH LEVER SHIFT LEVER MUFFLER TRACK AC STARTER BUTTON TAS type STARTER GRIP FUEL VALVE CHOKE KNOB ENGINE SWITCH TRANSMISSION FLUID RESERVOIR CHUTE CRANK FOOT PEDAL FRAME SERIAL NUMBER TRANSMISSION RELEASE LEVER ENGINE SERIAL NUMBER SKID SHOE ENGINE OIL FILLER CAP SNOW CLEARING BAR 31V416010 book 9 ページ 2014年5月19日...

Страница 12: ...R WHEEL AUGER SNOW DISCHARGE CHUTE WORK LIGHT DISCHARGE DEFLECTOR FUEL VALVE CHOKE KNOB ENGINE SWITCH TRANSMISSION FLUID RESERVOIR CHUTE CRANK FRAME SERIAL NUMBER TRANSMISSION RELEASE LEVER ENGINE SERIAL NUMBER SKID SHOE ENGINE OIL FILLER CAP SNOW CLEARING BAR AC STARTER BUTTON WAS type STARTER GRIP 31V416010 book 10 ページ 2014年5月19日 月曜日 午後2時50分 ...

Страница 13: ...reduce the possibility of fuel leakage Engine Switch The engine switch controls the ignition system The key can only be inserted and removed when turned to OFF OFF Stops the engine ON Running position and for starting with the recoil starter Fuel Gauge The fuel gauge indicates the amount of fuel in the tank When the fuel gauge needle enters the EMPTY position refill the tank as soon as possible ON...

Страница 14: ... grip to start the engine See page 24 for starting procedures Throttle Lever The throttle lever controls engine speed from SLOW to FAST it will stay in any designated position To throw snow to the left To throw snow to the right CHUTE CRANK STARTER GRIP THROTTLE LEVER SLOW FAST 31V416010 book 12 ページ 2014年5月19日 月曜日 午後2時50分 ...

Страница 15: ...ng a warm engine Shift Lever The shift lever selects F FORWARD N NEUTRAL or R REVERSE The shift lever also controls the transmission drive ratio moving the lever farther from NEUTRAL increases drive speed While clearing snow use the shift lever to control drive speed so you can leave the throttle lever in the FAST position for best snow clearing performance CHOKE KNOB OPEN CLOSED SHIFT LEVER R Rev...

Страница 16: ...elation to the tracks Hold the handles and step on the pedal Raise or lower the machine to the desired position and release the pedal LOW Smooth ice covered surfaces only MIDDLE Normal use HIGH Deep snow or for transporting the snowblower DISCHARGE DEFLECTOR LEVER DISCHARGE DEFLECTOR HIGH AND FAR LOW AND NEAR HIGH AND FAR LOW AND NEAR FOOT PEDAL HIGH MIDDLE LOW 31V416010 book 14 ページ 2014年5月19日 月曜日...

Страница 17: ...tch lever down Releasing the drive clutch lever then unlocks and releases the auger clutch lever DRIVE CLUTCH LEVER Squeeze to engage the drive transmission AUGER CLUTCH LEVER Squeeze to engage the snow blowing mechanism DRIVE CLUTCH LEVER LOCKED Both levers squeezed The auger clutch lever remains locked down as long as one hand continues to squeeze the drive clutch lever 31V416010 book 15 ページ 201...

Страница 18: ... engine stopped Operating the transmission release lever while the engine is running can damage the transmission 1 Stop the engine 2 Set the shift lever to the N Neutral position 3 Set the lever to the ENGAGED or RELEASED position Pushing or towing the snowblower with the transmission release control in the engaged position will damage the hydrostatic transmission ENGAGED TRANSMISSION RELEASE LEVE...

Страница 19: ...ow Clearing Bar If the snow discharge chute or snow blowing mechanism becomes restricted stop the engine and make sure all rotating parts have come to a complete stop Remove the spark plug cap from the spark plug Use the snow clearing bar to remove the obstruction After clearing the obstruction wipe the bar clean and store it in the holders Replace the spark plug cap WORK LIGHT UP DOWN SNOW CLEARI...

Страница 20: ...the service life of your equipment it is very important to take a few moments before you operate the snowblower to check its condition Be sure to take care of any problem you find or have your servicing dealer correct it before you operate the snowblower Before beginning your pre operation checks be sure the snowblower is on a level surface and the engine switch is in the OFF position Improperly m...

Страница 21: ... proper operation Check the auger and blower for loose or broken bolts If broken replace them with new ones see page 50 Check the skid shoes and scraper for wear Replace them if necessary see page 51 Check that all nuts bolts and screws are tightened Check the Engine Check the oil level see page 41 Check the fuel level see page 39 Starting with a full tank will help to eliminate or reduce operatin...

Страница 22: ...le and Pets People and animals near the work area can move into your snowblower s path or into a position where they could be struck by thrown objects Clear the area of people especially children and pets Their safety is your responsibility Work Area Check the condition of the snow Adjust your snowblower ground speed not engine speed and snowblowing swath accordingly Check the skid shoes for prope...

Страница 23: ...is a violation of Federal and California law For your safety do not start or operate the engine in an enclosed area such as a garage Your snowblower s exhaust contains poisonous carbon monoxide gas that can collect rapidly in an enclosed area and cause illness or death STARTING THE ENGINE 1 Move the shift lever to N Neutral position Exhaust contains poisonous carbon monoxide gas that can build up ...

Страница 24: ... lever in the ENGAGED position see page 16 3 Turn the fuel valve to the ON position Be sure that the drain knob is tightened securely TRANSMISSION RELEASE LEVER DRAIN KNOB ENGAGED ON FUEL VALVE LEVER 31V416010 book 22 ページ 2014年5月19日 月曜日 午後2時50分 ...

Страница 25: ...utlet To minimize the possibility of potentially dangerous electrical shocks always use a 3 conductor power cord with a power rating of no less than 15 amps Also be sure that the outlet you are using is properly grounded Do not connect and disconnect the power cord with wet hands Be sure to hold the plug when disconnecting the power cord from the electrical outlet or switch box Do not disconnect b...

Страница 26: ...utes before operating it again Manual Starting only a Turn the engine switch to the ON position b Pull the starter grip lightly until you feel resistance then pull briskly in the direction of the arrow as shown c Return the starter grip gently to the engine Do not allow the starter grip to snap back against the engine Return it gently to prevent damage to the starter Do not pull the starter grip w...

Страница 27: ...e choke knob has been pulled to the CLOSED position to start the engine gradually push it to the OPEN position as the engine warms up Move the throttle lever to the SLOW position THROTTLE LEVER CHOKE KNOB OPEN SLOW FAST 31V416010 book 25 ページ 2014年5月19日 月曜日 午後2時50分 ...
Страница 28: ...ueeze the drive clutch lever for about 30 seconds to warm up the transmission fluid STOPPING THE ENGINE To stop the engine in an emergency simply turn the engine switch to the OFF position Under normal conditions use the following procedure SHIFT LEVER N Neutral DRIVE CLUTCH LEVER OFF ENGINE SWITCH 31V416010 book 26 ページ 2014年5月19日 月曜日 午後2時50分 ...

Страница 29: ...and snow blowing mechanism will stop operation 2 Move the shift lever to N Neutral position 3 Turn the throttle lever to the SLOW position DRIVE CLUTCH LEVER AUGER CLUTCH LEVER N Neutral SHIFT LEVER SLOW THROTTLE LEVER FAST 31V416010 book 27 ページ 2014年5月19日 月曜日 午後2時50分 ...

Страница 30: ...28 OPERATION 4 Turn the engine switch to the OFF position 5 Turn the fuel valve to the OFF position ENGINE SWITCH OFF OFF ON FUEL VALVE LEVER 31V416010 book 28 ページ 2014年5月19日 月曜日 午後2時50分 ...

Страница 31: ... or hard packed snow 3 Set the foot pedal to the correct position see page 14 track type only 4 Adjust the throwing direction by using the chute crank and the discharge deflector lever see pages 12 and 14 5 Squeeze the auger clutch lever The machine will clear snow when you squeeze the auger clutch lever SHIFT LEVER FAST R Reverse SLOW SLOW FAST N Neutral F Forward AUGER CLUTCH LEVER 31V416010 boo...

Страница 32: ...er When both levers are squeezed the drive clutch lever locks the auger clutch lever down This frees your right hand to operate the other snowblower controls Releasing the drive clutch lever unlocks and releases the auger clutch lever To move from one place to another or to change direction use the drive clutch lever only Release both the drive clutch lever and auger clutch lever and then squeeze ...

Страница 33: ...31 OPERATION 7 Release the clutch levers to stop clearing or moving DRIVE CLUTCH LEVER AUGER CLUTCH LEVER 31V416010 book 31 ページ 2014年5月19日 月曜日 午後2時50分 ...

Страница 34: ...is not sufficient use the shift lever to clear snow with a back and forth motion Clear a narrower swath Make several passes with the auger overlapping the cleared areas If the snow is deeper than the height of the auger remove it in several steps as shown below or install the drift breaker kit optional part that is available from authorized Honda snowblower dealers 1st 2nd 3rd 31V416010 book 32 ペー...

Страница 35: ...tructions 1 Before removing the obstruction be sure to stop the engine and make sure that all rotating parts have come to a complete stop Remove the spark plug cap from the spark plug 2 Remove the snow clearing bar or use a wooden stick to clear the obstruction 3 After unclogging wipe the bar clean and secure it in the holders SNOW CLEARING BAR HOLDERS 31V416010 book 33 ページ 2014年5月19日 月曜日 午後2時50分 ...

Страница 36: ...r unusual conditions consult your servicing dealer for recommendations applicable to your individual needs and use Remember that your authorized Honda servicing dealer knows your snowblower best and is fully equipped to maintain and repair it To ensure the best quality and reliability use only new Honda Genuine parts or their equivalents for repair or replacement Maintenance replacement or repair ...

Страница 37: ...r doors Burns from hot parts Let the engine and exhaust system cool before touching Injury from moving parts Do not run the engine unless instructed to do so Read the instructions before you begin and make sure you have the tools and skills required To reduce the possibility of fire or explosion be careful when working around gasoline Use only a nonflammable solvent not gasoline to clean parts Kee...

Страница 38: ...c maintenance simple adjustments and repairs are supplied in the tool kit Spare shear bolts and nuts are also located in the tool kit SPARK PLUG WRENCH WRENCH HANDLE 10 12 mm BOX END WRENCH 14 17 mm WRENCH 6 mm SELF LOCK NUTS 3 LOCK BOLTS 3 TOOL BAG 31V416010 book 36 ページ 2014年5月19日 月曜日 午後2時50分 ...

Страница 39: ...uent inspection and replacement under heavy use Each use Every year First month or 20 hrs Every 100 hrs Every 300 hrs Every 4 years Page Before operation Before storage Engine oil Check level o 41 Change o 4 o o 4 42 Auger mission oil Check level o 2 HST oil Check level o 44 Battery electrolyte If applicable Check level o Check level and gravity o 2 4 Spark plug Check adjust o 4 46 Replace o o Aug...

Страница 40: ...0 hrs Every 4 years Page Before operation Before storage Fuel sediment cup Clean o 56 Fuel tank and carburetor Drain o 56 Anti corrosion oil Apply oil o 53 Chute guide control cable Check adjust o 2 4 o 2 4 Auger clutch cable Check adjust o 2 4 o 2 4 Throttle Choke cable Check adjust o 2 4 Drive clutch cable Check adjust o 2 4 o 2 4 Auger housing adjust lever Check move o 2 4 Drive belt Check adju...

Страница 41: ...the top of the fuel tank to allow for fuel expansion It may be necessary to lower the fuel level depending on operating conditions After refueling tighten the fuel tank cap securely Never refuel the snowblower inside a building where gasoline fumes may reach flames or sparks Keep gasoline away from appliance pilot lights barbecues electric appliances power tools etc Gasoline is highly flammable an...

Страница 42: ...ntain cosolvents and corrosion inhibitors Use of fuels with content of ethanol or methanol greater than shown above may cause starting and or performance problems It may also damage metal rubber and plastic parts of the fuel system Engine damage or performance problems that result from using a fuel with percentages of ethanol or methanol greater than shown above are not covered under warranty Neve...

Страница 43: ...heck the oil level If it is below the upper limit fill with the recommended oil to the upper limit see page 43 3 Reinstall the oil filler cap securely Running the engine with a low oil level can cause engine damage This type of damage is not covered by the Distributor s Limited Warranty OIL FILLER CAP UPPER LIMIT 31V416010 book 41 ページ 2014年5月19日 月曜日 午後2時50分 ...
Страница 44: ... mm wrench while loosening the drain plug with a 10 mm wrench 3 Allow the used oil to drain completely into an approved container then reinstall the drain plug with a new sealing washer and tighten it securely Improper disposal of engine oil can be harmful to the environment If you change your own oil please dispose of used motor oil properly Put it in a sealed container and take it to a recycling...

Страница 45: ...utor s Limited Warranty 5 Reinstall the oil filler cap securely ENGINE OIL RECOMMENDATIONS Oil is a major factor affecting performance and service life Use a 4 stroke automotive detergent oil SAE 5W 30 is recommended for general use The SAE oil viscosity and service classification are on the API label on the oil container Honda recommends that you use API SERVICE category SJ or later or equivalent...

Страница 46: ... the fluid level to rise above the UPPER level mark when snowblower operation warms the transmission When checking the level of cold fluid below room temperature refer to the temperature chart for appropriate fluid levels see page 45 At temperatures below 4 F 20 C fluid may not be visible in the reservoir before operation but should rise into the reservoir when the transmission warms up TRANSMISSI...

Страница 47: ... at room temperature or to the appropriate level shown in the temperature chart below Do not overfill 3 Reinstall the seal and tighten the cap securely Temp Fluid level 68 F 20 C Between upper and lower limit marks approx 0 20 in 5 mm above lower limit marks 50 F 10 C Slightly above lower limit mark approx 0 08 in 2 mm above lower limit mark 32 F 0 C Slightly below lower limit mark approx 0 04 in ...

Страница 48: ...ust be properly gapped and free of deposits If the engine has been running the muffler will be very hot Be careful not to touch the muffler 1 Remove the spark plug cap 2 Clean any dirt from around the spark plug base 3 Use the spark plug wrench supplied in the tool kit to remove the spark plug 4 Inspect the spark plug Replace it if the electrodes are worn or if the insulator is cracked chipped or ...

Страница 49: ...reading 7 After the spark plug is seated tighten with a spark plug wrench to compress the washer If installing a new spark plug tighten 1 2 turn after the spark plug seats to compress the washer If reinstalling a used spark plug tighten 1 8 to 1 4 turn after the spark plug seats The spark plug must be securely tightened An improperly tightened spark plug can become very hot and may damage the engi...

Страница 50: ...y pressing down midway between the wheels with a force of 33 lbf 15 kgf When correctly adjusted track deflection should be 1 1 16 1 5 16 in 27 33 mm Adjusting Procedure 1 Loosen the left and right tension bolt lock nuts at the rear axle and turn the adjusting nuts to correctly tension both tracks 2 After adjustment tighten the lock nuts securely 1 1 16 1 5 16 in 27 33 mm TRACK TENSION BOLT LOCK NU...

Страница 51: ...ssure AUGER AND BLOWER INSPECTION Check the auger auger housing blower and shear bolts for signs of damage or other faults If any of the shear bolts are broken replace them with the ones furnished with the snowblower Additional shear bolts and nuts are available from authorized Honda snowblower dealers Shear bolts are designed to break under force that would otherwise damage auger and blower parts...

Страница 52: ...he cap from the spark plug 3 Clean the auger and blower of snow ice or any other foreign particles 4 Check the entire snow clearing mechanism 5 Replace any broken lock bolts Tighten securely HS928 HS1332 LOCK BOLT 6 mm SELF LOCK NUT 6 mm SELF LOCK NUT 2 6 mm SELF LOCK NUTS LOCK BOLT 2 LOCK BOLT LOCK BOLTS 31V416010 book 50 ページ 2014年5月19日 月曜日 午後2時50分 ...

Страница 53: ...en set the skid to the convenient position and tighten the bolts securely Wear inspection 1 Raise the auger housing off the ground Track type Step on the foot pedal see page 14 and raise the auger to the highest position Wheel type Place a block of wood under the scraper to support the auger 2 Measure the thickness of the right and left skid shoes at their thinnest point If the thickness of the sk...

Страница 54: ...recommended auger ground clearance can damage the snowblower 3 Loosen all the nuts and bolts holding the scraper and adjust the scraper to the specified ground clearance Retighten the nuts and bolts securely SCRAPER GROUND CLEARANCE 4 Inspect the scraper Replace the scraper if it is excessively worn Ordinary snow conditions 5 32 5 16 in 4 0 8 0 mm Smooth ice covered surfaces 3 32 3 16 in 2 0 5 0 m...

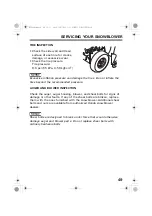
Страница 55: ...tart when you use the snowblower again Cleaning 1 Rinse the auger housing and wheels or tracks with a garden hose Wipe the rest of the snowblower with a moist rag 2 After the snowblower has dried touch up any damaged paint 3 Apply grease to the following areas for lubrication CHUTE GUIDE DISCHARGE DEFLECTOR LEVER SLIDING SURFACE LEVERS SLIDING SURFACE CHUTE DRIVE GEAR AND RING GEAR SHIFT AND THROT...

Страница 56: ...ine can be left in your fuel tank and carburetor without causing functional problems will vary with such factors as gasoline blend your storage temperatures and whether the fuel tank is partially or completely filled The air in a partially filled fuel tank promotes fuel deterioration Very warm storage temperatures accelerate fuel deterioration Fuel deterioration problems may occur within a few mon...

Страница 57: ...f you keep a container of gasoline for refueling be sure that it contains only fresh gasoline Add fuel stabilizer following the manufacturer s instructions After adding a fuel stabilizer run the engine outdoors for 10 minutes to be sure that treated gasoline has replaced the untreated gasoline in the carburetor Stop the engine and move the fuel valve lever to the OFF position 31V416010 book 55 ページ...

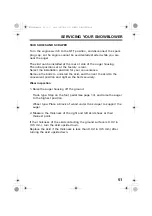
Страница 58: ...ning tighten the drain knob and turn the fuel valve OFF 4 Remove the fuel sediment cup 5 Empty the contents into a suitable container Clean the fuel sediment cup 6 Reinstall the sediment cup and new O ring and tighten securely Gasoline is highly flammable and explosive You can be burned or seriously injured when handling fuel Keep heat sparks and flames away Handle fuel only outdoors Wipe up spill...

Страница 59: ...inder 4 Pull the starter rope slowly several times to distribute the oil 5 Reinstall the spark plug 6 Pull the starter grip slowly until you feel resistance then return the starter grip gently This will close the valves so moisture cannot enter the engine cylinder Tires Check the air pressure see page 49 31V416010 book 57 ページ 2014年5月19日 月曜日 午後2時50分 ...

Страница 60: ...r on a level surface Tilting can cause fuel or oil leakage With the engine and exhaust system cool cover the snowblower to keep out dust A hot engine and exhaust system can ignite or melt some materials Do not use sheet plastic as a dust cover A nonporous cover will trap moisture around the engine promoting rust and corrosion REMOVAL FROM STORAGE Check your snowblower as described in the BEFORE OP...

Страница 61: ...ed has a low roof or cover with less than 5 ft 1 5 m of headroom lower the discharge deflector for better clearance or remove the chute assembly 5 Check that there is sufficient fuel in the tank The engine may stall on the ramp if there is not enough fuel in the tank HS928 HS1332 TA 254 lbs 115 kg 265 lbs 120 kg TAS 265 lbs 120 kg 276 lbs 125 kg WA 220 lbs 100 kg WAS 231 lbs 105 kg Length of Ramp ...

Страница 62: ...d run the snowblower up the loading ramp Be careful to avoid striking the chute or other parts of the machine 4 After the snowblower is in the truck stop the engine and turn the fuel valve to the OFF position This will prevent the possibility of carburetor flooding and will reduce the possibility of fuel leakage 5 Tie the snowblower down with rope or straps and block the treads Keep the tie down r...

Страница 63: ...ock the treads Keep the tie down rope or straps away from controls and cables Do not tie with rope or straps stronger than necessary to prevent snowblower parts from breaking Tie down Points Front Rear Track type Wheel type 31V416010 book 61 ページ 2014年5月19日 月曜日 午後2時50分 ...

Страница 64: ...on Throttle not in proper position Throttle must be in FAST position choke OFF for a hot start choke ON for a cold start see page 23 Fuel valve is OFF Sediment cup obstructed Turn fuel valve to ON see page 22 Check for contaminates in sediment cup see page 56 Stale or old fuel Be sure tank has fresh fuel Drain carburetor and sediment cup see page 56 Spark plug cap off Improper electrode gap or dep...

Страница 65: ...rge chute restricted Clear discharge chute obstructions see page 17 Spark plug cap not secure Improper electrode gap or deposits on the electrodes Make sure spark plug cap is securely connected Verify the spark plug is free of deposits and has the proper gap Choke in wrong position or choke plate sticking Check choke plate movement Stale or old fuel Be sure tank has fresh fuel Drain carburetor and...

Страница 66: ...ge 22 Fluid level is low Add hydrostatic transmission fluid to the proper level see page 45 Shift lever is in N neutral Move shift lever to forward or reverse see page 29 Drive clutch lever mechanism or cable not functioning properly See servicing Honda snowblower dealer Drive belt worn broken or not on pulleys See servicing Honda snowblower dealer 31V416010 book 64 ページ 2014年5月19日 月曜日 午後2時50分 ...

Страница 67: ...obstructions see page 17 Remove foreign object Belt worn not on pulleys or not properly installed See servicing Honda snowblower dealer Possible cause Correction Auger spinning too slowly Keep throttle in FAST see page 12 Lock bolts broken Replace broken lock bolt s see page 50 Wet deep snow is difficult to blow Reduce snowblowing swath see page 32 Belt worn not on pulleys or not properly installe...

Страница 68: ...r snow conditions Use shift lever to reduce ground speed see page 29 Possible cause Correction Engine running too slow Keep throttle in FAST when engaging auger clutch see page 12 Discharge chute restricted Foreign object stopping auger from rotating Auger frozen by ice Clear discharge chute or auger housing of obstruction see page 17 31V416010 book 66 ページ 2014年5月19日 月曜日 午後2時50分 ...

Страница 69: ...numbers in the spaces below You will need these serial numbers when ordering parts and when making technical or warranty inquiries see page 75 Engine serial number Frame serial number Date of purchase FRAME SERIAL NUMBER ENGINE SERIAL NUMBER 31V416010 book 67 ページ 2014年5月19日 月曜日 午後2時50分 ...

Страница 70: ...uretor modification This engine when operated at high altitude with the carburetor modifications for high altitude use will meet each emission standard throughout its useful life Even with carburetor modification engine horsepower will decrease about 3 5 for each 1 000 foot 300 meter increase in altitude The effect of altitude on horsepower will be greater than this if no carburetor modification i...

Страница 71: ...lean Air Acts EPA and California regulations require all manufacturers to furnish written instructions describing the operation and maintenance of emission control systems The following instructions and procedures must be followed in order to keep the Honda engine emissions within the emission standards Tampering and Altering Tampering is a violation of Federal and California law Tampering with or...

Страница 72: ...ment parts are manufactured to the same standards as the original parts so you can be confident of their performance The use of replacement parts that are not of the original design and quality may impair the effectiveness of your emission control system A manufacturer of an aftermarket part assumes the responsibility that the part will not adversely affect emission performance The manufacturer or...

Страница 73: ...y description is intended to provide you with information relating to the engine s emission durability period The descriptive term indicates the useful life period for the engine s emission control system See your Emission Control Warranty for additional information Descriptive Term Applicable to Emission Durability Period Moderate 50 hours 0 80 cc inclusive 125 hours greater than 80 cc Intermedia...

Страница 74: ...now throwing distance varies with snow conditions Max 49 5 ft 15 m Clearing capacity 50 Ton hour Model Honda GX270 Displacement 16 5 cu in 270 cm3 Bore stroke 3 03 2 28 in 77 0 58 0 mm Starting method Recoil starter or AC electric starter Ignition system CDI magneto Oil capacity 1 1 US qt 1 1 L Fuel tank capacity 1 32 US gal 5 0 L Spark plug BPR5ES NGK W16EPR U DENSO ITEM SPECIFICATION MAINTENANCE...

Страница 75: ...Max 56 1 ft 17 m Clearing capacity 65 Ton hour Model Honda GX390 Displacement 23 7 cu in 389 cm3 Bore stroke 3 46 2 52 in 88 0 64 0 mm Starting method Recoil starter Recoil starter or AC electric starter Ignition system CDI magneto Oil capacity 1 1 US qt 1 1 L Fuel tank capacity 1 51 US gal 5 7 L Spark plug BPR5ES NGK W16EPR U DENSO ITEM SPECIFICATION MAINTENANCE Spark plug gap 0 028 0 031 in 0 7 ...

Страница 76: ...vailable through your Honda dealer or through Helm Inc at 1 888 292 5395 or visit http powerequipment honda com support shop manuals Parts Catalog This manual provides complete illustrated parts lists Available through your Honda dealer Accessories Catalog Your authorized Honda power equipment dealer offers a selection of accessories optional equipment to make your snowblower even more useful Visi...

Страница 77: ...e decision made by the dealership s management contact the Honda Power Equipment Customer Relations Office You can write American Honda Motor Co Inc Power Equipment Division Customer Relations Office 4900 Marconi Drive Alpharetta Georgia 30005 8847 Or telephone 770 497 6400 M F 8 30 am to 7 00 pm ET When you write or call please give us this information Model and serial number see page 67 Name of ...

Страница 78: ...76 MEMO 31V416010 book 76 ページ 2014年5月19日 月曜日 午後2時50分 ...

Страница 79: ...t 1 1 L Spark Plug Type BPR5ES NGK W16EPR U DENSO Tires Tire Pressure 8 0 psi 55 kPa 0 56 kgf cm2 Maintenance Before each use check the following Engine oil level Tire air pressure HST oil level Auger skid shoes and scraper Auger and blower lock bolt Bolt and nut torque First 20 hours Change engine oil Adjust track deflection Subsequent See Maintenance Schedule see pages 37 and 38 31V416010 book 7...

Страница 80: ...2 OM表紙 31V41601 HS928 1332 OM表紙 31V41601 C 2014 Honda Motor Co Ltd All Rights Reserved Owner s Manual SNOWBLOWER HS928 HS1332 Printed in Japan 英 N AH HC Hi EM3 DIC F101 PF BK 31V41601 00X31 V41 6010 2000 2014 06 ...

Отзывы: