


Adding/Including/Pairing the HSW-120Z into a Z-Wave Network
1. Press the “ADD” button (in Advanced Setup) on the HomeScenario HSK-100Z Z-Wave AV Scenario Controller to begin the Z-Wave
inclusion process. (OK LED turns on)
2. Press the “DEVICE” button (in Advanced Setup) on HSK-100Z. (OK LED blinks once and stays on, LED B blinks slowly)
3. While the HSW-120Z is connected into the light, press the button near the LED.
4. HSK-100Z adding the HSW-120Z into a Z-wave network. (OK LED blinks once then turns off, LED B off)
Note:
To include the HSW-120Z with other controllers, please consult the operation manual for these controllers on how to include
Zwave products into an existing network.
Troubleshooting:
If the HSW-120Z was not successfully included into any Z-Wave network, the LED will be blinking. If the HSW-120Z
was successfully included to a Zwave network, the LED will either be on or off (depending on if the switch is on or off).
Removing/Resetting the HSW-120Z from your Z-Wave Network
1. Press the “CLEAR” button (in Advanced Setup) on the
HomeScenario HSK-100Z Z-Wave AV Scenario Controller to begin the Z-
Wave inclusion process. (OK LED turns on)
2. Press the “DEVICE” button (in Advanced Setup) on HSK-100Z. (OK LED blinks once and stays on, LED B blinks slowly)
3. While the HSW-120Z is connected into the light, press the button located between the LED.4. HSK-100Z removing the HSW-120Z
from a Z-wave network. (OK LED blinks once then turns off, LED B off)
Troubleshooting:
If the HSW-120Z was removed from the Z-Wave network, the LED will be blinking. If the HSW-120Z was not
successfully removed from the Z-Wave network, the LED will either be on or off (depending on if the switch is on or off).
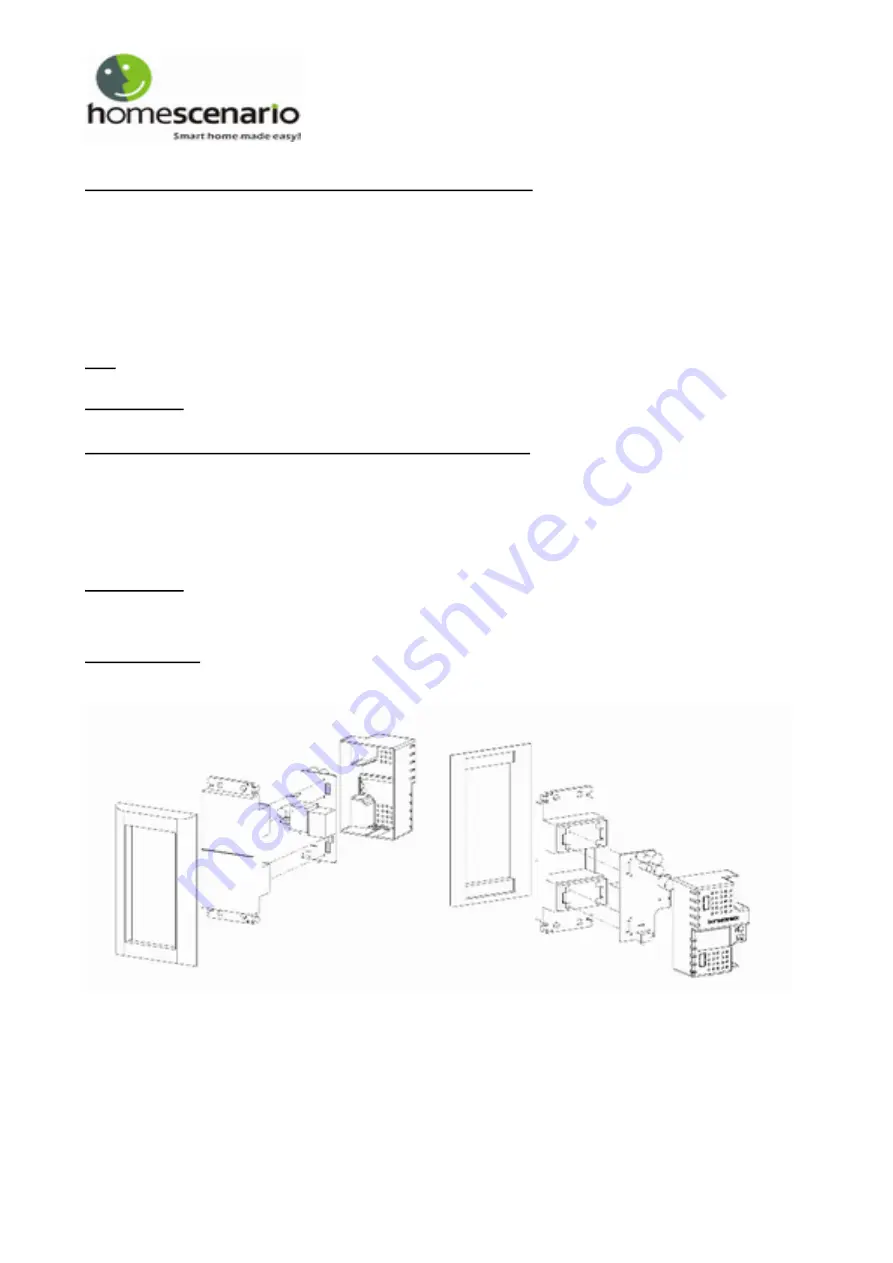
Assembly guide
The four connector in the HSW120 must be installed at the NC/NO side of the Panasonic switch module. The connectors for the light
must be outside the housing of the HSW120.
- 2 -


