background image

23

ASSEMBLING BAR AND CHAIN

See Figures 25, 26, 27, 28 and 29.

  WARNING:

The safety instructions in this section are to
protect the user from serious personal injury.

  CAUTION:

Remove the battery pack from the chain saw and
make sure the chain has stopped before you do
any work on the saw.

  CAUTION:

Always wear gloves when handling the bar and
chain; these components are sharp and may
contain burrs.

1. Remove the battery pack before you do any work

on the chain saw.

2. Remove the hex key from the storage area and use

it to remove the chain cover screw, washer and
chain cover from the chain saw.

3. Remove the bar and chain from the mounting

surface.

4. Remove the old chain from the bar.

5. Lay out the new saw chain in a loop and straighten

any kinks. The cutters should face in the direction
of chain rotation. If they face the opposite direction,
turn the loop over.

6. Place the chain drive links into the bar groove.

Position the chain so there is a loop at the back of
the bar. Hold the chain in position on the bar and
place the loop around the sprocket of the chain
saw. Fit the bar flush against the mounting surface
so that the bar stud is in the long slot of the bar.

NOTE:  When placing the bar on the bar stud,
assure that the adjusting pin is in the chain tension
pin hole.

Fig. 25

BAR

CHAIN

CHAIN

COVER

SCREW

WASHER

CHAIN

COVER

SPROCKET

ADJUSTING

PIN

CHAIN TENSION

PIN HOLE

BAR

GROOVE

CHAIN DRIVE

LINKS

Fig. 26

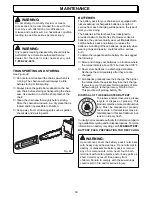
MAINTENANCE

  WARNING:

Never touch or adjust the chain while the motor
is running. The saw chain is very sharp, always
wear protective gloves when performing
maintenance to the chain.

Содержание UT34010

Страница 1: ...ve you years of rugged trouble free performance Pay close attention to the Rules for Safe Operation Warnings and Cautions If you use the chain saw properly and only for what it is intended you will enjoy years of safe reliable service Thank you for buying a Homelite chain saw WARNING To reduce the risk of injury the user must read and understand the operator s manual before using this product SAVE...

Страница 2: ...he charger and removable battery pack the chain saw can be charged and conveniently ready to use Safety performance and dependability have been given top priority in the design of this chain saw making it easy to maintain and operate This saw was designed for occasional light duty use and has some limitations as to what can be cut with it It was not designed for felling large trees or sawing of la...

Страница 3: ...hain should stop turning when the trigger is released If the chain turns after the trigger has been released have the unit serviced by your nearest Homelite service dealer Check for damaged parts Any part or guard that has been damaged should be carefully checked to determine that it will operate properly and perform its intended function Check for alignment of moving parts binding of moving parts...

Страница 4: ...cling the chain saw handles A firm grip together with a stiff left arm will help you maintain control of the saw if kickback occurs 2 Make sure that the area in which you are cutting is free from obstructions Do not let the nose of the guide bar contact a log branch fence or any other obstruction that could be hit while you are operating the saw 3 Always cut with the unit running at full speed Ful...

Страница 5: ...tions Do not use the chain saw near flammable liquids gases or in any type of explosive atmosphere Use extreme caution when cutting small size brush and saplings because slender material may catch the saw chain and be whipped toward you or pull you off balance When cutting a limb that is under tension be alert for spring back so that you will not be struck when the tension in the wood fibers is re...

Страница 6: ...k can propel debris and chemicals If exposed flush with water immediately Do not charge unit in a damp or wet location Following this rule will reduce the risk of electric shock For best results your battery unit should be charged in a location where the temperature is more than 50 F 10 C but less than 100 F 38 C Do not store outside or in vehicles Under extreme usage or temperature conditions bat...

Страница 7: ...ecycling and or disposal options When battery pack is not in use keep it away from other metal objects like paper clips coins keys nails screws or other small metal objects that can make a connection from one terminal to another Shorting the battery pack terminals together may cause sparks burns or a fire CHARGER SAFETY Save these instructions This manual contains important Rules for Safe Operatio...

Страница 8: ... Symbol Indicates danger warning or caution It means attention Your safety is involved Wet Conditions Alert Do not expose to rain or use in damp locations Read Your Operator s Manual Your manual contains special messages to bring attention to potential safety concerns machine damage as well as helpful operating and servicing information Please read all the information carefully to avoid injury and...

Страница 9: ...hen needed We recommend Wide Vision Safety Mask for use over eyeglasses or standard safety glasses with side shields Always wear eye protection which is marked to comply with ANSI Z87 1 The purpose of safety symbols is to attract your attention to possible dangers The safety symbols and the explanations with them deserve your careful attention and understanding The safety warnings do not by themse...

Страница 10: ...ng to use the chain saw familiarize yourself with all operating features and safety require ments WARNING Carefully read through this entire operator s manual before using your chain saw Pay close attention to the Important Safety Instructions Warnings and Cautions If you use your chain saw properly and only for what it is intended you will enjoy years of safe reliable service WARNING Do not allow...

Страница 11: ...11 Fig 5 CHAIN OIL TANK CAP REAR HANDLE FRONT HANDLE BAR CHAIN SAFE T TIP BATTERY PACK HEX KEY HEX KEY STORAGE AREA HAND GUARD TRIGGER LOCK BUTTON TRIGGER FEATURES SCABBARD ...

Страница 12: ...mplies with the kickback performance requirements of ANSI B175 1 1991 when tested on a representative sample of chain saws Normal Cutting Position Those positions assumed in performing the bucking and felling cuts Notching Undercut A notch cut in a tree that directs the tree s fall Felling The process of cutting down a tree Felling Back Cut The final cut in a tree felling operation made on the opp...

Страница 13: ...ery pack in charger If the yellow and green lights continue to remain on an addi tional 15 minutes the battery pack is damaged and will not accept charge When your battery pack becomes fully charged the red light will turn off and the green light will turn on After normal usage 1 hour of charge time is required to be fully charged A minimum charge time of 1 to 1 1 2 hours is required to recharge a...

Страница 14: ... starting the chain saw Failure to lubricate the chain will cause damage to the bar and chain CHAIN OIL SYSTEM See Figure 8 1 Use HOMELITE Bar and Chain Oil It is formulated to perform over a wide temperature range with no dilution required NOTE Do not use dirty used or otherwise con taminated oils Damage may occur to the bar or chain 2 Carefully pour the bar and chain oil into the tank 3 Check an...

Страница 15: ...k button will be automatically reset to the lock position STARTING AND STOPPING THE CHAIN SAW See Figure 9 Fig 10 This cordless chain saw is not designed for cutting trees larger than 5 in 127 mm in diameter This cordless chain saw is designed for limbing and pruning type cutting as well as cutting trees up to 5 in 127 mm in diameter only Do not attempt to make any cut that would require removal o...

Страница 16: ...s are on the same side of the handle is dangerous because a slight kick of the saw can cause loss of control WARNING Never use a left handed cross handed grip or any stance which would place your body or arm across the chain line WARNING Do not operate the throttle trigger with your left hand and hold the front handle with your right hand Never allow any part of your body to be in the chain line w...

Страница 17: ... s Manual or received adequate instruc tions for the safe and proper use of this chain saw When felling a tree keep everyone helpers bystanders children and animals a safe distance from the cutting area During felling operations the safe distance should be a least twice the height of the largest trees in the felling area During bucking operations keep a minimum distance of 15 feet 4 5 m between wo...

Страница 18: ... force and direction of the wind the lean and balance of the tree and the location of large limbs These things influence the direction in which the tree will fall Do not try to fell a tree along a line different from its natural line of fall The chain saw operator should keep on the uphill side of the terrain as the tree is likely to roll or slide downhill after it is felled Remove dirt stones loo...

Страница 19: ...rough the cut After the cut is complete the tip should be reinstalled immediately As tree starts to fall stop the chain saw and put it down immediately Retreat along the cleared path but watch the action in case something falls your way Be alert for overhead limbs or branches that may fall and watch your footing WARNING Never cut through to the notch when making a backcut The hinge controls the fa...

Страница 20: ...complete control of the chain saw release the cutting pressure near the end of the cut without relaxing your grip on the chain saw handles Do not let the chain contact the ground After completing the cut wait for the saw chain to stop before your move the chain saw Always stop the motor before moving from tree to tree See Figure 19 When bucking on a slope always stand on the uphill side of the log...

Страница 21: ... chain saw with a firm grip Always make sure your footing is secure and your weight is distributed evenly on both feet Leave the larger support limbs under the tree to keep the tree off the ground while cutting Limbs should be cut one at a time Remove the cut limbs from the work area often to help keep the work area clean and safe Branches under tension should be cut from the bottom up to avoid bi...

Страница 22: ... overbuck to drop the branch off 3 Now make your finishing cut smoothly and neatly against the main member so the bark will grow back to seal the wound FINISHING CUT WARNING If the limbs to be pruned are above chest height hire a professional to perform the pruning FIRST CUT 1 3 DIAMETER SECOND CUT LOAD Fig 23 SPRINGPOLES See Figure 24 A springpole is any log branch rooted stump or sapling which i...

Страница 23: ... new saw chain in a loop and straighten any kinks The cutters should face in the direction of chain rotation If they face the opposite direction turn the loop over 6 Place the chain drive links into the bar groove Position the chain so there is a loop at the back of the bar Hold the chain in position on the bar and place the loop around the sprocket of the chain saw Fit the bar flush against the m...

Страница 24: ...2 turn clockwise Repeat this process until sag does not exist 10 Hold the tip of the guide bar up and tighten the bar mounting screw securely 11 Chain is correctly tensioned when there is no sag on the underside of the guide bar the chain is snug but it can be turned by hand without binding NOTE If chain is too tight it will not rotate Loosen the chain cover screw slightly and turn tension adjuste...

Страница 25: ... the chain is snug but it can be turned by hand without binding 2 Chain must be re tensioned whenever the flats on the drive links hang out of the bar groove 3 During normal saw operation the temperature of the chain will increase The drive links of a correctly tensioned warm chain will hang approximately 050 in 1 25 mm out of the bar groove NOTE New chain tends to stretch check chain tension freq...

Страница 26: ...NOTE Inspect the drive sprocket for wear or damage when replacing the chain If signs of wear or damage are present in the areas indicated have the drive sprocket replaced by a Homelite Service dealer HOW TO SHARPEN THE CUTTERS See Figure 34 and 35 Be careful to file all cutters to the specified angles and to the same length as fast cutting can be obtained only when all cutters are uniform 1 Wear g...

Страница 27: ...ng a file with diameter too small or file held too low BACKWARD SLOPE Needs too much feed pressure causes excessive wear to bar and chain Results from using a file with diameter too large or file held too high DEPTH GAUGE CLEARANCE See Figure 38 1 The depth gauge should be maintained at a clear ance of 025 in 0 6 mm Use a depth gauge tool for checking the depth gauge clearances 2 Every time the ch...

Страница 28: ...faults should be re placed Wear inside the bar rails which permits the chain to lay over sideways Bent guide bar Cracked or broken rails Spread rails In addition guide bars with a sprocket at their tip must be lubricated weekly with a grease syringe to extend the guide bar life Using a grease syringe lubricate weekly in the lubricating hole See Figure x Turn the guide bar and check that the lubric...

Страница 29: ...SE GUARD See Figuress 42 and 43 1 Mount the SAFE T TIP on the bar nose NOTE The tab fits in the recessed hole in the bar 2 Tighten the screw with your finger 3 From the finger tight position tighten the screw an additional 3 4 of a turn using a wrench WARNING Although the guide bar comes with a SAFE T TIP anti kickback device already installed you need to check the tightness of the mounting screw ...

Страница 30: ...information regard ing available recycling and or disposal options For more information on battery recycling call 1 800 8BATTERY BATTERY PACK PREPARATION FOR RECYCLING WARNING Upon removal cover the battery pack s terminals with heavy duty adhesive tape Do not attempt to destroy or disassemble battery pack or remove any of its components Also never touch both terminals with metal objects and or bo...

Страница 31: ...running hot and smoking Motor runs but chain is not rotating 1 Check chain tension for over tight condition 2 Chain oil tank empty 1 Chain tension too tight 2 Check guide bar and chain assembly 3 Check guide bar and chain for damage 1 Tension chain Refer to Chain Tension earlier in this manual 2 Check oil tank 1 Retension chain Refer to Chain Tension earlier in this manual 2 Refer to Assembling th...

Страница 32: ...ult of improper maintenance or to any HOMELITE product that has been altered or modified so as to adversely affect the products operation performance or durability or that has been altered or modified so as to change its intended use The warranty does not extend to repairs made necessary by normal wear or by the use of parts or accessories which are either INCOMPATIBLE WITH THE HOMELITE product or...

Страница 33: ...33 NOTES ...

Страница 34: ...hen you call or visit Please call 1 800 chainsaw 1 800 242 4672 for your nearest Homelite Authorized Service dealer You can also check our web site at www homelite com for a complete list of Authorized Service dealers MODEL NO AND SERIAL NO The model and serial number of this unit will be found on a label attached to the motor housing Please record the serial number in the space provided below HOW...

Отзывы: