6
Instructions for Use
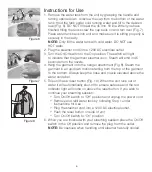
1. Remove the water tank from the unit by grasping the handle and
turning upside down. Unscrew the cap from the bottom of the water
tank. Hold the tank under cold running water and fill to the desired
level (Fig. 6). DO NOT fill past the 45 min. fill line. When you have
finished filling the tank screw the cap back on and turn over (Fig. 7).
Place water tank back into unit and make sure it is sitting properly &
securely in the cavity.
NOTE:
Only fill the water tank with cold water, DO NOT use
HOT water.
2. Plug the steamer cord into a 120V AC electrical outlet.
3. Turn the On/Off switch to the On position. The switch will light
to indicate that the garment steamer is on. Steam will emit in 45
seconds from the nozzle.
4. Hang the garment onto the hanger attachment (Fig 8). Steam the
garment in an up/down motion starting from the top of the garment
to the bottom. Always keep the hose and nozzle elevated above the
water container.
5. This unit has a reset button (Fig. 10). When the unit runs out of
water it will automatically shut-off to ensure safe use and the red
indicator light will come on above the reset button. If you wish to
continue your steaming session:
• Turn On/Off switch to “Off” position and unplug the power cord
• Remove and refill water tank by following Step 1 under
Instructions for Use
• Plug the steamer cord into a 120V AC electrical outlet.
• Push the reset button on side of unit
• Turn On/Off switch to “On” position
6. When you are finished with your steaming session place the On/Off
switch in the Off position and remove the plug from the outlet.
NOTE:
Be cautious when handling until steamer has fully cooled.
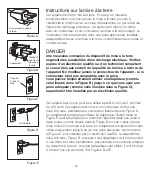
Figure 6
Figure 7
Figure 8


