background image

4

Pieza

Descripción

Cantidad

AA

Tornillo extra para soporte de aspas

BB

Conector plástico para cables

3

CC

Tapón plástico (para ventilador sin kit de luces)

Preinstalación (continuación)

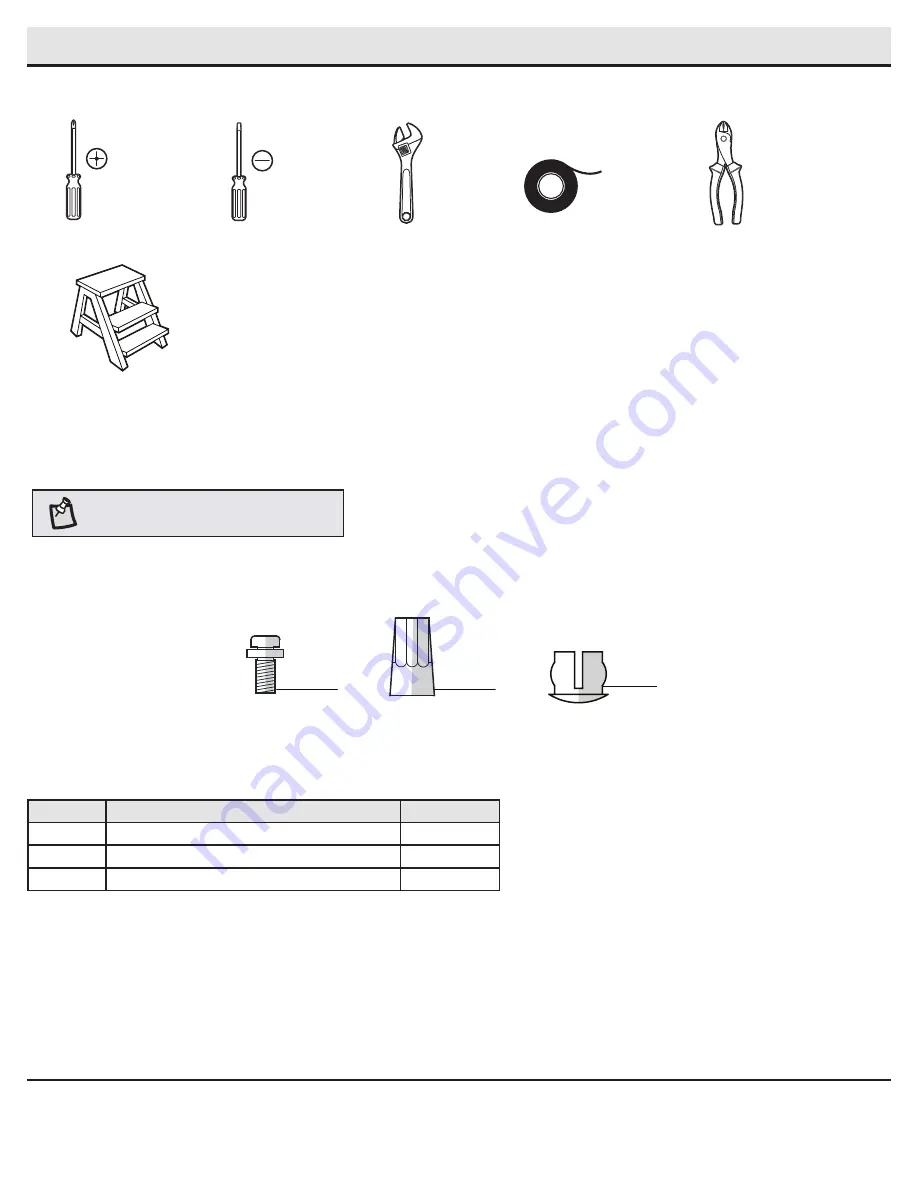
SE INCLUYEN HERRAJES

NOTA: 

Los herrajes no se muestran en tamaño real.

HERRAMIENTAS NECESARIAS

Destornillador 
Phillips

Destornillador 
plano

Llave 
ajustable

Cinta de 
electricista

Cortacables/ 
pelacables

Escalera de tijera

AA

BB

CC

Содержание 51560

Страница 1: ...igned to enhance your home Visit us online to see our full line of products available for your home improvement needs Thank you for choosing Home Decorators Collection Item 1001 636 889 Model 51560 ETL Model 60 BDT USE AND CARE GUIDE SHENANDOAH 60 INCH CEILING FAN To view an instructional video on how to install this product 1 Go to www homedepot com and enter either the Item or Model number found...

Страница 2: ...box before wiring If you feel you do not have enough electrical wiring knowledge or experience contact a licensed electrician WARNING Electrical diagrams are for reference only Optional use of any light kit shall be UL listed and marked suitable for use with this fan WARNING To reduce the risk of fire or electric shock this fan should only be used with fan speed control part no RH786NR manufacture...

Страница 3: ...nauthorized persons shall render the warranty invalid There is no other express warranty Hampton Bay hereby disclaims any and all warranties including but not limited to those of merchantability and fitness for a particular purpose to the extent permitted by law The duration of any implied warranty which cannot be disclaimed is limited to the time period as specified in the express warranty Some s...

Страница 4: ...connector 3 CC Plastic plug for light without light kit 1 Pre Installation continued HARDWARE INCLUDED NOTE Hardware not shown to actual size TOOLS REQUIRED Phillips screwdriver Flat blade screwdriver Adjustable wrench Electrical tape Wire cutter stripper Step ladder AA BB CC ...

Страница 5: ...er 1 E Fan motor assembly 1 Part Description Quantity F Blade bracket 5 G Blade 5 H Switch cup 1 I Light kit fitter assembly 1 J LED bulbs 9 5 Watt maximum 3 K Glass bowl 1 L Transmitter battery included 1 IMPORTANT This product and or components are governed by one or more of the following U S Patents 5 947 436 5 988 580 6 010 110 6 046 416 6 210 117 and other patents pending Pre Installation con...

Страница 6: ...ucture Use the appropriate fasteners and materials The outlet box and its bracing must be able to fully support the weight of the moving fan at least 35 lbs Do not use a plastic outlet box The illustrations below show three different ways to mount the outlet box If the canopy touches the downrod then remove the decorative canopy bottom cover and turn the canopy 180 before attaching the canopy to t...

Страница 7: ...e the decorative motor collar cover D onto the end of the ball downrod B Make sure the slots on the canopy C are on top Route the wires exiting the top of the fan motor assembly E through the downrod B as shown 2 3 1 C A GG FF EE C D E GG B Loosen but do not remove the setscrew HH on the motor collar II on top of the fan motor assembly E by turning it counterclockwise Install the downrod B by inse...

Страница 8: ...he outlet box as shown Securely tighten the two mounting screws 1 Carefully lift the fan motor assembly E up to the slide on mounting bracket A Insert the ball portion of the ball downrod assembly into the socket of the slide on mounting bracket Turn the ball downrod assembly clockwise until it is seated with the tab of the slide on mounting bracket aligned with the slot in the ball 1 2 WARNING To...

Страница 9: ...re connecting nut BB Secure each wire connecting nut using electrical tape Turn the wire connecting nut BB upward and push the wiring into the outlet box LL 3 IMPORTANT Use the wire connecting nuts BB supplied with your fan Secure the connectors with electrical tape and ensure there are no loose strands or connections NOTE The fan comes with 78 in lead wires for use with an extended ball downrod a...

Страница 10: ...ce 5 WARNING When using the standard ball downrod mounting the tab in the ring at the bottom of the mounting bracket must rest in the groove of the hanger ball Failure to properly seat the tab in the groove could cause damage to the wiring Assembly Hanging the Fan continued Wrapping the extra wire Gently wrap the excess wire around the mounting bracket A Secure the wire with electrical tape 4 NOTE...

Страница 11: ...cket F by aligning the three key slot holes in the blade G with the three posts on the top of the blade brackets F Hold the blade G with both hands close to the blade bracket F and press the blade G down firmly Ensure the key slot holes are properly seated on the blade arm posts While still holding the blade G down with both hands firmly slide the blade G away from the fan motor assembly E until t...

Страница 12: ...tric shock disconnect the electrical supply circuit to the fan before installing the light fixture NOTE This light kit cannot be transferred to another fan Assembly Attaching the Lights Remove the three screws OO on the switch cup cover of the light kit fitter assembly I Connect the wires from the light kit fitter assembly I to the wires from the switch cup by connecting the molded adaptor plugs t...

Страница 13: ...he hex nut overtightening the hex nut may cause the glass to break Assembly Attaching the Lights continued Assembling the fan without the light kit 1 Remove the three light kit mounting screws PP on the side of the light kit fitter assembly I In order to use the fan without the light kit remove the switch cup cover R from the light kit fitter assembly I by removing the center hex nut inside the sw...

Страница 14: ...he lights If using non dimmable bulbs use a ballpoint pen or small screwdriver to set the switch to ON to disable the dimming function If using dimmable bulbs set the switch to DIM to enable the dimming function 0 1 LEARN Slide the dip switch in the battery compartment to the 1 setting Confirm that the power to the fan is off at either the wall switch or breaker box Return power to the fan at the ...

Страница 15: ... setting Pressing the button while in Comfort BreezeTM mode will automatically cancel the Comfort BreezeTM mode and resume normal fan operation button decreases fan speed Pressing and releasing the button one time will decrease the speed of the fan Each setting decrease will cause the LED bar to dim slightly more until the fan has reached the minimum speed setting At that time the LED bar will be ...

Страница 16: ...verse direction if the fan is not moving A Warm weather B Cool weather 5 Fan reverse button Must be pushed when the fan is in operation Warm weather LED bar will illuminate and the lights will flow from high to low Cool weather LED bar will illuminate and the lights will flow from low to high 6 Light If your fan is equipped with a light kit Press and release the light button to turn the light on o...

Страница 17: ...the blades Measure from a point on the center of each blade to the point on the ceiling Measure this distance Rotate the fan until the next blade is positioned for measurement Repeat for each blade Any measurement deviation should be within 1 8 in Run the fan for ten minutes If the fan continues to wobble please contact Customer Service and a balancing kit will be sent to you at no charge The fan ...

Страница 18: ...ssing parts Before returning to the store call Home Decorators Collection Customer Service 8 a m 7 p m EST Monday Friday 9 a m 6 p m EST Saturday 1 800 986 3460 HOMEDEPOT COM HOMEDECORATORS Retain this manual for future use ...

Страница 19: ...hogar Visítanos por Internet para ver nuestra línea completa de productos disponibles con vistas a las necesidades de mejoras de tu hogar Gracias por elegir Home Decorators Collection Artículo núm 1001 636 889 Modelo núm 51560 Modelo ETL núm 60 BDT GUÍA DE USO Y MANTENIMIENTO VENTILADOR DE TECHO SHENANDOAH DE 1 5 M Para ver un video instructivo sobre cómo instalar este producto 1 Ir a www homedepo...

Страница 20: ...una posible descarga eléctrica corta la electricidad en la caja principal de fusibles antes del cableado Si crees que no tienes suficiente conocimiento o experiencia sobre cableado eléctrico contacta a un electricista certificado ADVERTENCIA Los diagramas eléctricos son sólo para referencia Cualquier juego de luces opcional deberá estar aprobado por UL y marcado como adecuado para usar con este ve...

Страница 21: ...al no autorizado invalidará la garantía No hay ninguna otra garantía expresa Por este medio Hampton Bay queda exonerado de todas y cada una de las garantías incluyendo pero sin limitarse a aquellas de comercialización e idoneidad para un fin particular en al alcance fijado por la ley La duración de cualquier garantía implícita sin posibilidad de exención está limitada al plazo especificado en la g...

Страница 22: ...CC Tapón plástico para ventilador sin kit de luces 1 Preinstalación continuación SE INCLUYEN HERRAJES NOTA Los herrajes no se muestran en tamaño real HERRAMIENTAS NECESARIAS Destornillador Phillips Destornillador plano Llave ajustable Cinta de electricista Cortacables pelacables Escalera de tijera AA BB CC ...

Страница 23: ...or del ventilador 1 Pieza Descripción Cantidad F Soporte de aspa 5 G Aspa 5 H Caja del interruptor 1 I Conjunto del soporte del kit de luces 1 J Bombillas LED de 9 5 W como máximo 3 K Tazón de vidrio 1 L Transmisor incluye batería 1 IMPORTANTE Este producto y o sus componentes están protegidos por una o más de las siguientes patentes de los EE UU 5 947 436 5 988 580 6 010 110 6 046 416 6 210 117 a...

Страница 24: ...riales apropiados La caja eléctrica y su soporte tienen que ser aptos para sostener el peso completo del ventilador en movimiento al menos 15 9 kg No uses una caja eléctrica de plástico Las ilustraciones a continuación muestran tres formas distintas de montar la caja eléctrica Si la cubierta toca el tubo bajante retira la cubierta inferior de la tapa decorativa y gira la cubierta 180º antes de fij...

Страница 25: ...o del tubo bajante bola B Asegúrate de que las ranuras de la cubierta C estén en la parte superior Inserta los cables que salen por la parte superior del ensamblaje del motor del ventilador E a través del tubo bajante B como se muestra 2 3 1 C A GG FF EE C D E GG B Afloja sin quitar el tornillo de fijación HH del collarín II en la parte superior del ensamblaje del motor E girando hacia la izquierd...

Страница 26: ... Aprieta bien los dos tornillos de montaje 1 Con cuidado levanta el ensamblaje del motor del ventilador E hasta el soporte de montaje deslizante A Inserta la bola de soporte del ensamblaje del tubo bajante bola en el casquillo del soporte de montaje deslizante A Gira el ensamblaje del tubo bajante bola de izquierda a derecha hasta que quede encajado con la pestaña del soporte de montaje deslizante...

Страница 27: ...BB Asegura cada tuerca de conexión de cables con cinta de electricista Gira la tuerca de conexión de cables BB hacia arriba y coloca el cableado dentro de la caja eléctrica LL 3 IMPORTANTE Usa las tuercas de conexión de cables BB incluidas con tu ventilador Sujeta los conectores con cinta de electricista y asegura que no haya conexiones ni cables sueltos NOTA El ventilador viene con cables termina...

Страница 28: ... su lugar 5 ADVERTENCIA Cuando uses el montaje estándar del tubo bajante bola la pestaña en el aro en la parte inferior del soporte de montaje tiene que encajar en la ranura de la bola de soporte Si la pestaña no se asienta correctamente en la ranura se puede dañar el cableado Ensamblaje Cómo colgar el ventilador continuación Cómo enroscar el cable sobrante Con cuidado enrolla el exceso de cable a...

Страница 29: ... los tres orificios tipo ojo de cerradura en el aspa G con los tres postes de la parte superior de los soportes de las aspas F Sostén el aspa G con ambas manos cerca del soporte del aspa F y presiónala G hacia abajo con firmeza Asegúrate de que los orificios tipo ojo de cerradura estén correctamente apoyados sobre los postes del brazo del aspa Mientras sujetas el aspa G con ambas manos desliza el ...

Страница 30: ...arga eléctrica desconecta el circuito eléctrico del ventilador antes de instalar la lámpara NOTA Este kit de luces no puede transferirse a otro ventilador Ensamblaje Cómo instalar las lámparas Quita los tres tornillos OO en la cubierta de la caja del interruptor del ensamblaje del soporte del kit de luces I Conecta los cables del ensamblaje del soporte del kit de luces I a los cables de la caja de...

Страница 31: ... Ensamblaje Cómo instalar las lámparas continuación Cómo ensamblar el ventilador sin el kit de luces 1 Quita los tres tornillos de montaje del kit de luces PP ubicados en el lado del ensamblaje del soporte del kit de luces I Con el fin de utilizar el ventilador sin el kit de luces retira la cubierta de la caja del interruptor R del ensamblaje del soporte del kit de luces I retirando la tuerca hexa...

Страница 32: ...onda o un destornillador pequeño para configurar el interruptor a la posición ON Encendido a fin de desactivar la función de regulación de intensidad Si usas bombillas regulables configura el interruptor en la posición DIM para activar la función de regulación de intensidad 0 1 LEARN Desliza el interruptor en el compartimiento de la batería a la configuración 1 Verifica que el suministro de electr...

Страница 33: ...da el ventilador ha alcanzado la configuración de máxima velocidad Si presionas el botón en el modo Comfort BreezeTM este se cancelará automáticamente y se reiniciará el funcionamiento normal del ventilador El botón reduce la velocidad del ventilador Al presionar y soltar el botón una vez la velocidad del ventilador disminuirá Cada descenso en la configuración hará que la barra de luz LED disminuy...

Страница 34: ...ontrola la velocidad y las luces Las configuraciones de velocidad para clima cálido o frío dependen del tamaño de la habitación la altura del techo la cantidad de ventiladores y otros factores A Clima cálido Hacia adelante Un flujo de aire descendente surte un efecto refrescante Esto te permite fijar el aire acondicionado en una configuración más alta sin afectar tu comodidad B Clima frío Reversa ...

Страница 35: ...unto en el techo sobre la punta de una de las aspas Mide desde un punto en el centro de cada aspa al punto en el cielo raso Mide esta distancia Gira el ventilador hasta que la siguiente aspa quede bien colocada para medir Repite para cada aspa Las desviaciones de medición no deben pasar de 0 3 cm 1 8 de plg Enciende el ventilador durante diez minutos Si el ventilador continúa oscilando comunícate ...

Страница 36: ...a llama al Servicio al Cliente de Home Decorators Collection de lunes a viernes entre 8 00 a m y 7 00 p m Hora Estándar del Este y los sábados de 9 00 a m a 6 00 p m Hora Estándar del Este 1 800 986 3460 HOMEDEPOT COM HOMEDECORATORS Conserva este manual para uso futuro ...

Отзывы: