background image


13 

HOMEDEPOT.COM/HOMEDECORATORS 


Please contact 1-800-986-3460 for further assistance. 

Assembly (continued) 

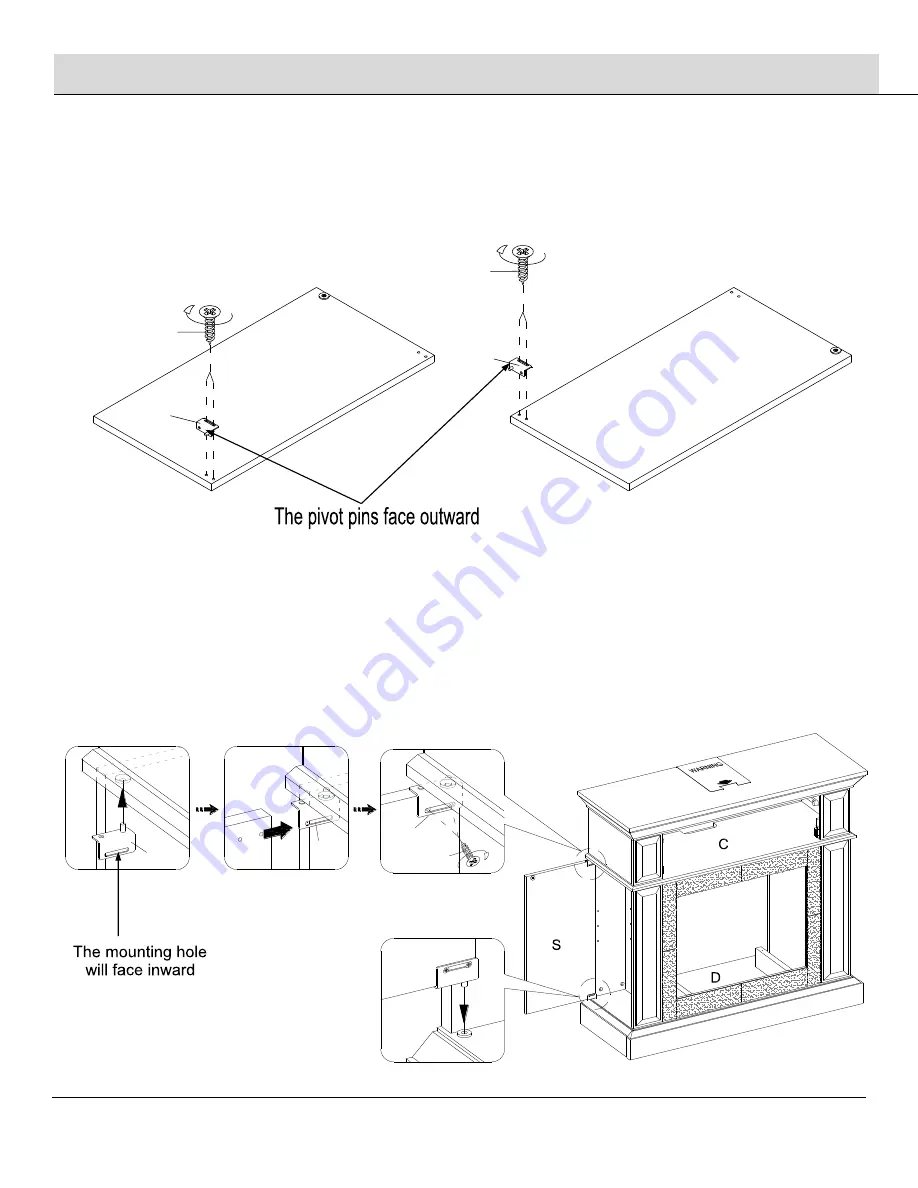
17   

Attaching the bottom pivot hinges 


□  Using the pilot holes as a guide, attach the left bottom pivot hinge (PP) to the left door (S) with two short wood 

screws (EE) as shown. Make sure that the pivot pin runs against the edge.  

□  Repeat the same procedure to attach the right bottom pivot hinge (QQ) to the right door (T). 


18   

Installing the left door 


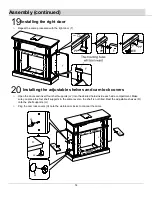
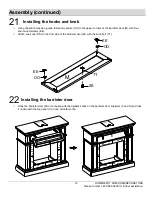
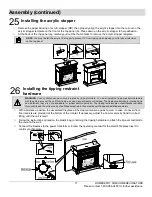
□  Stand the assembled unit upright.  
□  Tilt and insert the pivot pin under the left door (S) into the plastic bushing pre-attached on the base (D).   
□  Attach the left upper pivot hinge (QQ) to the plastic bushing pre-attached on the center shelf (C) as shown. Make 

sure that the pivot hinge mounting plate will face inward. 

□  Fit the left door (S) to the inserted pivot hinge (QQ) making sure the mounting holes overlap the pilot holes on the 

door panel. Secure the left upper pivot hinge (QQ) to the left door (S) with two short wood screws (EE). Open and 
close the door to make sure it is aligned and shut correctly. If necessary, adjust the screws for a good fit. 


S

PP

EE

QQ

EE

T

QQ

QQ

S

QQ

EE

S

Содержание 301353160

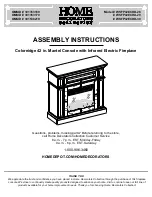
Страница 1: ...le for your home improvement needs Thank you for choosing Home Decorators Collection Model WSFP42ECHD 28 WSFP42ECHD 29 WSFP42ECHD 30 OMSID 301353160 OMSID 301353179 OMSID 301538219 ASSEMBLY INSTRUCTIONS Coloreidge 42 in Mantel Console with Infrared Electric Fireplace Questions problems missing parts Before returning to the store call Home Decorators Collection Customer Service 8 a m 7 p m EST Mond...

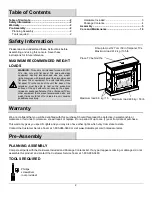
Страница 2: ...el TVs or flat panel TVs or other equipment that exceed recommended size and weight limits could fall off or break the unit causing possible serious injury Warranty We are confident that you will be delighted with this purchase Should this product be defective in workmanship or materials or fail under normal use we will repair or replace it for a period of up to one 1 year from date of purchase Th...

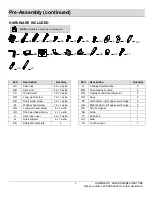
Страница 3: ...tra PP Left bottom right upper pivot hinge 2 FF Washer head screw 16 1 extra QQ Right bottom left upper pivot hinge 2 GG Long pan head screw 8 1 extra RR Acrylic stopper 1 HH Short pan head screw 2 1 extra SS Knob 1 II Cam lock cover 20 1 extra TT Knob bolt 1 JJ Shelf support 8 1 extra UU Glue 1 KK Straight metal plate 4 VV Touch up pen 1 MM MAXIMUM LOAD 50 LB 22 7 kg LL MAXIMUM LOAD 50 LB 22 7 kg...

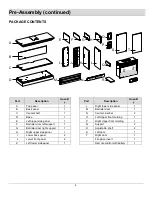
Страница 4: ...2 D Base 1 O Left Upper front molding 1 E Left upper side panel 1 P Right Upper front molding 1 F Barrister door left support 1 Q Support 2 G Barrister door right support 1 R Adjustable shelf 2 H Right upper side panel 1 S Left door 1 I Lower back panel 2 T Right door 1 J Lower front panel 2 Fireplace insert 1 K Left lower side panel 1 Remote control with battery 1 A B C D E F G H I J K L M N R O ...

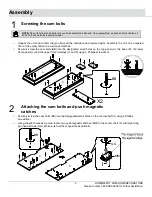
Страница 5: ...or or the empty carton to avoid any scratches Securely screw the cam bolts BB into the designated small holes on the top panel A the base D the lower front panels J and the upper front moldings O and P using a Phillips screwdriver 2 Attaching the cam bolts and push magnetic catches Securely screw the cam bolts BB into the designated small holes on the center shelf C using a Phillips screwdriver Us...

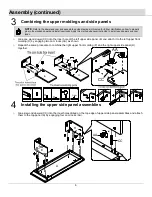
Страница 6: ... wood dowel CC into the inner hole of the left upper side panel E and attach it to the left upper front molding O by engaging two cam locks AA as shown Repeat the same procedure to combine the right upper front molding P and the right upper side panel H together 4 Installing the upper side panel assemblies Glue six wood dowels CC into the inner holes drilled on the top edge of upper side panel ass...

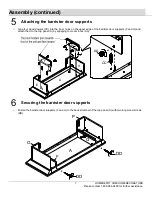
Страница 7: ...e four wood dowels CC into the inner holes on the upper edge of the barrister door supports F and G and attach them to the top panel A by engaging four cam locks AA 6 Securing the barrister door supports Fasten the barrister door supports F and G to the back stretcher of the top panel A with two long wood screws DD DD DD O P F G A F G A E H CC AA ...

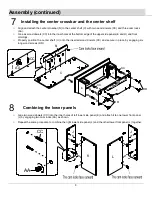
Страница 8: ... H and front moldings Properly position the center shelf C onto the inserted wood dowels CC and secure in place by engaging six long wood screws DD 8 Combining the lower panels Glue two wood dowels CC into the inner holes of left lower side panel K and attach it to one lower front panel J by engaging two cam locks AA as shown Repeat the same procedure to combine the right lower side panel L and th...

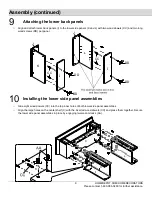
Страница 9: ...two wood dowels CC and two long wood screws DD per panel 10 Installing the lower side panel assemblies Glue eight wood dowels CC into the top inner holes of both lower side panel assemblies Align the large holes on the center shelf C with the inserted wood dowels CC and press them together Secure the lower side panel assemblies in place by engaging twelve cam locks AA CC CC J J K L I I DD DD DD DD...

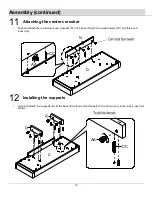
Страница 10: ... and attach the remaining center crossbar N to the base D with two wood dowels CC and three cam locks AA 12 Installing the supports Align and attach the supports Q to the base D with two wood dowels CC and two cam locks AA in each as shown Q AA CC D Q N AA CC D ...

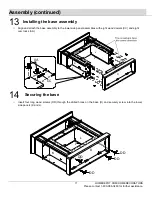
Страница 11: ... base assembly Align and attach the base assembly to the lower side panel assemblies with eight wood dowels CC and eight cam locks AA 14 Securing the base Insert four long wood screws DD through the drilled holes on the base D and securely screw into the lower side panels K and L CC I K J J L I D I K J J L I DD DD DD DD D ...

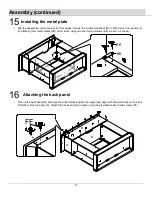
Страница 12: ...y attaching four metal plates KK at the joints using two short wood screws EE in each as shown 16 Attaching the back panel Pick up the back panel B and align the drilled holes against the upper long edge with the pilot holes on the back stretcher of the top panel A Attach the back panel B in place using the provided washer head screws FF KK EE J J N N FF A H B D ...

Страница 13: ...ssembled unit upright Tilt and insert the pivot pin under the left door S into the plastic bushing pre attached on the base D Attach the left upper pivot hinge QQ to the plastic bushing pre attached on the center shelf C as shown Make sure that the pivot hinge mounting plate will face inward Fit the left door S to the inserted pivot hinge QQ making sure the mounting holes overlap the pilot holes o...

Страница 14: ...en the doors and insert four shelf supports JJ into the desired holes inside each side compartment Make sure you place the four shelf supports in the same level so the shelf is not tilted Rest the adjustable shelves R onto the shelf supports JJ Plug the cam lock covers II onto the visible cam locks to conceal the cams R R N J J L JJ R JJ II PP PP T PP EE T ...

Страница 15: ...oks OO to the upper corners of the barrister door M with four short wood screws EE Attach one knob SS to the front side of the barrister door M with the knob bolt TT 22 Installing the barrister door Hook the barrister door M onto the pre attached plastic slides on the barrister door supports F and G and tuck it underneath the top panel A in one smooth motion M TT SS OO EE OO EE M M ...

Страница 16: ...d mantel and center it in the opening DO NOT drag the insert across the bottom panel D as it may scratch the unit 24 Attaching the L shaped metal braces Using the pilot holes as a guide align and attach two L shaped metal braces LL to the supports Q by screwing two short pan head screws HH Q Q Electric Firebox HH LL Q Q Q ...

Страница 17: ...pping restraint hardware with the unit to prevent the unit from tipping causing any accidents or damage The tipping restraints are intended only as a deterrent they are not a substitute for proper adult supervision The tipping restraints are not earthquake restraints If you wish to add the extra security of earthquake restraints they must be purchased and installed separately With assistance posit...

Страница 18: ...marks from crayons or ink markers will be difficult to remove In the event that your furniture is stained or otherwise damaged during use we recommend that you call a professional to repair your furniture Check bolts screws periodically and tighten them if necessary CARING FOR WOOD FURNITURE It is best to keep your furniture in a climate controlled environment Extreme temperature and humidity chan...

Страница 19: ...ssing parts Before returning to the store call Home Decorators Collection Customer Service 8 a m 7 p m EST Monday Friday 9 a m 6 p m EST Saturday 1 800 986 3460 HOMEDEPOT COM HOMEDECORATORS Retain this manual for future use ...

Отзывы: