background image


To hang your fan where there is an existing fixture but no ceiling 
joist, you may need an installation hanger bar (not included) as 
shown above.

If your ceiling fan does not have an existing UL-listed mounting 
box, then install one using the following instructions:


Disconnect the power by removing the fuses or turning off 
the circuit breakers.


Secure the outlet box (not included) directly to the 
building structure. Use appropriate fasteners and materials 
(not included). The outlet box and its bracing must be able 
to fully support the weight of the moving fan (at least 35 
lbs.). Do not use a plastic outlet box.

The illustrations below show three different ways to mount the 
outlet box (not included).

Outlet Box

Outlet Box

Hanger Bar

Outlet Box

Recessed
Outlet
Box

A

Installation 

MOUNTING OPTIONS

MOUNTING OPTIONS


WARNING:


To reduce the risk of fire, electric shock, or 

personal injury, mount the fan to an outlet box marked 
acceptable for fan support using the screws provided with the 
outlet box. An outlet box commonly used for the support of 
lighting fixtures may not be acceptable for fan support and 
may need to be replaced. If in doubt, consult a qualified 
electrician.

NOTE:


You may need a longer downrod to maintain proper 

blade clearance when installing on a steep, sloped ceiling. 
The maximum angle allowable is 18° away from horizontal. If 
the canopy (C) touches the hanger ball/downrod assembly 
(D), turn the canopy (C) 180° before attaching the canopy (C) 
to the mounting bracket (A).

7

HOMEDEPOT.COM/HOMEDECORATORS

Please contact 1-800-986-3460 for further assistance.

Содержание 1005 711 231

Страница 1: ...nce you have placed in Home Decorators Collection through the purchase of this ceiling fan We strive to continually create quality products designed to enhance your home Visit us online to see our full line of products available for your home improvement needs Thank you for choosing Home Decorators Collection THANK YOU Questions problems missing parts Before returning to the store call Home Decora...

Страница 2: ... Included Package Contents Installation Assembly Hanging the Fan Attaching the Fan Blades Installing the Light Kit 2 3 4 4 4 4 5 6 7 8 9 13 15 READ AND SAVE THESE INSTRUCTIONS Operation Pull Chain Operating Instructions Reverse Switch Operating Instructions Care and Cleaning Troubleshooting Service Parts 17 17 17 18 18 20 ...

Страница 3: ...only UL listed outlet boxes marked FOR FAN SUPPORT 4 The fan must be mounted with a minimum of 7 ft 2 1m clearance from the trailing edge of the blades to the floor 5 Avoid placing objects in the path of the blades 6 To avoid personal injury or damage to the fan and other items be cautious when working around or cleaning the fan 7 Do not use water or detergents when cleaning the fan or fan blades ...

Страница 4: ...allation or by affixing any accessories is not covered by this warranty Because of varying climatic conditions this warranty does not cover any changes in brass finish including rusting pitting corroding tarnishing or peeling Brass finishes of this type give the longest useful life when protected from varying weather conditions A certain amount of wobble is normal and should not be considered a de...

Страница 5: ... AA BB CC DD Plastic wire nut Pull chain and fob Hex wrench Hex screw Part Part Description Description 3 2 1 5 Quantity Quantity 5 HOMEDEPOT COM HOMEDECORATORS Please contact 1 800 986 3460 for further assistance AA BB CC NOTE Hardware not shown to actual size DD ...

Страница 6: ...lade arm Switch housing 20W LED Light kit Plastic shade assembly Quantity Quantity 5 5 1 1 1 Part Part A B C D E F Quantity Quantity 1 1 1 1 1 1 Description Description Mounting bracket preassembled Canopy ring preassembled Canopy Hanger ball downrod assembly Coupling cover Fan motor assembly G A B C D E F I H J K ...

Страница 7: ...box not included Outlet Box Outlet Box Hanger Bar Outlet Box Recessed Outlet Box A Installation MOUNTING OPTIONS MOUNTING OPTIONS WARNING To reduce the risk of fire electric shock or personal injury mount the fan to an outlet box marked acceptable for fan support using the screws provided with the outlet box An outlet box commonly used for the support of lighting fixtures may not be acceptable for...

Страница 8: ...wnrod assembly D Carefully feed the motor wires up through the downrod MM Thread the downrod MM into the collar Align the holes and replace the clevis pin GG and cotter pin FF Tighten the two collar setscrews HH Slip coupling cover E canopy ring B and canopy C onto the downrod MM Carefully reinstall the hanger ball JJ onto the downrod MM and reinstall the ground lead LL onto the downrod MM being s...

Страница 9: ...y to an outlet box or supporting system marked acceptable for fan support and use the mounting screws provided with the outlet box WARNING The tab in the ring must rest in the groove of the hanger ball downrod assembly D Failure to properly seat the tab in the groove could cause damage to the wiring D F Pass the 120 volt supply wires through the center hole in the mounting bracket A Attach the mou...

Страница 10: ...rience have your fan installed by a licensed electrician Follow the steps below to connect the fan to your household wiring Use the plastic wire nuts AA with your fan Secure the plastic wire nuts AA with electrical tape Make sure there are no loose strands or connections Make wire connections as follows using the wire nuts AA From Fan To Outlet Box Black Blue Wires Black Wire Hot White Wire White ...

Страница 11: ...fan and light can be turned on or off separately Make wire connections as follows using the wire nuts AA Wall switch not included From Fan To Outlet Box Black Wire for Fan Black Wire Hot 1 Blue Wire for Light Red Wire Hot 2 White Wire White Wire Neutral Green Wires Green or Bare Wire Ground AA SINGLE SWITCH Neutral AC IN Black Ground conductor White Blue Black Green White Green Outlet Box AA Neutr...

Страница 12: ...ing bracket A properly sits in the groove in the hanger ball downrod assembly D before attaching the canopy C to the mounting bracket A by turning the canopy C until it drops into place Slide the canopy C up to the ceiling Make sure you have placed the wires safely into the outlet box Secure the canopy C to the mounting bracket A with the four canopy mounting screws with lock washers EE included w...

Страница 13: ...ocking mechanism OO is upward and the butt of the spring locking mechanism OO is against the edge of the blade To install the blade to the blade arm Press down the spring locking mechanism OO to release the blade G from the blade arm H Slide the blade G toward the blade arm H until the blade G disengages from the spring locking mechanism OO carefully push the blade G up to detach from the blade ar...

Страница 14: ...ing the blades G or cleaning the fan Do no insert foreign objects between rotating fan blades G Fasten the blade assemblies to the fan motor assembly F by lining up the slots of the motor RR with the tabs SS on the blade arms H Tighten the two blade arm screws with lock washers TT already installed in the blade arms H Repeat this procedure for the remaining blade arms H TT SS RR F H G 14 ...

Страница 15: ...wer off using the fan switch is not sufficient to prevent electric shock Attaching the light kit to the switch housing Remove one of the three light kit mounting screws XX from the switch housing I and loosen the other two screws XX Do not remove While holding the 20W LED light kit J under your fan motor assembly F make the polarized plug connections YY White to white Black to blue Carefully push ...

Страница 16: ... disconnect the power by turning off the circuit breaker or removing the fuse at the fuse box Turning power off using the fan switch is not sufficient to prevent electric shock Raise the plastic shade assembly K up against the switch housing I and use the four hex screws DD to tighten it firmly with a hex wrench CC CC DD I K 16 ...

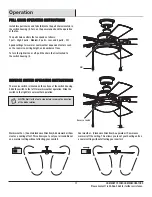
Страница 17: ...op before reversing the direction of the blade rotation REVERSE SWITCH OPERATING INSTRUCTIONS REVERSE SWITCH OPERATING INSTRUCTIONS The reverse switch is located on the surface of the switch housing Slide the switch to the left for warm weather operation Slide the switch to the right for cool weather operation Warm weather Counterclockwise Direction A downward air flow creates a cooling effect Thi...

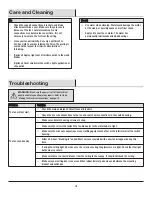
Страница 18: ...h WARNING Make sure the power is off at the electrical panel box before you attempt any repairs Refer to step 6 Making the electrical connections on page 10 Check the main and branch circuit fuses or breakers Check the line wire connections to the fan and switch wire connections in the switch housing Make sure all motor housing screws are snug Make sure the screws that attach the fan blade arm to ...

Страница 19: ...hen select any fan blade and measure from the center of the selected blade to the point on the ceiling Rotate the fan until the next blade is positioned and repeat the measurement using the same point from the ceiling for every blade Measurement deviations should be within 1 8 in If all deviations are less than 1 8 in and the fan continues to wobble please call Customer Service 1 800 986 3460 to o...

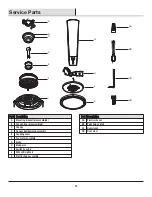
Страница 20: ...ssembled Canopy Hanger ball downrod assembly Coupling cover Fan motor assembly Blade Blade arm Switch housing 20W LED Light kit Plastic shade assembly Part Part AA BB CC DD Description Description Plastic wire nut Pull chain and fob Hex wrench Hex screw Service Parts AA BB CC DD A D G H J K E F I B C 20 ...

Страница 21: ...ssing parts Before returning to the store call Home Decorators Collection Customer Service 8 a m 7 p m EST Monday Friday 9 a m 6 p m EST Saturday 1 800 986 3460 HOMEDEPOT COM HOMEDECORATORS Retain this manual for future use ...

Отзывы: