background image

Scooter assembly

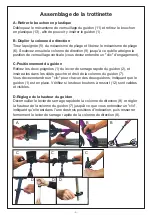
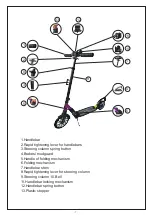
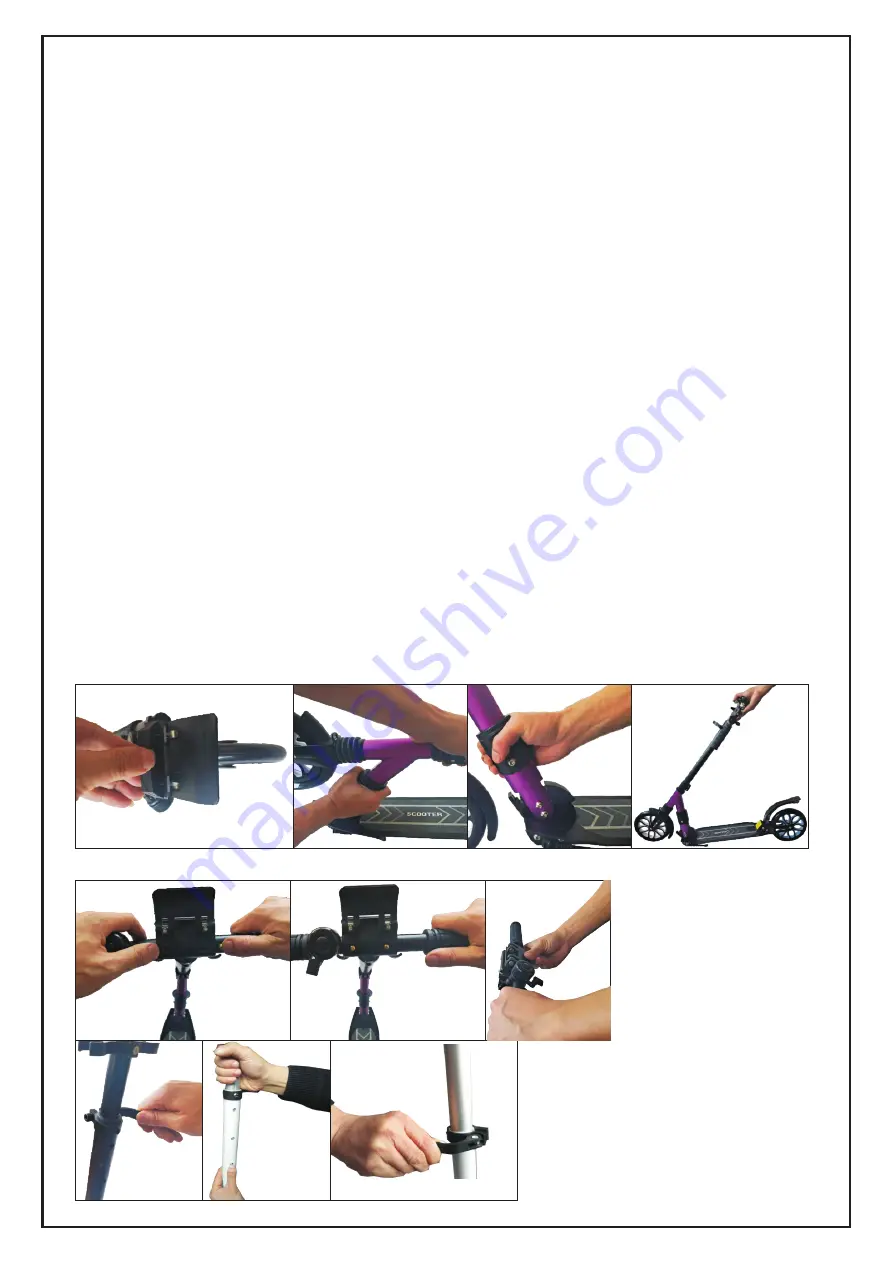
A- Take out the plastic stopper 

Open the handlebar locking mechanism (11) and remove the plastic plug (13), 

So that the handlebar (1) can be inserted therein. 

B- Unfold the steering column 

Pull the handle (5) of the folding mechanism and open the folding mechanism 

(6). Then lift the steering column (9) until it reaches the vertical locking position 

(you should hear a "clicking" engagement sound). 

C-Positioning handlebars 

Take the two handles (1) out of the rapid tightening lever for handlebars(2), and 

Insert them into the left and right sides of the handlebar stem (7). For both han-

dlebars, you should hear "click" sound, indicating that the handlebar (1) Is in 

place. Check whether the two spring buttons (12) are valid and visible. 

D-Adjusting the handlebar height 

Open the rapid tightening lever for the steering column (8) and adjust the height 

of The handlebar stem (7) until you hear "click," indicating that it is in one of the 

three Index positions, and then firmly fasten the rapid tightening lever for the 

steering Column (8)

A

B

B

B

C

C

D

D

D

C

D

-8-

Содержание AA1-097

Страница 1: ...USING INSTRUCTION IMPORTANT RETAIN FOR FUTURE REFERENCE READ CAREFULLY Nabb021_FR_EN AA1 097 ...

Страница 2: ... 2 ...

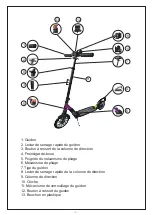
Страница 3: ...ins garde boue 5 Poignée du mécanisme de pliage 6 Mécanisme de pliage 7 Tige du guidon 8 Levier de serrage rapide de la colonne de direction 9 Colonne de direction 10 Cloche 11 Mécanisme de verrouillage du guidon 12 Bouton à ressort du guidon 13 Bouchon en plastique 1 2 8 3 5 6 4 9 11 10 7 12 13 3 ...

Страница 4: ...u guidon Retirez les deux poignées 1 du levier de serrage rapide du guidon 2 et insérez les dans les côtés gauche et droit de la colonne du guidon 7 Vous devez entendre un clic pour chacun des deux guidons indiquant que le guidon 1 est en place Vérifiez si les deux boutons à ressort 12 sont valides et visibles D Réglage de la hauteur du guidon Déverrouiller le levier de serrage rapide de la colonn...

Страница 5: ...uillage du guidon 11 appuyer sur le bouton à ressort 12 de chaque guidon sortir le guidon des deux côtés de la tige du guidon 7 et le placer dans le levier de serrage rapide pour guidon 2 Fixez le mécanisme de verrouillage du guidon 11 G Pliage de la colonne de direction Soulevez la poignée 5 du mécanisme de pliage pour déverrouiller le mé canisme de pliage 6 Ensuite abaissez la hauteur de la colo...

Страница 6: ... 6 ...

Страница 7: ...ing button 4 Brakes mudguard 5 Handle of folding mechanism 6 Folding mechanism 7 Handlebar stem 8 Rapid tightening lever for steering column 9 Steering column 10 Bell 11 Handlebar locking mechanism 12 Handlebar spring button 13 Plastic stopper 1 2 8 3 5 6 4 9 11 10 7 12 13 7 ...

Страница 8: ...ars Take the two handles 1 out of the rapid tightening lever for handlebars 2 and Insert them into the left and right sides of the handlebar stem 7 For both han dlebars you should hear click sound indicating that the handlebar 1 Is in place Check whether the two spring buttons 12 are valid and visible D Adjusting the handlebar height Open the rapid tightening lever for the steering column 8 and ad...

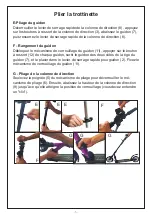
Страница 9: ...n the handlebar locking mechanism 11 press the spring button 12 on each Handlebar take out the handlebar from both sides of the handlebar stem 7 And put it into the rapid tightening lever for handlebars 2 Fasten the han dlebar Locking mechanism 11 G Folding the steering column Lift the handle 5 of the folding mechanism to unlock the folding mechanism 6 Then lower the steering column height 9 until...

Отзывы: