


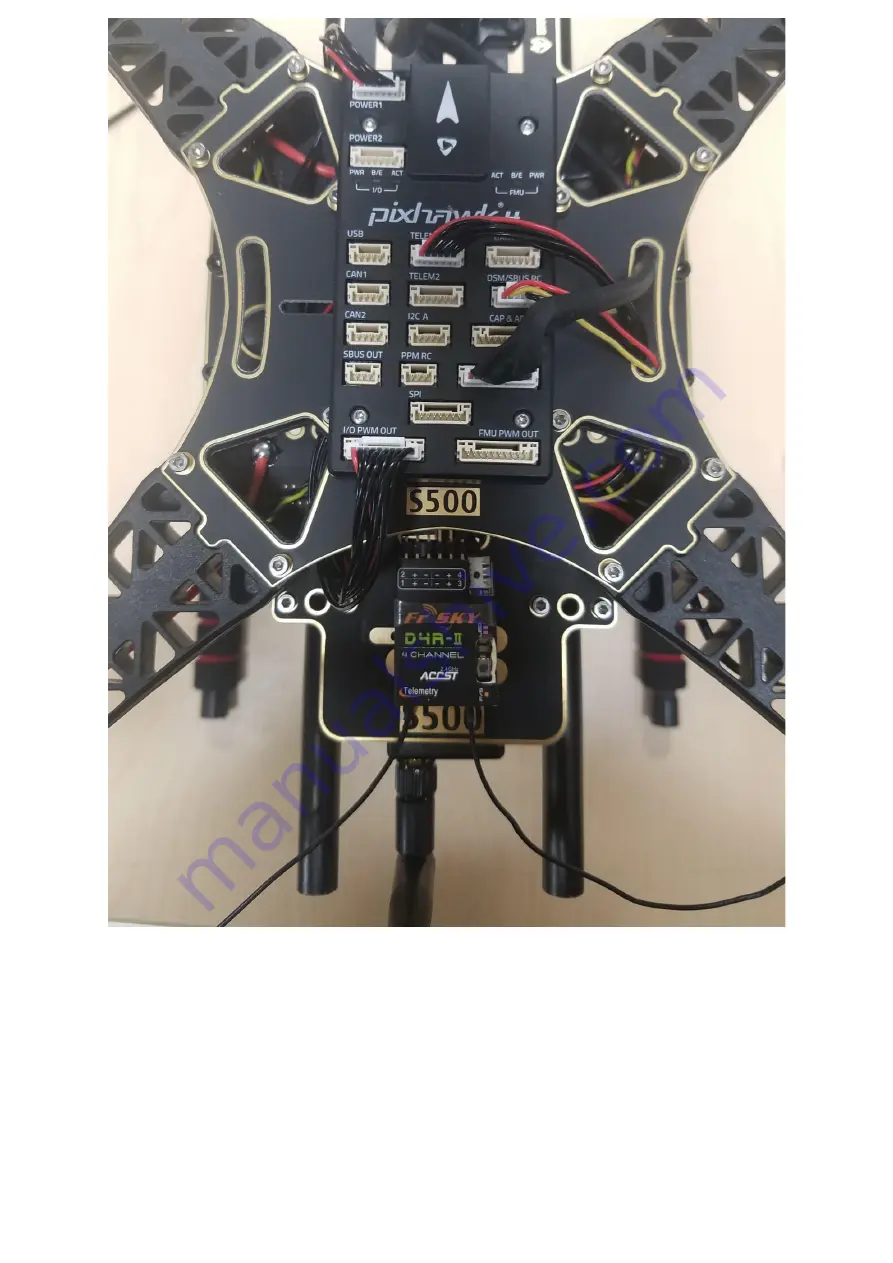
Figure 30
Step 10: Assembling the Battery Mount to the frame.
For this we will need the M2 5X6 screws and the battery mount see Figure 31. Insert the
long rods to the small rings see Figure 32 and 33. Attach that to the frame, make sure all
four sides are aligned to insert the screws, see Figure 34. Assemble the small plate to the
legs, see Figure 35 screw on all four sides. The final step is to attach the plate to the, see
figure 36.
Содержание Pixhawk 4 S500 V2 Basic Kit
Страница 2: ...soldering iron The image below shows both frames and electronic components...
Страница 8: ...Figure 3...
Страница 10: ...Figure 6...
Страница 11: ...Figure 7...
Страница 12: ...Figure 8...
Страница 14: ...Figure 10...
Страница 15: ...Figure 11...
Страница 16: ...Figure 12...
Страница 18: ...Figure 14...
Страница 19: ...Figure 15...
Страница 20: ...Figure 16...
Страница 22: ...Figure 17...
Страница 23: ...Figure 18...
Страница 24: ...Figure 19...
Страница 25: ......
Страница 28: ...Figure 24...
Страница 30: ...Figure 26 Figure 27...
Страница 31: ...Figure 28...
Страница 32: ...Figure 29...
Страница 34: ...Figure 31 Figure 32 Figure 33...
Страница 35: ......
Страница 36: ...Figure 34 Figure 35...
Страница 38: ...Figure 37 That s it The final build is shown below...
Страница 39: ...Figure 38 This is the finished setup...
Страница 40: ......
Страница 41: ......
Страница 43: ...Step 2 Select the airframe Holybro S500 in QGC Airframe Quadrotor X Step 3 Radio calibration...
Страница 46: ......