10 of 28
Installation and Setup
(continued)
6. Once connected, open the web browser
on your device, type
into the
address bar and press
ENTER
to access
the
Main Console
setup interface.
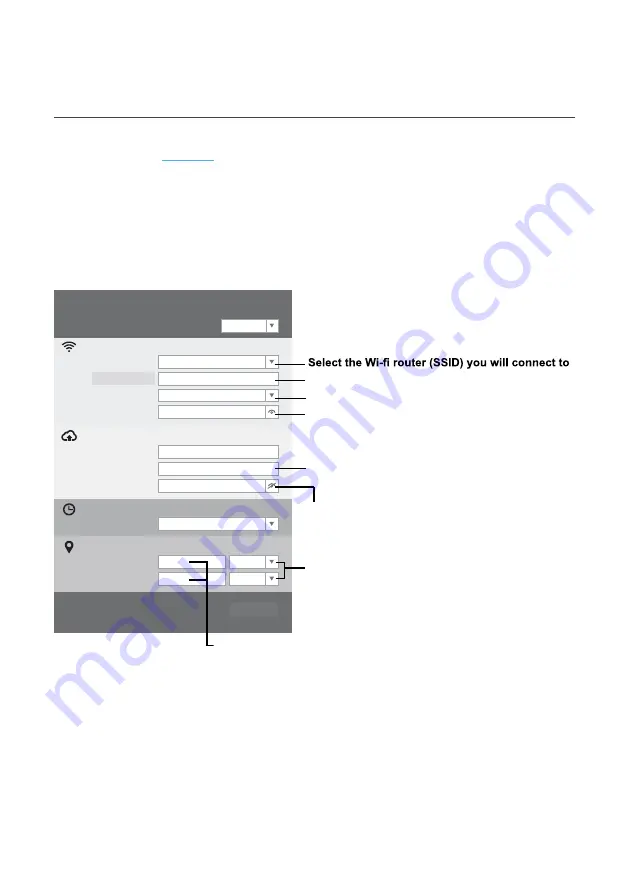
7. Fill in the connection information for the setup
interface. Your
Aspect Wi-Fi Solar Pro
will use
this information to connect your Wi-Fi router.
Wi-Fi Connection Setup (continued)
WiFi Router setup
Web server URL: rtupdate.wunderground.com
Station ID:
Weather server setup
Station key:
Server URL:
nist.time.gov
Time server setup
Latitude:
Longitude:
Location setup
Router:
Add Router
East
0.00
North
0.00
Security type:
Router Password:
WAP2
ROUTER_A
Firmware version: 1.00
Apply
Language:
English
Manually enter the SSID if it is not on the list
Select router’s security type (usually WAP2)
Enter your router password
Enter the "Station ID" assigned by
Wunderground
Enter the "Station key" assigned by
Wunderground
Select the direction (e.g. EU countries Longitude
is East and US is West)
Enter the latitude and longitude with 3 decimal places
Setup interface will differ depending
on your web browser.
This requires
STATION ID
,
STATION KEY/PASSWORD
and
LONGITUDE/LATITUDE
as outlined
in previous steps.
8. Click
APPLY
to finish the setup. If all the
information you entered is correct, the
Main Console
LED will change to solid blue.
If the LED does not change to solid blue, please
check your details and correct them accordingly.
Once setup is complete, the
Main Console
will disconnect the Wi-Fi from your device
and search for the router that you have
assigned. If the connection is successful,
the status LED on the
Main Console
will
change to blue and the Wi-Fi Icon
WIFI
will
show on the LCD without flashing.
Содержание Aspect Wi-Fi Solar Pro
Страница 1: ...1 of 28 User Guide WS5091W...
Страница 3: ...3 of 28...
Страница 17: ...17 of 28 Weather Index continued Operation and Settings continued...


