background image


3.


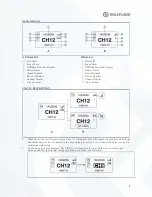
The black and bold te xt on white background means that it is the DFS channel, wh ile  the white te xt on 
the black background is the non-DFS channel. 

4.


When the device detects  the USB d isk connected, the USB d isk detection display lights up. 

5.


When the voltage is too low, the low battery alarm will be triggered and the icon will flash slowly . 


Caution 

1.


When the receiver is not connected, it will not display the hotpot number. 

2.


When the receiver is turned on, the channel number will not be displayed bef

ore the receiver is 

connected with transmitter. 


CHANNEL CHANGE 

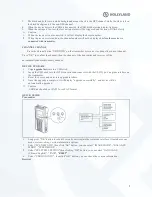
Press the channel button “UP/DOW N” on the transmitter or rece iver to change the current channel. 

Press “OK” to confirm the channel, then the channel of the transmitter and receiver will be 

automaticallyandsynchronously changed. 
 

DEVICE UPGRADE 

1.


Co

py upgrade fir

mwa re to a USB stick. 

2.


Insert the USB stick into the OTG converter andconnect

 it

 with the USB Type-C upgrade interface on 

the transmitter. 

3.


Reset the device, and enter into upgrade interface. 

4.


Once the upgrade is complete, it will display “upgrade successfully”, and device will be 
automatically upgraded. 


Caution


 USB disk should be at FAT32 or e xFAT format.


QUICK GUIDE 
Transmitter  


1.


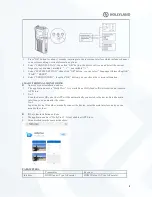
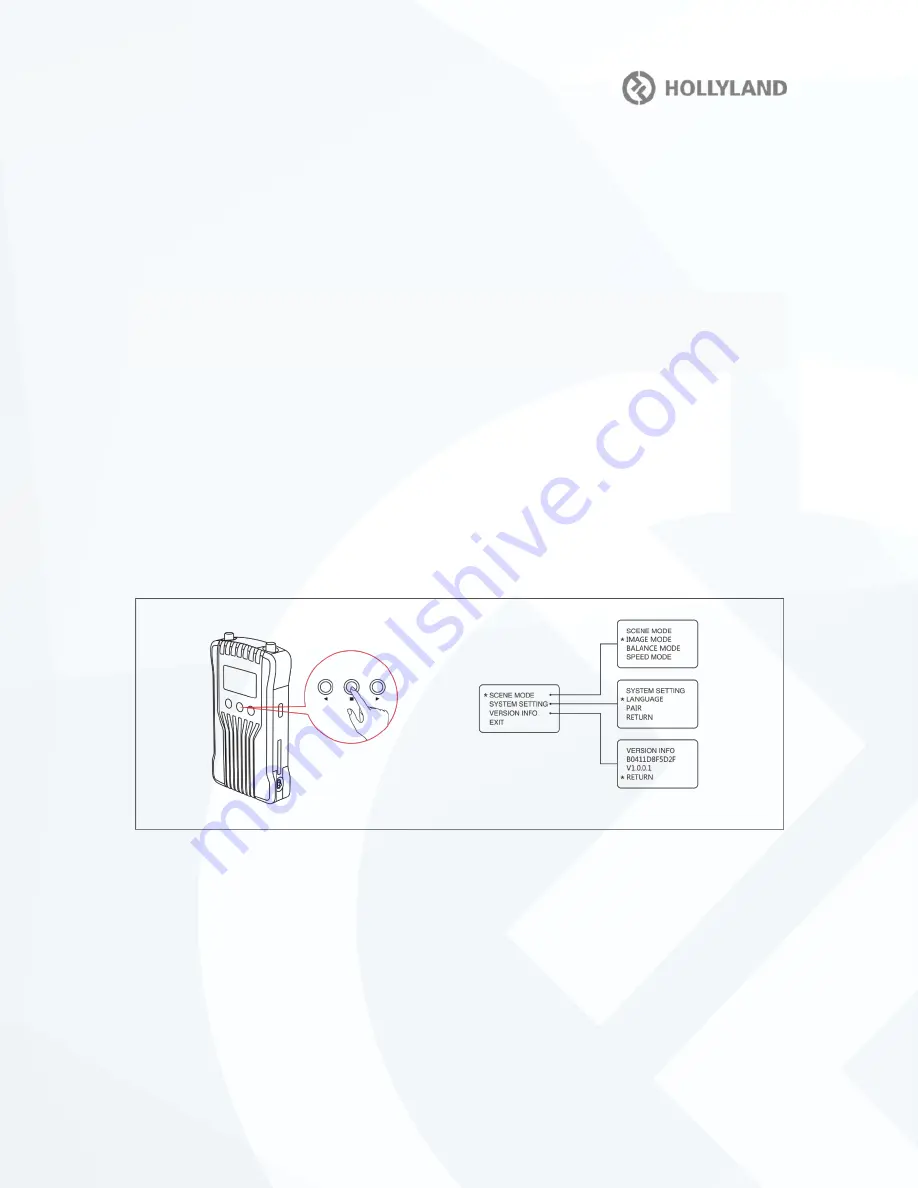
Long press “OK” button for about 3 seconds, enteringintothe root menu interface, it includes scene 
mode, system setting, version information options. 

2.


Select “SCENE M ODE”, then clic k “OK” button, you can select “IMAGE MODE”, “ BALA NCE 
MODE” , “SPEED MODE”. 

3.


Select “SYSYTEM SETTING”,then clic king “OK” button, you can select “LANGUA GE 
(Ch inese/English)”, “PAIR”

, “RESET”. 

4.


Select “ VERSION INFO”, thenclic k “OK” button, you can check the version informat ion. 

Recei ver  

Содержание CH12

Страница 1: ...solution and in the end achieves Full HD HDMI video transmission KEY FEATURES 200m Transmission Range Less than 0 1s Latency HDMI Input HDMI Loop Out Dual HDMI Output Mounting Batteries for Both the Transmitter and Receiver 6 16V DC Power Input 1 Transmitter withMultiple Receivers Smart Terminal Monitoring Smart ChannelSelecting USB Firmware Upgrade OLED Display Stable Reliable Industrial Metal Ca...

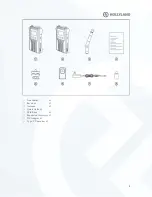
Страница 2: ...2 Transmitter x1 Receiver x1 Antenna x5 Quick Guidex1 Cold Shoe x1 Expansion Accessory x1 DC Adapter x1 Type C Converter x1 ...

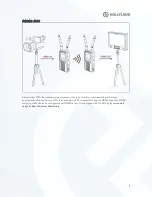
Страница 3: ...atest wireless communication technology andtransmits ultra low latency HD video transmission The transmitter supports HDMI Input and HDMI loop out while the receiver supports dual HDMI output It is equipped with OLED display screen and supports Smart Terminal Monitoring ...

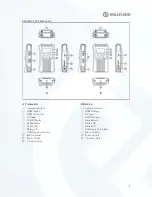
Страница 4: ... DC Input OLED Display Button Down Button OK Button UP USB Upgrade Interface Fan Air Outlet Power Switch 1 4 Screw Hole B Receiver Antenna Interface HDMI Output DC Input OLED Display Button Down Button OK Button UP USB Upgrade Interface Fan Air Outlet Power Switch 1 4 Screw Hole ...

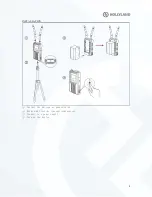
Страница 5: ...5 INSTALLATION Install the antenna as demonstrated Mount and fixedthe transmitter receiver Connect to a power supply Turn on the device ...

Страница 6: ... Number Channel Display Video Format STATUS DESCRIPTION 1 When the devices are disconnected a cross x will appear above the signal strength bars on both the transmitter and receiver As shown in the above diagram device 1 is on connected status device 2 is on disconnected status 2 As shown in the above diagram NO VIDEO will appearon the screenif there is no video input detected and the video format...

Страница 7: ... the transmitter and receiver will be automaticallyandsynchronously changed DEVICE UPGRADE 1 Copy upgrade firmware to a USB stick 2 Insert the USB stick into the OTG converter andconnect it with the USB Type C upgrade interface on the transmitter 3 Reset the device and enter into upgrade interface 4 Once the upgrade is complete it will display upgrade successfully and device will be automatically ...

Страница 8: ...tion SMART TERMINAL MONITORING Android system installation and use 1 The application name is HollyView It is available on Hollyland s official website and Android APP store 2 No 1 Scan the device QR code the APP will be automatically connected to the device Enterthe main interface you can monitor the video No 2 Input the device ID number manually connect the device enter the main interface and you...

Страница 9: ... indication showsat itslow battery please replace the battery in time 3 Please try to change to another channel andconnectthe devices again 4 Please re pair the devices 5 Please check if the antennasonthe transmitter and receiver arecorrectlyinstalled Display Issues 1 Please check if the video source is correctly connected with the HDMI IN interface 2 Please check if the transmitter shows a video ...

Страница 10: ...easonable protection against harmful interference in a residential installation This equipment generates uses and can radiate radio frequency energy and if not installed and used in accordance with the instructions may cause harmful interference to radio communications However there is no guarantee that interference will not occur in a particular installation If this equipment does cause harmful i...

Отзывы: