GETTING STARTED
Step #1: Remove the seat, and both wires (+ and -) from the battery.
Step #2: Remove the outer fairing/headlamp assembly. Refer to a service manual
if you need help with this. Note: A towel on the front fender can help
prevent scratches or “dings” from dropped tools or fasteners etc.
Step #3: Take the 2 wires off each front speaker by gently pulling one at a time.
Undo the screws that attach each speaker/grill assembly to the inner
fairing and remove. Gently pull the stock speaker out of each grill as-
sembly.
Step #4: “Clip” the Hogtunes front speakers (Model 902.2-AA) into each grill
assembly. Position your new speaker/grill assembly onto the inner fairing,
and re-attach each one using the OE screws. Although a hand screwdriver
is recommended for this step, make sure these screws are tight! Let the
factory speaker wires hang for now.
Step #5: Remove each rear speaker grill by undoing the 4 screws on the front of
the grills. Carefully lift up on each speaker and take the 2 wires off by
pulling one at a time from the stock speaker. Put the grills, fasteners, and
speakers aside.
Step #6: Locate the 2ch/4ch switch on the side of the amplifier, and make sure
it is in the “4ch”position. In this position, the amplifiers front and rear
channels are controlled independently by the Ultra radios built in fader.
If the switch is in the “2ch” position, all 4 channels are driven equally,
and although all 4 channels will play, the radios fader will not adjust
front/rear.
Step #7: Locate the 3 position switch on the side of the amplifier marked
“GAIN”, and make sure this switch is in the “+3” position. Since Ultra
radio’s come with a fader, you can use the fader control to adjust front/
rear balance. If you were to run this amp off a 2 channel radio
(no fader) the 2/4 switch would go to the “2” position, and the gain
switch would be used to adjust the volume of what ever is plugged into
the rear channels.
Step #8: The power harness has an 8 pin white plug with 3 red wires, 3 black
wires, and 1 orange wire. Locate this and plug it into the white socket on the
amplifier marked “power”. The input harness has a smaller black 8 pin plug with
smaller gauge wire. Plug this into the black socket on the amplifier marked “hi
level input”. Locate the long “rear speaker”
harness with 8 black wires in it. One end has a white 8 pin connector,
the other end has two 4 pin connectors. One of the 4 pin connectors on
3
4
this long harness will plug into the empty 4 pin plug on the input harness. It will
only go on one way. The other 4 pin plug on the rear harness will plug into the
“rear out” which is a white connector on the other side of the amp. Locate the 4
pin black plug with black/brown, and black/blue wires. This will plug into the
“front out” on the amp, which is a 4 pin black socket. Note: There is a blue socket
on the amp labeled “bypass out”. This carries the radios built in power (front chan-
nels) and although not used in this kit, is there for future expansion.
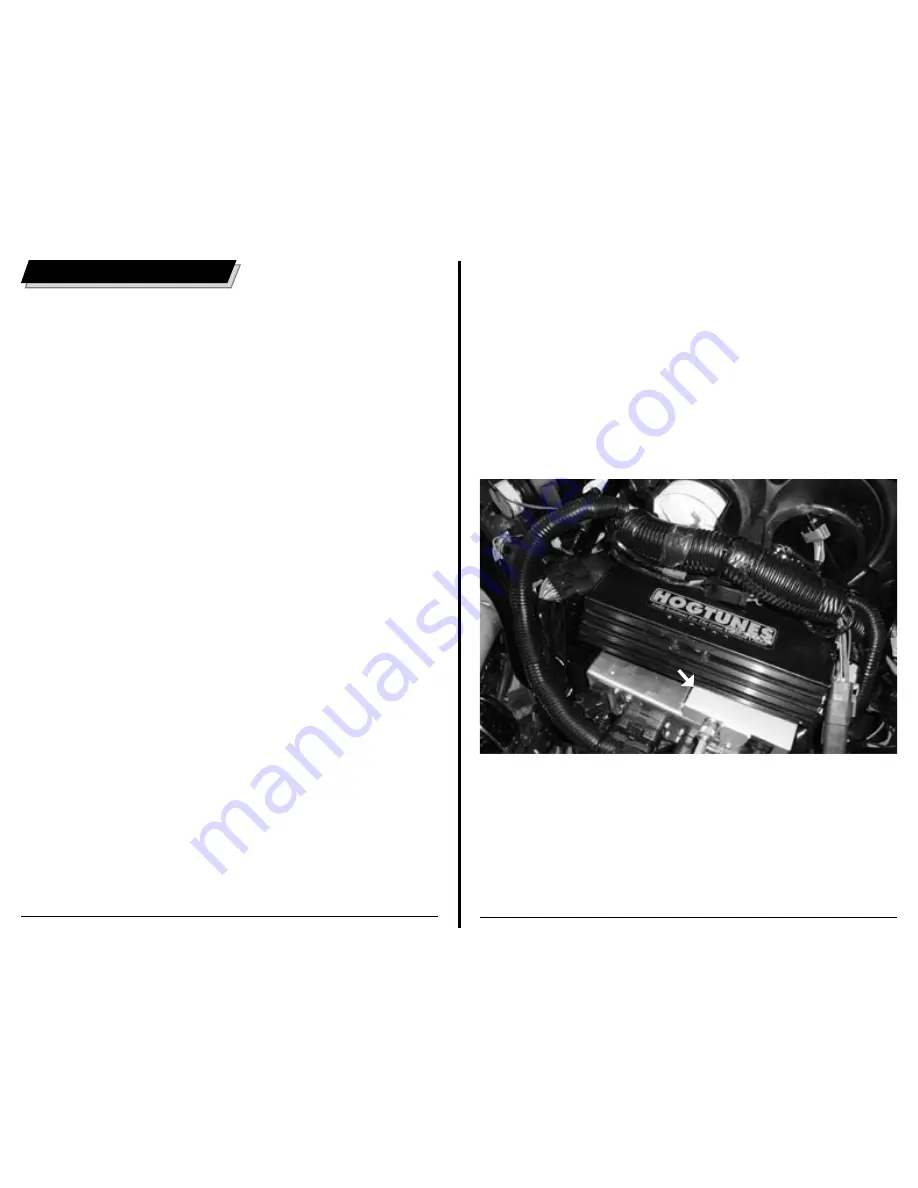
The amplifier is designed to mount on top of the radio inside the fairing so
when installed, the large factory wire harness that goes across the back of the
speedometer and tachometer will sit in the “trough” or “dish” cut into the top of
the amplifier, as show in Diagram 1.1 below.
Diagram 1.1 (Prototype Amp Shown on 06+ Without “Foot”)
There is a black rubber “foot” in the kit. On 2006+ Ultras, the CB module is
mounted on top of the radio on the clutch side. The foot is used to fill the void next
to the CB, so when installed, the amplifier has ample support. On 1998-2005
bikes, or 2006+ bikes with the CB and XM modules, or 2006 bikes with the CB
removed, the foot is not used.
CB MODULE


