25
8. APPLIANCE OPERATION
1.
Place the base unit (6) on a stable and level surface.
2.
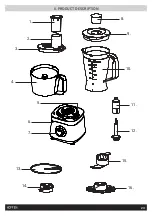
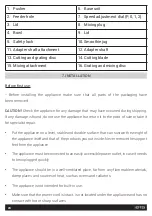
Install the adapter shaft (12) on the base unit (6).
3.
Place put the bowl (4) on the base unit (6). Move the handle back and rotate it counter-
clockwise until it locks into position. Always mount the bowl on the appliance before
adding ingredients.
4.
Mount the adapter shaft attachment (11) and the selected accessory (cutting and
grating disc, mixing attachment, or grating and mixing disc) inside the bowl (4). Just
push the accessory onto the adapter shaft until it fits against the bottom of the bowl.
5.
Put on the cover (3).
Do not use the cover to control the food processor. Always use the on/off button instead.
6.
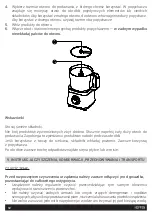
Turn on the appliance and select a speed setting. The default setting is 0, which means
the appliance is off.
There are 2 speeds available: 1 – slow and 2 – fast, as well as P – pulse mode.
The food processor will not work unless the bowl and cover are correctly installed.
Use the pulse switch (by turning the speed dial left) to turn the appliance on for a moment.
In this mode, the appliance only works while the pulse switch is activated.
7.
To remove the cover, accessories and bowl, follow these instructions in reverse order.
Always turn the appliance off before removing the cover.
Important information
The food processor is not suitable for crushing, grinding coffee or grinding granulated
sugar into confectioner's sugar.
When adding almond essence or flavouring, avoid contact with the plastic, as this may
result in permanent stains.
Using the smoothie jug
1.
Place the base unit (6) on a stable and level surface.
2.
Place the smoothie jug (10) on top.
3.
Rotate the smoothie jug (10) on the base unit (6) in a counter-clockwise direction to
lock it in place.
4.
Place ingredients in the jug.
5.
Close the lid (9) with the mixing plug (8) and rotate it.
6.
Rotate the lid counter-clockwise to lock it on the jug.
7.
Select the speed setting or the pulse mode.

