RXW EC-5 and 10H Soil Moisture Sensor (RXW-SMx-xxx) Manual
1-800-LOGGERS 3
www.onsetcomp.com
Sensor Cable:
This is the cable that connects the mote to the
sensor.
Eyelet:
Use this eyelet to attach a 3/16 inch padlock to the
mote for security.
Latch:
Use the two latches to open and close the mote door.
Ground Wire Port:
Use this port to connect a ground wire (see
Deploying and Mounting
).
Antenna:
This is the built-in antenna for the radio
communications across the RX Wireless Sensor Network.
Solar Panel Cable:
This cable connects the built-in solar panel
to the mote circuitry.
LEDs:
There are two LEDs to the left of the LCD screen. The
green LED blinks during the process of joining a network,
blinking quickly while the mote searches for a network and
then slowly as the mote registers with the network. Once the
network registration process is complete, the blue LED blinks at
4 seconds to indicate normal operation. If the mote is not
currently part of a network, the blue LED will be off. If the blue
LED is on and not blinking, there is a problem with the mote.
Contact Onset Technical Support.
Battery Holder:
The location where the batteries are installed
as shown (see
Battery Information
).
USB Port:
Use this port to connect to the mote to a computer
via USB cable if you need to update the firmware (see
Updating
Mote Firmware
).
Button:
Push this button for 1 second to illuminate the LCD or 3
seconds for the mote to search for an RX Wireless Sensor
Network to join (see
Adding the Mote to the RX Wireless Sensor
Network
).
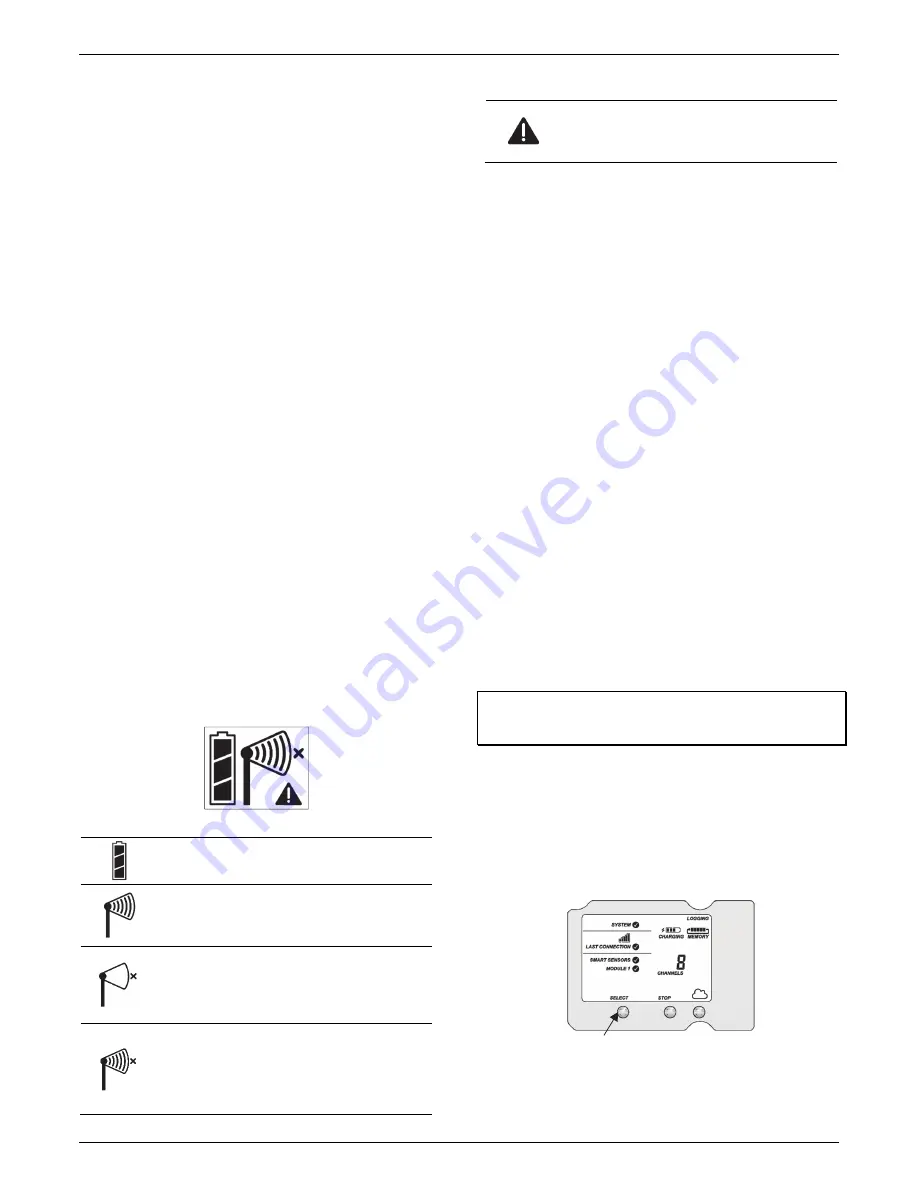
LCD Screen:
The mote is equipped with an LCD screen that
displays details about the current status. This example shows all
symbols illuminated on the LCD screen followed by definitions
of each symbol in the table.
LCD Symbol
Description
The battery indicator shows the approximate battery
charge remaining.
This is a signal strength indicator. The more bars, the
stronger the signal between motes. If there is no x
icon next to the signal strength indicator, then the
mote is part of an RX Wireless Sensor Network.
An empty signal strength icon plus the x icon
indicates that the mote is not currently part of a
network. See
Adding the Mote to the RX Wireless
Sensor Network
for details on how to add a mote to
the network.
When the mote is in the process of joining a
network, the signal strength icon will blink and then
the bars in the icon will cycle from left to right. The x
icon will blink during the last step in the network
registration process (see
Adding the Mote to the RX
Wireless Sensor
Network for details).
LCD Symbol
Description
This indicates a problem with the sensor itself (the
mote is operational). Check the sensor and make any
adjustments to it as needed. Contact Onset
Technical Support if the problem persists.
Sensor Operation
The soil moisture sensor measures the dielectric constant of
soil in order to determine its volumetric water content. The
dielectric constant of water is much higher than that of air or
soil minerals, which makes it a sensitive measure of the water
content. During operation, values of 0 to 0.5 m
3
/m
3
are
possible. A value of 0 to 0.1 m
3
/m
3
indicates oven-dry to dry
soil respectively. A value of 0.3 or higher normally indicates a
wet to saturated soil. Values outside the operating range may
be a sign that the sensor is not properly installed (poor soil
contact or foreign objects are adjacent to the sensor) or that a
soil-specific calibration is required. Note that sudden changes in
value typically indicate that the soil has settled or shifted,
which are signs that the sensor may not be installed properly or
that it has been altered or adjusted during deployment.
The soil moisture sensor provides accurate readings for soil
between 0 and 50°C (32° and 122°F). The sensor will not be
damaged by temperatures as low as -40°C (-40°F); it is safe to
leave the sensor in the ground year-round for permanent
installation. Readings outside the sensor frequency range may
result in errors in HOBOlink.
Adding the Mote to the RX Wireless Sensor
Network
The mote must join an RX Wireless Sensor Network before it
can begin measuring soil moisture and transmitting data. This
requires accessing the RX3000 station and the mote at the
same time so it is recommended that you complete these steps
before deploying the mote.
Important:
If you have not configured the RX3000 station with
the RXW Manager, follow the instructions in the RX3000 Quick
Start before continuing.
To add a mote to the RX Wireless Sensor Network:
1.
If the LCD is blank on the RX3000 station, press any button
to wake it up.
2.
Press the Select button once (which shows the number of
smart sensors installed) and then press it again once if the
HOBO RXW Manager is installed in the left slot (module 1)
or twice if it is installed on the right slot (module 2).
Press this button to view the module
where the RXW Manager is installed


