background image


Ref : MP_WILDCAT_GB 

Issued by : Alban ROSSOLLIN 

Date : March 2010 

Up-date : 0 

Page 7/49 

OWNER’S MANUAL : HOBIE WILD CAT 


Copyright HCE 2010 

Before sailing check the following points : 

1/ Install the drain plugs (if any) – do not overtighten, hand tight is sufficient. Overtightening may 
cause the drain plug flange to distort and cause leakage. 
 
2/ Tension the rig. This can be accomplished by having your assistant hang from the trapeze or you 
can use mainsheet tension on one side at a time so that you can adjust the shroud position in the 
side stay adjusters. 
 
3/ Fit the daggerboards into the daggerboards wells.  
 
4/ Check all fastenings : 
- Mast tang shackles and shrouds (to prevent the mast to fall down) 
- pins and trapeze rope locks (to prevent falling out in the water if the trapeze is not well fastened) 
- pins and spring rings on the forestay and shrouds (to prevent the mast to fall down) 
- spring rings on the rudder pins (to prevent loosing the rudder assembly in case of capsizing) 
 
Transport and launching 
 
In order to avoid hull damages : 
 
- Always use a dolley to transport your Hobie Tiger on the beach (even if it is sand beach) and for 
launching. Step into the water with the dolley and once the cata is afloat take out the dolley.  
 
- DO NOT BEACH. Beaching, even smoothly, may damage the hulls. use your beach dolley to take 
the boat out of the water. 
 
- For towing,  always use an homologated road trailer with cradles. 


How to use your Hobie


Содержание WILD CAT

Страница 1: ...Ref MP_WILDCAT_GB Issued by Alban ROSSOLLIN Date March 2010 Up date 0 Page 1 49 OWNER S MANUAL HOBIE WILD CAT Copyright HCE 2010 HOBIE CAT WILD CAT...

Страница 2: ...teran of many years we recommend that you read this thoroughly before your first sail and TRY IT OUR WAY FIRST If you are new to sailing this manual alone is not intended to teach you how to sail Ther...

Страница 3: ...Crossbar assembly 19 21 Trampoline Assembly 22 26 Preparing the past 27 30 Stepping the mast 31 Mast rotation 32 Installation of the boom 33 35 Assembling the spinnaker kit 36 39 Hoist the main sail...

Страница 4: ...DIS 8666 Small crafts main data Builder s plate The boat identification number is engraved on the transom of the boat Example Immatriculation is mandatory see governemental web sites for procedure Len...

Страница 5: ...oat Never go out in conditions beyond your ability Everyone on board should wear a life jacket at all times If you are in the water remain in contact with the boat even if it is capsized A sailboat ca...

Страница 6: ...Copyright HCE 2010 Hobie Cat owners are organised in a world wide class association The IHCA International Hobie Class Association For Europe you can contact the EHCA European Hobie Class Association...

Страница 7: ...all fastenings Mast tang shackles and shrouds to prevent the mast to fall down pins and trapeze rope locks to prevent falling out in the water if the trapeze is not well fastened pins and spring ring...

Страница 8: ...while slowly leaning back away from the trampoline As the mast and sail lift out of the water drop down to your knees then into the water Hold on to the crossbar near the hull that you were standing o...

Страница 9: ...to solve problems you may encounter As soon as you become owner please date and sign this receipt below and give it to your dealer to be covered by our warranty Please carefully read the warranty con...

Страница 10: ...g your boat to the nearest authorised Hobie Cat Europe dealer a list of the dealers is available at HCE Be sure to take proof of date of retail purchase invoice All payments for in warranty expenses s...

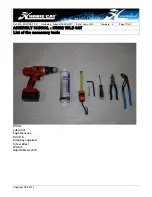
Страница 11: ...Alban ROSSOLLIN Date mars 2012 Up date 3 Page 11 49 ASSEMBLY MANUAL HOBIE WILD CAT Copyright HCE 2012 Driller Lubricant Tape measure Drill 8 Allen key supplied Screw driver Wrench Adjustable wrench L...

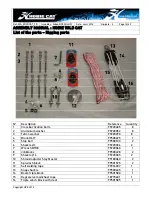
Страница 12: ...nt crossbar 18762500 with the trampoline 18725800 mounted o Rear crossbar 18762600 o Boom 18712800 o Tiller crossbar 18762260 o Rig bag 18780300 o Rope bag 18770400 o Wire bag 18760500 4 parcel n 2 in...

Страница 13: ...Mast rotation line A 18770416 2 4 Degressive spinnaker halyard 18770410 1 5 Jib cunningham B 18770408 1 6 Jib car bordering line 18770419 1 7 Main cunningham mast cleat 18770504 1 8 Jib cunningham A...

Страница 14: ...washer 99220290 8 4 Block H417 99500495 1 5 Stop ball 99500103 2 6 Shackle 4 99220036 2 7 Wrench BTR8 99220060 1 8 Jib blocks 99500478 2 9 Shackle 6 99220035 2 10 Shroud adjuster Stay Master 99180060...

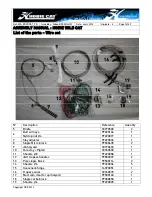
Страница 15: ...p date 3 Page 15 49 ASSEMBLY MANUAL HOBIE WILD CAT Copyright HCE 2012 N Description Reference Quantity 1 Spreader bar kit V2 18760300 1 2 Left adjustable spreader wire 18760565 1 3 Shrouds 18780400 2...

Страница 16: ...9220019 1 7 Stay adjuster 99220033 1 8 Single Micro block 99500478 2 9 Jib halyard 18770418 1 10 Forestay Pigtail 18760530 1 11 Shackle 8 99220058 1 12 J H trapeze handles 99500037 2 13 Pole single bl...

Страница 17: ...ban ROSSOLLIN Date mars 2012 Up date 3 Page 17 49 ASSEMBLY MANUAL HOBIE WILD CAT Copyright HCE 2012 N Description reference Quantity 1 Spinnaker trumpet soft 99267755 1 2 Spinnaker soft bag 99267535 1...

Страница 18: ...being careful to have the trampoline towards the back 3 Insert the two bolts and washers in the order shown in the photo Tighten gently without forcing Now take the left hull and proceed in the same w...

Страница 19: ...cated on the photo 2 and hold in place with a bowline knot 3 On the back right hand side bring the trampoline up along the cord Make a loop which will be after tension completely hidden inside the sea...

Страница 20: ...MBLY MANUAL HOBIE WILD CAT Copyright HCE 2012 6 And again through the loop 7 Once more through the ring 8 Then pass through the eyelet of the trampoline 9 Tie a knot to stop the cord at the ring as sh...

Страница 21: ...the band at the back of the trampoline 12 Take the back trampoline lacing and lace as shown the diagram attach the end to the first lacing button take the lace down and around the rod bring up again...

Страница 22: ...2010 model The two parts A and B are attached with the nuts and bolts delivered in the plastic bag with the kit Cover the nut and bolt or the axe and split ring that fix the part B with self welding t...

Страница 23: ...ing inside the left spreader G pass through the pulley at the top of the mast H back down along the mast I and fix it on the turret cleat for the moment F without passing back through spreader bars 4...

Страница 24: ...ert it into the slot at the base of the mast bring it out of the bottom of the mast and screw to the base of the mast foot Leave the other end on hold Take the right adjustable cable unscrew the botto...

Страница 25: ...into the corresponding slot of the left spreader taking care that the black plastic disk is above the spreader Repeat the same for the right cable being careful to screw the two parts of cable togeth...

Страница 26: ...the ends of the spreaders Pass through the hole at the end of the spreader and on one side of the spreader roll two or three times around the spreader cables Do the same the other side cut off any pi...

Страница 27: ...bolts on each hull Unscrew the serrated adjustment roller of the Staymasters to the maximum 3 Raising the mast Before raising the mast remove the plastic bag that is fixed to the jib rail and which c...

Страница 28: ...t while B pushes the mast forward A connects the shroud to the stay adjuster 4 Installing the trapezes Fix the shackle to the trapeze wire Make a bowline knot between the shock cord that comes out of...

Страница 29: ...that are pre assembled on the end of the Cunningham attached to the front crossbar 2 Using the pins and split rings install the Cunningham cam cleats onto the support plates at the bottom of the mast...

Страница 30: ...of the loose cord through 6 Pull through tightly and finish by a knot that can be easily undone 7 It should look like this when the assembly is finished 8 Install the righting cord around the marting...

Страница 31: ...trampoline pass the end of the cord through the eyelet facing the rotation arm then into the pulley already assembled then back down under the trampoline through the eyelet and then put the pulley bac...

Страница 32: ...Issued by Alban ROSSOLLIN Date mars 2012 Up date 3 Page 32 49 ASSEMBLY MANUAL HOBIE WILD CAT Copyright HCE 2012 Connect the boom on the mast using the gooseneck hinge the pin and the split ring Instal...

Страница 33: ...front crossbar using the pin and split ring Attach the front bridles and make sure the the pulley at the end of the pole is facing upwards towards the sky Put on the central tension rope without tigh...

Страница 34: ...rossbar The mouth should be perpendicular to the pulley at the end of the boom Drill the boom with a 8 mm bit through the holes of the trumpet screw to the boom with the screws that are supplied The s...

Страница 35: ...ake the spinnaker halyard down from the cleat on the front crossbar then iinto the pulley near to the rear crossbar After take it through the pulley on the trampoline and under the trampoline through...

Страница 36: ...nnaker pole Unfold the main sail on the trampoline and insert the battens into their sleeves The battens are numbered 1 to 7 from the smallest N 1 at the top of the sail to the longest N 7 at the bott...

Страница 37: ...ke the other end and pass it through the small ring from the back as in the photo Tie a figure of eight knot Introduce the luff of the main sail into the opening of the mast track and hoist the mainsa...

Страница 38: ...mainsail Fix the shackle to the metal ring of the mainsail Take the mainsheet assembly already mounted from the rigging bag and attach the snap hook to the strap of the mainsail under the boom Fix th...

Страница 39: ...e of the main sail as shown in the photo Take the Cunningham ropes from the rope bag Insert one of the ropes into the cleat on the right on the mast pass it through the pulley on the right of the main...

Страница 40: ...ach the head of the using the shackle positioned on the white halyard rope 2 Position the jib so that the halyard rope and forestay are inside the zip Pull on the halyard rope to hoist the jib Close t...

Страница 41: ...that comes out of the jib zip in the place of the yellow halyard back down and tie a knot on the large shackle 6 Take the end of the cunningham line and pass it through the pulley attached at the fix...

Страница 42: ...ck that is pre mounted on the jib sheet A Lead the spectra line through the block that is fixed on the spi pole B Then lead it through the carbo pulley attached to the traveller car on the self tackin...

Страница 43: ...m the rigging bag onto the trampoline put the trampoline against the pad eye and pass the rope through the eyelet of the trampoline onto the pad eye to fix the block 2 Final assembly 3 Ecoute de spi F...

Страница 44: ...012 Up date 3 Page 44 49 ASSEMBLY MANUAL HOBIE WILD CAT Copyright HCE 2012 1 Take the pintle and insert it through the rudder arm and the top gudgeon 2 Place the washer between the gudgeon and the rud...

Страница 45: ...Date mars 2012 Up date 3 Page 45 49 ASSEMBLY MANUAL HOBIE WILD CAT Copyright HCE 2012 4 Rudder in the down position 5 Engage the round plastic part into its cavity on the rudder arm 6 Fix the elastic...

Страница 46: ...n ROSSOLLIN Date mars 2012 Up date 3 Page 46 49 ASSEMBLY MANUAL HOBIE WILD CAT Copyright HCE 2012 7 Assemble the tiller system as in the photo 8 Fix the tiller extension in the middle of the tiller cr...

Страница 47: ...Ref MA_WILDCAT_FR Issued by Alban ROSSOLLIN Date mars 2012 Up date 3 Page 47 49 ASSEMBLY MANUAL HOBIE WILD CAT Copyright HCE 2012 Tuning guide Daggerboard Cunningham rotation mast rake...

Страница 48: ...0 cm 15 knots and up 20 cm up 20 cm Crew weight Shroud Spreader wire tension Opening of the spreader bar Mast rotation in Daggerboards height cm Cunningham tension of your max power 10 knots or less 1...

Страница 49: ...te mars 2012 Up date 3 Page 49 49 ASSEMBLY MANUAL HOBIE WILD CAT Copyright HCE 2012 HOBIE CAT EUROPE SAS ZI Toulon Est BP 250 83078 Toulon cedex 9 Tel 33 0 494 08 78 78 Fax 33 0 494 08 13 99 Email inf...

Отзывы: