background image

Step 10

15

Step 9

14

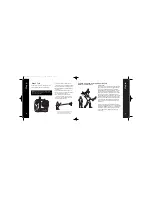
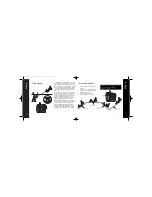
Range Test

1. One person holds the transmitter; the other 

person walks 100 paces away with the airplane.

2. Be sure the throttle slider is in the Off position.

3. Extend transmitter antenna completely and turn

transmitter on.

4. Plug in airplane battery and close hatch cover.

5. As soon as you move the throttle slider forward,

the propeller should spin quickly.

6. As the first person moves the transmitter 

controls at the same time, the other person 

watches to be sure the airplane’s motor and 

tail controls operate smoothly.

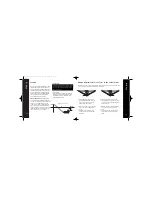
WARNING: The person holding the airplane should
hold it so that the propeller does not come in contact
with any part of their body.

You will need two people to do the range test: one to
hold the transmitter and one to hold the airplane.

If model does not range test correctly, do not fly. Call
Horizon Hobby Product Support staff toll-free at 
1-877-504-0233 for directions on how to proceed.

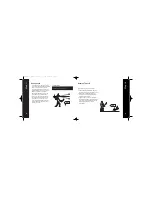
Seek Assistance from an Experienced
Radio Control Pilot

VERY IMPORTANT
The 3-channel control system is designed for the experienced
radio control pilot and is not intended for the first-time flyer.
If you can successfully fly the HobbyZone

®

Firebird XL™,

Firebird Commander™, or Aerobird Challenger™, then you
should be ready for the Aerobird Xtreme™. The Aerobird
Xtreme can be controlled in a similar manner as a 2-channel
plane, such as the Firebird XL or Firebird Commander, by 
simply limiting control stick movements to the left or the right
and using the throttle to ascend or descend. However, first-
time pilots of the Aerobird Xtreme should seek the assistance
of an experienced RC flyer until they’ve mastered the pitch
function. Once again, crash damage is not covered under 
the warranty.

The flying characteristics of the Aerobird Xtreme should not 
be altered for your first flights. Once you are comfortable flying 
the plane in the standard “out-of-the- box” configuration, only
then should you attempt to change the flying characteristics 
of the Aerobird Xtreme by changing hole positions in the 
control horns.

5723_HBZ Aerobird X manual  12/15/03  1:55 PM  Page 14

Содержание Aerobird Xtreme

Страница 1: ...ne products are distributed exclusively by Horizon Hobby Inc 4105 Fieldstone Road Champaign IL 61822 2004 Horizon Hobby Inc www hobbyzonesports com 6293 HBZ6515 6 05482 14265 3 5723_HBZ Aerobird X manual 12 15 03 1 55 PM Page 42 ...

Страница 2: ...X Port feature X Port lets you add exciting plug n play acces sories like the Sonic Combat Module HBZ4020 for aerial combat and the Aerial Drop Module HBZ6023 that includes a parachute jumper and two streamer bombs you can carry aloft and release Your Aerobird Xtreme adventures are about to begin In order to have a safe and successful experience we d like you to do a couple of things first watch t...

Страница 3: ...as shown 5 Turn on the transmitter and install the fully charged flight battery pack 6 Make certain the control stick and trim levers on the transmitter are centered as shown in the diagram on page 10 7 With the radio system on and the transmitter stick at neutral both tail control surfaces should be level with the rest of the tail 8 Give transmitter input The control surfaces should react as illu...

Страница 4: ...ongly recommended for those 14 and under Mounting the Landing Gear 1 Insert the landing gear into the slot on bottom of the fuselage Rc Attaching the Wing 1 Center the wing onto the fuselage by aligning the molded dimples on the trailing edge of the wing symmetrically with the top of the fuselage when it is attached 2 Once you re satisfied that the wing is centered attach it to the fuselage using ...

Страница 5: ...attery 1700mAh 7 2V Ni Cd 1 8 amps 55 minutes Optional Xtreme Battery 3000mAh 7 2V Ni MH 1 8 amps 105 minutes charge times are only estimates Actual charge times may vary Charging HobbyZone Ni CD and Ni MH Battery Packs The Aerobird Xtreme s charger uses unique peak detection circuitry that ensures an accurate charge every time and protects your Ni Cd and Ni MH batteries from the dangers of over c...

Страница 6: ...selage and plug in connector 4 Move the stick side to side The tail flaps should move as shown on the following page 5 Move the stick up and down The tail flaps should move as shown on the following page 6 The small lever under and to the side of the control stick are the trim levers and are used to adjust the neutral point of your control stick It s very important that this lever is centered when...

Страница 7: ...ly to keep people property and your Aerobird Xtreme safe Crash damage is not covered by the warranty Choose a Calm Day To ensure success on your first flights DO NOT FLY in winds of more than 8 mph To check wind conditions 1 Tie the included red flag to the end of the transmitter antenna 2 Hold the transmitter flat so the antenna is parallel to the ground and note how much the flag moves in the wi...

Страница 8: ... from an Experienced Radio Control Pilot VERY IMPORTANT The 3 channel control system is designed for the experienced radio control pilot and is not intended for the first time flyer If you can successfully fly the HobbyZone Firebird XL Firebird Commander or Aerobird Challenger then you should be ready for the Aerobird Xtreme The Aerobird Xtreme can be controlled in a similar manner as a 2 channel ...

Страница 9: ...e ground when releasing Think of it as a javelin that you are throwing 20 feet away Keep the spinning propeller away from your hair head and hands or injury may occur Step 12 17 Safety First Runway Takeoff Not recommended for inexperienced pilots 1 Stand behind the Aerobird Xtreme and point it directly into the wind on smooth asphalt or concrete 2 Apply full power and adjust the right control stic...

Страница 10: ...ccess Tip Flying continued Rudder Trim If the Aerobird Xtreme seems to drift in one direc tion when the control stick is in the neutral centered position gradually move the trim control lever below the control stick in the OPPOSITE direction of the drift until the plane flies straight with the control stick at neutral See page 23 if additional adjustments are needed Elevator Trim The Aerobird Xtre...

Страница 11: ...low down and stall the airplane To avoid crashing from a stall always maintain enough altitude to recover from it In a stall the nose of the plane will go down looks like the plane is diving To recover from the stall pull the stick back slowly UP elevator once the nose of the plane goes down and plane has built up airspeed Exit the stall to straight and level flight Be careful since pulling the st...

Страница 12: ... the wind As you gain experience try adding a bit of gentle back pressure on the stick just before touchdown to flare the plane With some practice your landings will be expertly smooth and on target Reduce power at 10 feet Step 14 23 Safety First Success Tip A If the Aerobird Xtreme keeps turning to the left and adjusting the trim control lever page 19 does not correct enough to fly straight with ...

Страница 13: ...ick or if you would like to fine tune the flight characteristics with the trim levers and controls in the neutral position Multi Mode Flight Control System The Aerobird Xtreme includes two ways to fly The mode is selected by the way you boot up the system each time you plug in a flight battery Sport Mode Sport Mode is the default mode It offer HobbyZone s Flight Trak system with the addition of pi...

Страница 14: ...the control surfaces you will give the Aerobird Xtreme more control response for aerobatic maneuvers like loops and tail slides good for experienced pilots Moving the control lines further from the control surfaces will soften the Aerobird Xtreme responsiveness and make it easier to fly good for beginning pilots Moving the control line to adjust the control response Note Only adjust one control su...

Страница 15: ...on the control stick Chandelle Gradually pull back on the control stick until the plane is going vertical Once on a vertical heading add right or left rudder Once the nose of the plane is heading toward the ground gradually pull back on the stick to exit the maneuver in straight and level flight Step 17 CHARGER CAPACITY MAX CHARGE RATE CHARGE TIME HBZ6519 DC Peak Charger 1 8 1700mAh NiCd pack 1 8 ...

Страница 16: ...it to emit a loud pitch tone that lets you know you ve scored a kill Aerial Drop Module The Aerial Drop Module HBZ6023 attaches to your fuselage and allows you to drop one or both of the included streamer bombs on ground targets A para chute jumper is also included offering the opportunity to practice dropping in behind enemy lines For more information regarding these HobbyZone accessories as well...

Страница 17: ...n aerial combat When hit the SCM temporarily disables your motor while allowing you to steer HBZ4025 Stealth Target An optional Stealth fighter ground target with hit sensor is available so you can practice with the Sonic Combat Module or take on friends in a target shooting contest HBZ6023 Aerial Drop Module ADM Plug in the Aerial Drop Module and you can drop streamer bombs or a parachute jumper ...

Страница 18: ... upholstery while charging Never charge the battery for more than three hours 6 Never cut into the wires on the battery charger or airplane as serious injury can occur Causing the battery to short out crossing negative and positive bare wires can cause fire serious injury and damage 7 Hold the plane securely and keep all body parts away from the propeller when the flight battery is plugged in When...

Страница 19: ... you finish flying the Aerobird Xtreme always unplug the battery before you turn off the transmitter 8 Never fly on the same frequency as another RC vehicle in your area The frequency of the Aerobird Xtreme is shown on stickers on the back of the transmitter Success Tips Unit does not operate 1 Transmitter AA batteries are depleted or installed incorrectly indicated by a dim or unlit LED on transm...

Страница 20: ...on RA number If in our opinion after inspecting the product we deter mine it to be defective we will repair or replace it at our discretion If you are directed by our Product Support staff to return the Aerobird Xtreme please follow these instructions 1 Unplug the battery from the airplane 2 Pack the complete Aerobird Xtreme all components in the original box and put into a sturdy shipping carton ...

Отзывы: