IMPORTANT
This section is very important and must not be
omitted! A model that is not properly balanced will
be unstable and possibly unflyable.
Check the lateral balance
1. An airplane that has been laterally balanced will
track better in loops and other maneuvers. With the
wing attached, gently lift the airplane by the spinner
and the bottom of the fuselage at the tail. You may
need an assistant to help you with this. If one wing tip
is noticeably heavy (the tip will drop) attach some
weight to the lighter tip until they are equal. Use Great
Planes "stick-on" lead weights (GPMQ4485) for
easy balancing.
Check the fore-alt balance
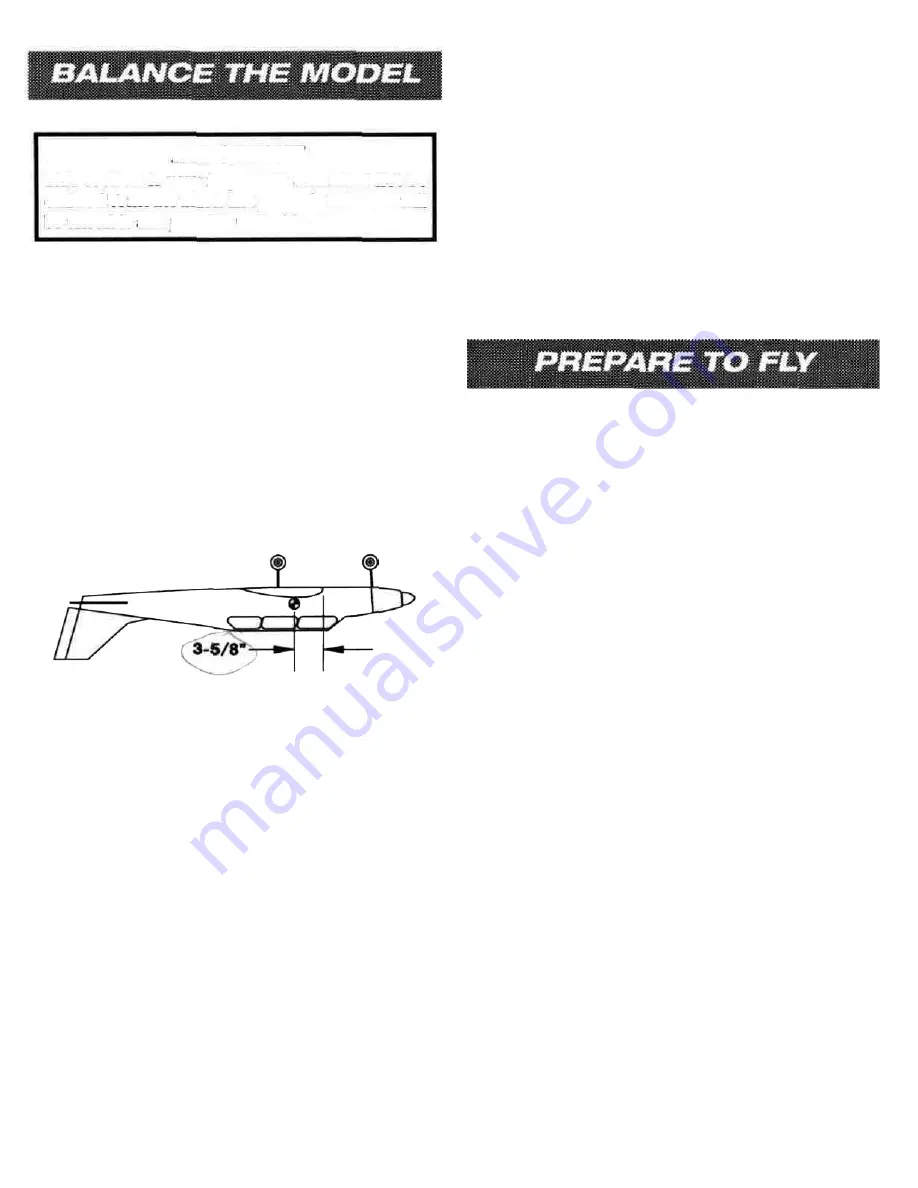
2. Check the fore-aft balance point, also referred to as
the "center of gravity" (CG). Accurately mark the balance
point on the top of the wing on both sides of the
fuselage. The balance point is located 3-5/8" back from
the leading edge. This is the balance point at which your
model should balance for your first flights.
The plane must be "ready to fly" (all components
installed) with an empty fuel tank before checking the
CG. Turn the model upside down and place your finger
tips or a balancing stand under the wing at the marked
balance point. Lift the model. If the tail drops, the
plane is "tail heavy" and you must add weight to the
nose. If the nose drops, the plane is "nose heavy" and
you must add weight to the tail. If possible, first
attempt to balance the model by changing the position
of the battery and receiver. If you are unable to obtain
good balance by doing so, then it will be necessary to
add weight to the nose or tail to achieve the proper
balance point.
You may wish to experiment by shifting the balance up
to 3/16" forward or back to change the flying
characteristics. Moving the balance forward may
improve the smoothness and arrow-like tracking, but it
may then require more speed for takeoff and make it
more difficult to slow down for landing. Moving the
balance aft makes the model more agile with a lighter,
snappier "feel." In any case, please start at the location
we recommend and do not at any time balance your
model outside of the range of 2 7/8" to 3-1/4" back
from the leading edge.
3 -3/16"to 3 -7/16" Use first CG
If you're a novice, there is one thing that you will need to
fly your BrightStar safely that is not furnished with the
kit: You will need a qualified instructor to teach you to
fly. No model ever made will let you teach yourself to fly
safely. It can be done, but you would be seriously risking
more than just the airplane. To find an instructor, you
should join an R/C flying club. If there is not a club
nearby, then you should find an experienced model pilot
who is willing to help you. The chosen instructor should
fly well enough to allow you to concentrate on your own
flying. If you are worried about your instructor crashing
your model, you will not be able to concentrate on
learning to fly. After you have found an instructor, you
should spend some time just talking with him about
what you will be trying to learn. He should inspect the
model to be certain that it is ready to fly. Listen to him
and learn from his experience.
Now that you have a good model and an instructor
whom you trust, you can go out and start learning to fly.
You can expect to be very nervous at first and you will
make some mistakes. There will be several instances
where the instructor will prevent you from crashing.
This will be unsettling, but the thing to do is jump right
back into flying the model (after your knees stop
shaking, of course). This is one of the most important
things about learning to fly model airplanes...you have
to fly! Fly as often as you can. Be sure to make several
flights each time you go to the flying field, but give
yourself time after each flight to calm down and discuss
the flight with your instructor. Spending some time after
each flight talking about what happened and what you
need to work on to improve your skills will pay off with
greater confidence in your own growing abilities.
25


