


© 2022 HM Electronics, Inc. All rights reserved.
4
.
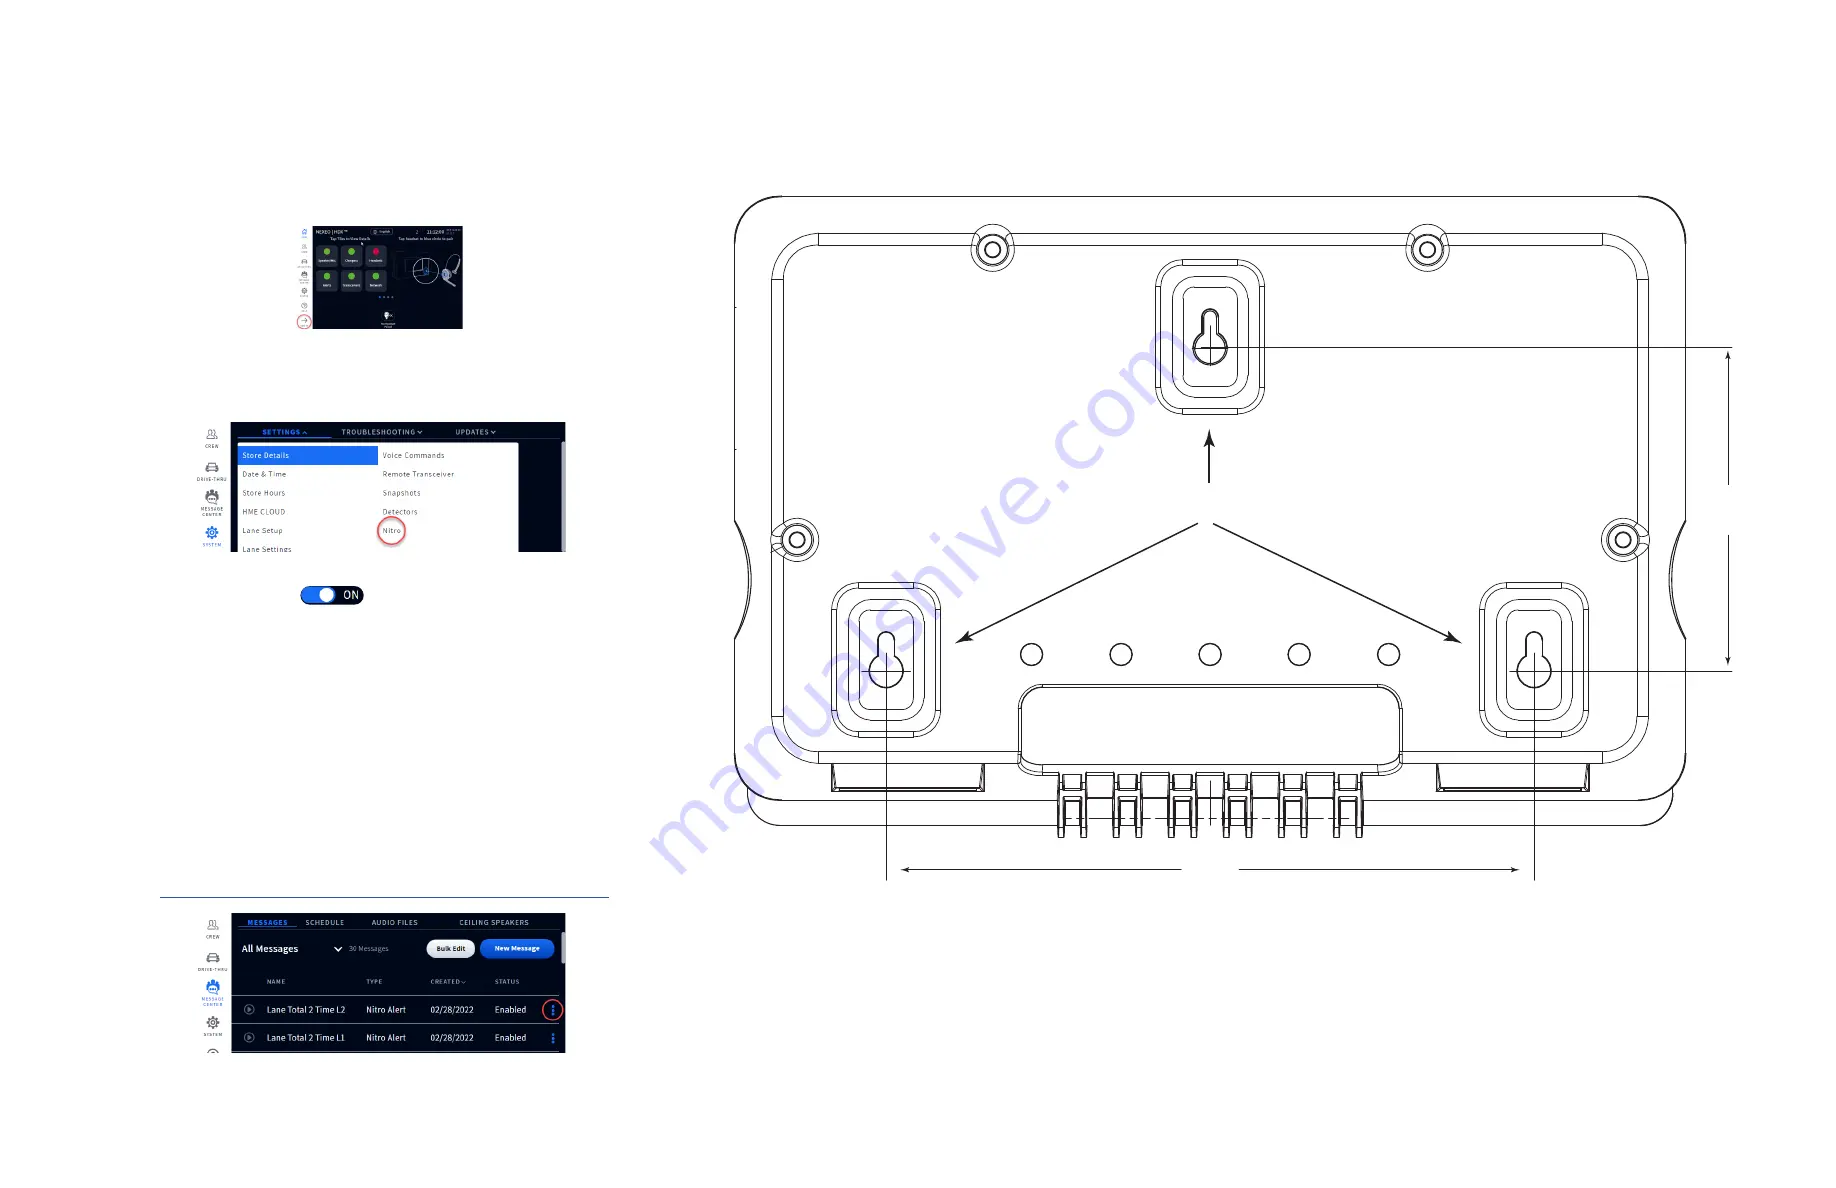
6.00”
(152.4 mm)
3.00”
(76.2 mm)
TSP60
TEMPLATE FOR MOUNTING HARDWARE
This way up
Three mounting keyholes
1. On the NEXEO|HDX base station HOME screen (see Fig. 4.1), log in to
the base station using the four-digit
Installer’s
PIN.
Fig. 4.1
2. Navigate to the SYSTEM screen, and from the SETTINGS drop-down
list, select “Nitro.” See Fig. 4.2.
Fig. 4.2
3. Tap Nitro Alerts toggle
to enable alerts and then configure:
Nitro MQTT IP:
Specifies the assigned IP address for ZOOM Nitro.
Log in to the ZOOM Nitro dashboard and go to NETWORK>LO-
CAL NETWORK. Copy the listed IP Address and enter here.
Nitro MQTT Port:
Specifies the assigned port for Nitro MQTT bro-
ker. The default port number is 1883.
Nitro MQTT Keep Alive Interval:
Specifies the keep message alive
interval in seconds (range = 1 - 120), the default is 10 seconds,
this means system messaging is set to occur every 10 seconds.
4. Navigate to the MESSAGE CENTER screen, and under the MESSAGES
tab, find Nitro Alerts listed under the TYPE column (see in Fig. 4.3).
5. Use the More icon at the end of each row to enable/disable or edit
alerts. For example, Fig. 4.3 shows the first two Nitro Alerts enabled.
Also see the online document “Configuring ZOOM Nitro to NEXEO
Alerts” for more details. It can be found here:
https://www.hme.com/training/supporting-documents/?lng=1
Fig. 4.3
C
onfIgurIng
neXeo|HDX
for
ZooM n
Itro
use
(
If
requIreD
)


