HLT-1110 Series
HITROL CO., LTD. 17
2.4 Gauge Adjustment and Completion
1) Adjust the gauge to the current level of tank.
2) After adjusting the float position and gauge, make sure that the measuring tape is not dislodged from
the roller of the sheave elbow.
3) If there is no problem, close the cover of the sheave elbow to finish the assembly.
1) Install guide wire, float, bottom anchor, top anchor, gauge & pipe support, gauge head on the tank.
2) Open the cover of the sheave elbow and insert the measuring tape.
3) Open the back cover of the gauge head and secure the measuring tape to the tape locking screw.
4) Connect the measuring tape to the float.
5) Install the spring on the spring loaded drum ① and ② which inside the gauge head.
6) Open the front cover of the gauge head and set the indicator to zero.
■ Pipe (User Scope)
- The pipes should be galvanized or stainless.
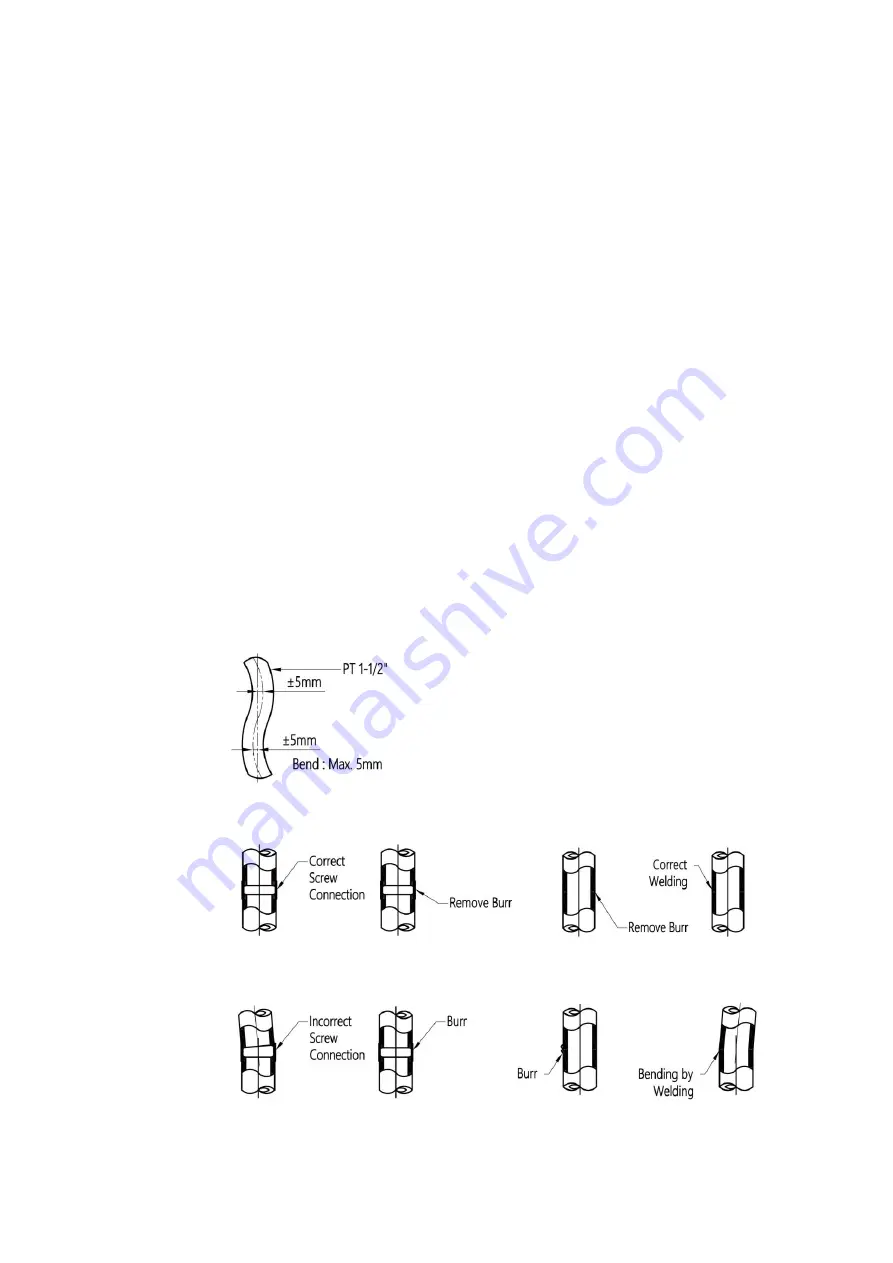
- The bending degree of the pipe should not be over than 5mm when installing. [Refer to Figure.9]
- If the contents of the tank are highly corrosive liquids, coated should be used.
- When connecting pipes, ensure proper connection is made to prevent leakage of gas in the tank or
rainwater from entering the tank. [Refer to Figure.10]
[Figure. 9] Pipe Material
[Figure. 10-1] Proper Pipe-Screw Connection
[Figure. 10-2] Proper Pipe-Welding Connection
[Figure. 10-3] Wrong Pipe-Screw Connection
[Figure. 10-4] Wrong Pipe-Welding Connection
3. Installation Summary
Precautions
for
Installation


