


Chapter 2. Installing and Set Up
2-6
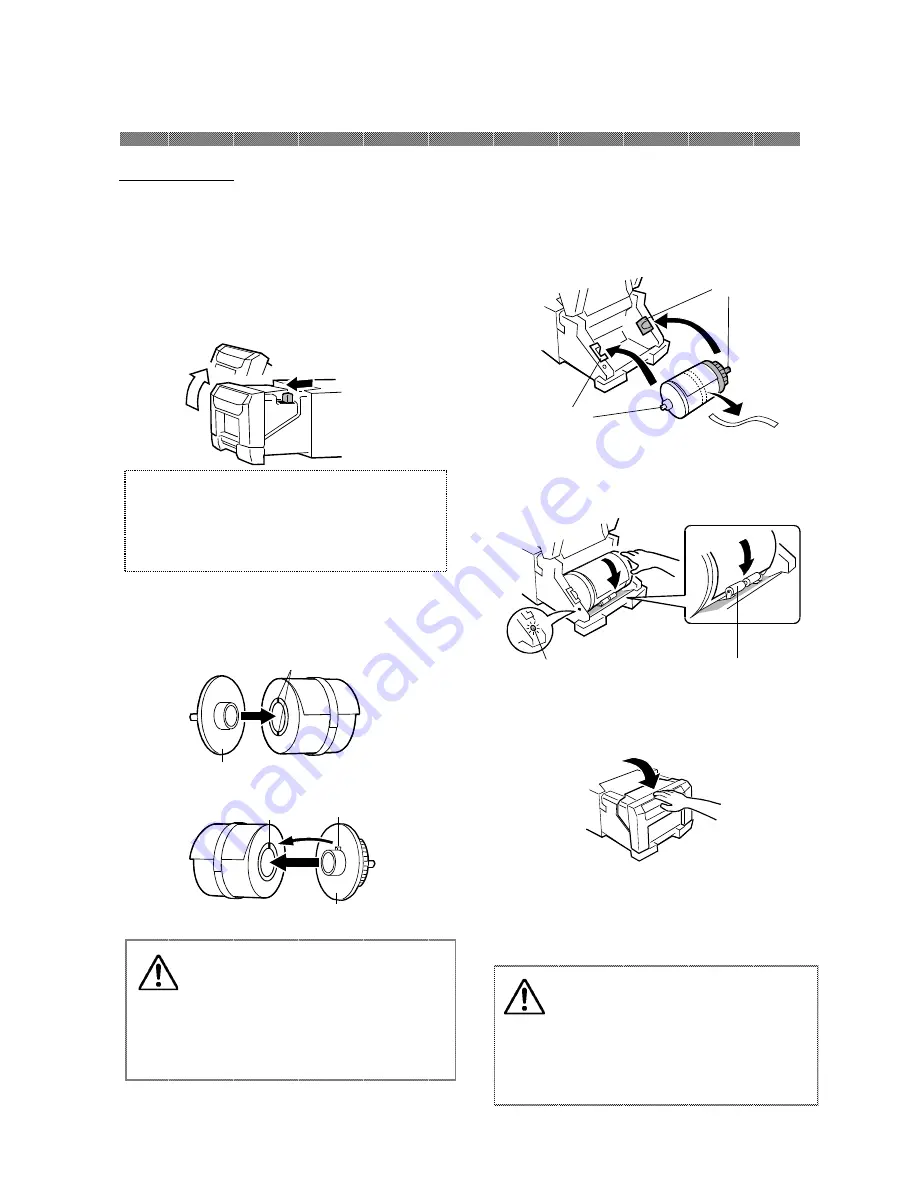
Loading Paper
1. In the drawer unit pull out, pull the
lever to open the open guide unit.
Pull out the drawer unit and pull the
lever to open the open guide unit.
3. Set the paper in the printer.
Set the paper by matching the color of the
paper flange and the color of the holder.
After setting the paper, remove the seal
from the paper.
Turn on the power of the printer by
pressing "|" on the power switch.
2. Install the paper flange (white) and paper
flange (blue).
5. Close the open guide unit.
When close the open guide unit, press on the
center of the open guide unit.
Caution: Close the front cover
carefully so as not to catch your
fingers.
Close the drawer unit and later to
close the open guide unit.
Do not close the drawer unit and
the open guide unit quickly.
Attention: Do not open the drawer unit
quickly or with unnecessary force.
Do not press the drawer unit or place a
heavy object other than paper after opening
the drawer unit.
4. Insert the edge of paper under the guide
roller by rotating the paper flanges.
Insert the paper until the Paper Setting
Lamp is lit.
6. Close the drawer unit.
When the drawer unit is closed,
initialization starts and four sheets of paper
are ejected automatically.
PAPERSET lamp
Guide Roller
Blue
White
Caution: The paper is not set
correctly if there is a gap of about
5mm ~ 10mm
between the paper
flange and paper. Match the notch
of the paper flange and the notch of
the paper core by rotating the paper
flange.
Blue
White
Two notches
Notch
Projection
Содержание P910L
Страница 1: ...Operation Manual Digital Photo Printer P910L...
Страница 4: ......
Страница 8: ......
Страница 16: ......


