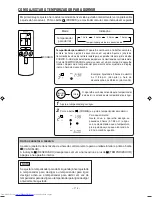
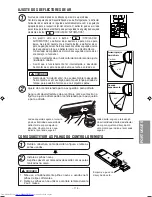
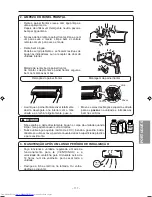
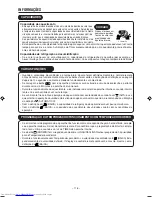
background image

– 124 –

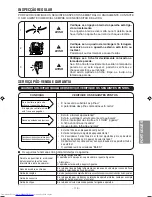
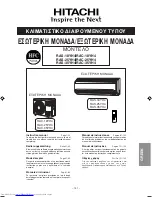
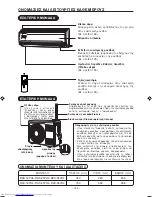
√¡√ª∞™π∂™ ∫∞π §∂π∆√Àƒ°π∂™ ∫∞£∂ ª∂ƒ√À™

∂™ø∆∂ƒπ∫∏ ª√¡∞¢∞

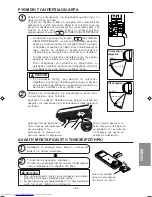
º›ÏÙÚÔ ·¤Ú·

∞ÔÚÚÔÊ¿ ÙË ÛÎfiÓË ÂÌÔ‰›˙ÔÓÙ¿˜ ÙËÓ Ó· ÌÂÈ
ÛÙËÓ ÂÛˆÙÂÚÈ΋ ÌÔÓ¿‰·.
(µÏ. ÛÂÏ›‰· 136)

ªÚÔÛÙÈÓfi Ï·›ÛÈÔ

∂Ӊ›ÍÂȘ ÂÛˆÙÂÚÈ΋˜ ÌÔÓ¿‰·˜

ºˆÙÂÈÓ¤˜ ÂӉ›ÍÂȘ (Ï·Ì¿ÎÈ·) Ô˘ ‰Â›¯ÓÔ˘Ó ÙËÓ
ηٿÛÙ·ÛË ÏÂÈÙÔ˘ÚÁ›·˜ Ù˘ ÌÔÓ¿‰·˜.
(µÏ. ÛÂÏ›‰· 125)

√ÚÈ˙fiÓÙȘ ÂÚÛ›‰Â˜ ∫¿ıÂÙ˜ ÂÚÛ›‰Â˜
(ŒÍÔ‰Ô˜ ·¤Ú·)

(µÏ. ÛÂÏ›‰· 135)

∆ËϯÂÈÚÈÛÙ‹ÚÈÔ

™Ù¤ÏÓÂÈ  ÙÔ  Û‹Ì·  ÏÂÈÙÔ˘ÚÁ›·˜  ÛÙËÓ  ÂÛˆÙÂÚÈ΋
ÌÔÓ¿‰·. ∂ϤÁ¯ÂÈ ÙË ÏÂÈÙÔ˘ÚÁ›· ÔÏfiÎÏËÚ˘ Ù˘
ÌÔÓ¿‰·˜.
(µÏ. ÛÂÏ›‰· 126)

√¡√ª∞™π∞ ª√¡∆∂§√À ∫∞π ¢π∞™∆∞™∂π™

∂•ø∆∂ƒπ∫∏ ª√¡∞¢∞

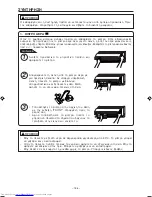
ŒÍÔ‰Ô˜ ·¤Ú·

ŸÙ·Ó  ÍÂÎÈÓ¿  Ë  ÏÂÈÙÔ˘ÚÁ›·

“ı¤ÚÌ·ÓÛ˘”,  ÎÚ‡Ô˜  ·¤Ú·˜

ÂͤگÂÙ·È ·fi ÙÔ ÎÏÈÌ·ÙÈÛÙÈÎfi Î·È

fiÙ·Ó ÍÂÎÈÓ¿ Ë ÏÂÈÙÔ˘ÚÁ›· “„‡Í˘”

‹  “·Ê‡ÁÚ·ÓÛ˘”,  ˙ÂÛÙfi˜  ·¤Ú·˜

ÂͤگÂÙ·È ·fi ÙÔ ÎÏÈÌ·ÙÈÛÙÈÎfi.

™ˆÏ‹Ó·˜ ·ÔÛÙÚ¿ÁÁÈÛ˘

∞ÔÛÙÚ·ÁÁ›˙ÂÈ  ÙÔ  ÓÂÚfi  Ô˘  Û¯ËÌ·Ù›˙ÂÙ·È  ÂÍ·ÈÙ›·˜  Ù˘
Û˘Ì‡ÎÓˆÛ˘ ·fi ÙËÓ ÂÛˆÙÂÚÈ΋ ÚÔ˜ ÙËÓ Â͈ÙÂÚÈ΋ ÌÔÓ¿‰·
ηٿ ÙË ÏÂÈÙÔ˘ÚÁ›· “„‡Í˘” ‹ “·Ê‡ÁÚ·ÓÛ˘”.

™ˆÏËÓÒÛÂȘ Î·È Î·Ïˆ‰ÈÒÛÂȘ

∂›ÛÔ‰ÔÈ ·¤Ú· (¶›Ûˆ Î·È ·ÚÈÛÙÂÚ‹ ÏÂ˘Ú¿)

¶ÏËÚÔÊÔڛ˜ ÁÈ· ÙËÓ Â͈ÙÂÚÈ΋ ÌÔÓ¿‰·:

ŸÙ·Ó ÂÈϤÍÂÙ “¢È·ÎÔ‹” Î·Ù¿ ÙË ÏÂÈÙÔ˘ÚÁ›· Ù˘
ÂÛˆÙÂÚÈ΋˜ ÌÔÓ¿‰·˜, Ô ·ÓÂÌÈÛÙ‹Ú·˜ Ù˘ Â͈ÙÂÚÈ΋˜
ÌÔÓ¿‰·˜  Û˘Ó¯›˙ÂÈ  Ó·  ÂÚÈÛÙÚ¤ÊÂÙ·È  ÁÈ·  10  ¤ˆ˜
60 ‰Â˘ÙÂÚfiÏÂÙ· ÒÛÙ ӷ ÎÚ˘ÒÛÔ˘Ó Ù· ËÏÂÎÙÚÈο
̤ÚË Ù˘ Û˘Û΢‹˜.

∫·Ù¿ ÙË ÏÂÈÙÔ˘ÚÁ›· ı¤ÚÌ·ÓÛ˘, ÙÚ¤¯ÂÈ Û˘Ì‡Îӈ̷
‹ ÓÂÚfi ÂÍ·ÈÙ›·˜ Ù˘ ·fi„˘Í˘.
ªËÓ  Î·Ï‡ÙÂÙ  ÙÔ  ÛÙfiÌÈÔ  ·ÔÛÙÚ¿ÁÁÈÛ˘  Ù˘
Â͈ÙÂÚÈ΋˜  ÌÔÓ¿‰·˜  ÁÈ·Ù›  ÙÔ  ÓÂÚfi  ÌÔÚ›  Ó·
·ÁÒÛÂÈ Û ȉȷ›ÙÂÚ· ¯·ÌËϤ˜ ıÂÚÌÔÎڷۛ˜.

ŸÙ·Ó  Ë  Â͈ÙÂÚÈ΋  ÌÔÓ¿‰·  ÎÚ¤ÌÂÙ·È  ·fi  ÙÔ  Ù·‚¿ÓÈ,
ÙÔÔıÂÙ‹ÛÙ ÙÔ ‰·ÎÙ‡ÏÈԠηȠÙԠۈϋӷ ·ÔÛÙÚ¿ÁÁÈÛ˘
ÛÙÔ ÛÙfiÌÈÔ ·ÔÛÙÚ¿ÁÁÈÛ˘ ÁÈ· ÙËÓ ÂÍ·ÁˆÁ‹ ÙÔ˘ ÓÂÚÔ‡.

™ÙfiÌÈÔ

·ÔÛÙÚ¿ÁÁÈÛ˘

(ÛÙË ‚¿ÛË)

∞ÎÚÔ‰¤ÎÙ˘

Á›ˆÛ˘

(¯·ÌËÏ¿ ÛÙÔ Ï¿È)

ª√¡∆∂§√

¶§∞∆√™ (mm)

˾ê (mm)

µ∞£√™ (mm)

RAS-18YH4, RAS-25YH4, RAS-35YH4

780

280

205

RAC-18YH4, RAC-25YH4, RAC-35YH4

750

548

288

RAS_25_35_GREEK.p65

2004.11.23, 2:45 PM

124

Содержание RAC-18YH4

Страница 1: ...tes instructions après avoir entièrement lu ce mode d emploi Manuale di istruzioni Pag 61 80 Per garantire la migliore prestazione e la più lunga durataleggere attentamente e al completo le seguanti istruzioni Manual de instrucciones Página 81 100 Para obtener el mejor funcionamiento y asegurar años de uso libre de problemas lea cuidadosamente este manual de instrucciones Manual de instruções Pági...

Страница 2: ...ng of 1m between the supports Please ensure smooth flow of water when installing the drain hose If any failure is found in the drain path water drops from the indoor and outdoor units causing wet household effects Make sure that a single phase 230V power source is used The use of other power sources may cause electrical components to overheat and lead to fire PROHIBITION CONNECT EARTH LINE PROHIBI...

Страница 3: ...t and cause electric shock Please ensure that outdoor mounting frame is always stable firm and without defect If not the outdoor unit may collapse and cause danger Do not place plants or animals directly under the air flow as it is bad for the plants or animals Do not climb on the outdoor unit or put objects on it PROHIBITION PROHIBITION PROHIBITION DON T TOUCH DON T TOUCH When operating the unit ...

Страница 4: ...the dehumidified water from the indoor unit to the outdoor during cooling or dehumidifying operation Piping and Wiring Air inlets Rear and left sides About the outdoor unit When Stop is selected during operation of the indoor unit the fan of the outdoor unit continues turning for 10 to 60 seconds to cool the electric parts down In heating operation condensate or water due to defrosting will flow D...

Страница 5: ...at the most recent setting made The unit will immediately go into automatic operation once power is switched on CAUTION Turn off the circuit breaker or pull out the power plug if the unit is not be operated for a long period If the power stays on and the unit is not operated power is slightly consumed in the control circuit The power is saved by turning off the power switch or the circuit breaker ...

Страница 6: ...F time ON TIMER button Select the turn ON time RESERVE button Time setting reservation CANCEL button Cancel time reservation NAMES AND FUNCTIONS OF EACH PART REMOTE CONTROLLER This controls the operation of the indoor unit The range of control is about 7 meters If indoor lighting is controlled electronically the range of control may be shorter in some cases the control signal may not be received T...

Страница 7: ... or COOL depending on the current room temperature When AUTO is first selected the device will determine the current room temperature and select the proper operation mode accordingly When the air conditioner has adjusted the room s temperature to the near preset temperature it will begin to monitor operation If the room temperature subsequently changes the air conditioner will once again select th...

Страница 8: ...ture of the air which blows out HI Economical as the room will become warm quickly But you may feel a chill at the beginning MED Quiet LOW More quiet 2 Set the desired room temperature with the TEMPERATURE buttons the display indicates the setting The temperature setting and the actual room temperature may vary somewhat depending on conditions 3 As the settings are stored in memory in the remote c...

Страница 9: ...ase use the FUNCTION selector Set the desired temperature is available You also can use the FUNCTION selector to select this operation Dehumidifying Function Dehumidifying takes place with a target temperature which is slightly lower than the room temperature setting However target temperature is 16 C for a temperature setting of 16 C If the room temperature becomes lower than the target value ope...

Страница 10: ...may form on the air outlet grille of the indoor unit Press the FUNCTION selector so that the display indicates COOL 1 Set the desired FAN SPEED with the FAN SPEED button the display indicates the setting AUTO The FAN SPEED is HI at first and varies to MED automatically when the preset temperature has been reached HI Economical as the room will become cool quickly MED Quiet LOW More quiet 2 Set the...

Страница 11: ...s the FAN SPEED button HI The strongest air blow MED Quiet LOW More quiet 2 FAN SPEED AUTO When the AUTO fan speed mode is set in the cooling heating operation For the heating operation The fan speed will automatically change according to the temperature of discharged air As room temperature reaches the preset temperature a very light breeze will blow Operation starts in the HI mode to reach the p...

Страница 12: ...rn on off and off on at the designated times The switching occurs first at the preset time that comes earlier The arrow mark appearing on the display indicates the sequence of switching operations 1 Press the OFF TIMER button so that the OFF mark blinks 2 Set the turn off time with the TIMER control button Pressthe RESERVE button PM 3 Press the ON TIMER button so that the OFF mark lights and the O...

Страница 13: ...e ON mark starts lighting instead of flashing and the RESERVED sign lights A beep occurs and the TIMER lamp lights on the indoor unit AM Example The device will turn on early so that the preset temperature be almost reached at 7 00 a m The setting of the turn on time is now complete 4 Set the turn on time with the TIMER control button 5 Point the signal window of the remote controller toward the i...

Страница 14: ...lay indicates the turn off time AM Example If you set 3 hours sleep time at 11 38 p m the turn off time is 2 38 a m Sleep timer Start The device will be turned off by the sleep timer and turned on by on timer 1 Set the ON timer 2 Press the SLEEP button and set the sleep timer AM AM For heating In this case the device will turn off in 2 hours at 1 38 a m and turn on early so that the preset tempera...

Страница 15: ...s should match the marks in the case 1 Do not use new and old batteries or different kinds of batteries together 2 Take out the batteries when you do not use the remote controller for 2 or 3 months CAUTION Push and pull to the direction of arrow Vertical Vertical about 15 about 60 about 45 about 30 When cooling dehumidifying When heating If the AUTO SWING button is pressed once the horizontal air ...

Страница 16: ...1 Open the front panel carefully and remove the filter 2 Vacuum dust from the air filter using vacuum cleaner If there is too much dust wash the filter with a detergent and rinse it thoroughly After that dry it in the shade 3 Set the filter with FRONT mark facing front and slot them into the original state After attaching the filters push the front panel at three arrow portions as shown in figure ...

Страница 17: ...nt panel is fully opened with both hands push the right arm to the inside to release it and while closing the front panel slightly put it out forward Move the shafts of the left and right arms into the steps in the unit and securely insert them into the holes Shaft Step Hole BENZINE THINNER A C I D Do not splash or direct water to the body of the unit when cleaning it as this may cause short circu...

Страница 18: ...ation and the buttons are released the indication of settings will go off in 10 seconds and only the operation mode will be displayed Pressing the button while the unit is in operation will let the protective circuit work so that the unit will not operate for approximately 3 minutes During heating operation the indoor unit s color indicator lamp may flash with no air emitted for a while If you fee...

Страница 19: ...on mode selected Are the air inlets or air outlets of indoor and outdoor units blocked Is the fan speed LOW When it does not operate When it does not cool well When it does not heat well If the remote controller is not transmitting a signal Remote controller display is dim or blank The following phenomena do not indicate unit failure Operation start The unit is preparing to blow warm air Please wa...

Страница 20: ... according to room temperature changes Mist is generated as the air within the room is suddenly cooled by conditioned air Water generated during defrosting operation evaporates and steam is emitted Caused as the smells and particles of smoke food cosmetics etc present in room air become attached the unit and blown off into the room again Defrosting is underway as the heating operation is stopped t...

Страница 21: ...es instructions après avoir entièrement lu ce mode d emploi Manuale di istruzioni Pag 61 80 Per garantire la migliore prestazione e la più lunga durataleggere attentamente e al completo le seguanti istruzioni Manual de instrucciones Página 81 100 Para obtener el mejor funcionamiento y asegurar años de uso libre de problemas lea cuidadosamente este manual de instrucciones Manual de instruções Págin...

Страница 22: ... betragen soll Achten Sie beim Einbau darauf daß eine einwandfreie Wasserableitung möglich ist Wenn in der Abflußleitung Defekte auftreten tropft Wasser von den Innen und Außen geräten und verursacht Wasserschäden an der Wohnungseinrichtung Überprüfen Sie dass eine einphasige 230V Stromquelle eingesetzt ist Die Anwendung von anderen Stromquellen kann zu einem Überhitzen der elektrischen Komponente...

Страница 23: ...erätes stabil standhaft scha denfrei und in gutem Zustand ist Denn sonst könnte das Gerät einstürzen und Gefahren verursachen Keine Tiere oder Pflanzen unmittelbar unter dem Luftstrom halten da dies schädlich für Tiere oder Pflanzen ist Nicht auf das Außengerät steigen oder Gegenstände darauf stellen VERBOT VERBOT VERBOT NICHT BERÜHREN Wenn das Gerät für längere Zeit bei geöffneten Türen und oder ...

Страница 24: ...le Luft aus und in der Betriebsart Kühlen oder Entfeuchten strömtWarmluft aus Ablaßschlauch Sorgt während der Betriebsarten Kühlen oder Entfeuchten für das Abführen des beim Entfeuchten entstehenden Wassers vom Innengerät zum Außengerät Verrohrung und Verdrahtung Lufteingänge Hinten und links Über das Außengerät Wenn während des Betriebs des Innengerätes Stop gewählt wird läuft der Ventilator des ...

Страница 25: ...erneuern möchten wenden Sie sich bitte an Ihren Vertragshändler Wenn das Gerät über einen längeren Zeitraum nicht eingesetzt werden soll den Unterbrecherschalter ausschalten oder den Netzstecker herausziehen VORSICHT TEMPORÄR SCHALTER Wenn die Fernbedienung nicht arbeitet diesen Schalter zum Starten und Ausschalten benutzen Diese vorübergehende Funktion wird zu der neusten Einstellung gemacht Die ...

Страница 26: ... SLEEP Diese Taste verwenden um den Einschlaf Zeitschalter einzustellen Temperaturregeltasten Verwenden Sie diese Tasten um die eingestellte Temperatur zu erhöhen oder zu vermindern Die entsprechende Taste gedrückt halten um die Einstellung schneller zu ändern Zeittasten Diese Taste verwenden um Zeit und Datum einzustellen und zu prüfen RÜCKSTELL Taste RESET Diese Taste nach Austausch der Batterie...

Страница 27: ...KÜHLEN Wenn AUTO als erstes eingestellt wurde bestimmt das Gerät die aktuelle Raumtemperatur und wählt dementsprechend die geeignete Betriebsart Wenn die Klimaanlage die Raumtemperatur annähernd an die voreingestellte Temperatur angepaßt hat beginnt sie mit der Überwachung des Betriebs Wenn sich die Raumtemperatur nachfolgend ändert wählt die Klimaanlage erneut die geeignete Betriebsart Heizen ode...

Страница 28: ...geblasenen Luft HOCH Besonders wirtschaftlich da der Raum schnell erwärmt wird Am Beginn können Sie jedoch eine Kühlung fühlen MITTEL Ruhiger Betrieb NIEDRIG Noch ruhigerer Betrieb 2 Die gewünschte Raumtemperatur mit den Temperaturregeltasten einstellen das Display zeigt die Einstellung an Die eingestellteTemperatur und die tatsächliche Raumtemperatur können etwas abweichen abhängig von den Verwen...

Страница 29: ...dern möchten die Betriebsart Wahltaste verwenden Die gewünschte Temperatur einstellen Sie können auch die Betriebsart Wahltaste verwenden um diesen Betrieb zu wählen Entfeuchtungsfunktion Beim Entfeuchtungsbetrieb liegt die Solltemperatur etwas niedriger als die eingestellte Zimmertemperatur Der Sollwert liegt jedoch bei 16 C wenn die Temperatureinstellung 16 C beträgt Wenn die Zimmertemperatur un...

Страница 30: ...rt Wahltaste drücken bis KÜHLBETRIEB auf dem Display angezeigt wird 1 Die gewünschte Intensität der Luftzirkulation mit der Ventilatordrehzahltaste einstellen das Display zeigt die Einstellung an AUTOMATIK Die Intensität der Luftzirkulation ist zuerst auf HOCH eingestellt und variiert automatisch auf MITTEL wenn die voreingestellte Temperatur erreicht ist HOCH Wirtschaftlich da der Raum schnell ge...

Страница 31: ... taste drücken HOCH Der stärkste Luftzug MITTEL Ruhiger Betrieb NIEDRIG Noch ruhigerer Betrieb 2 VENTILATORDREHZAHL AUTOMATIK Wenn der automatische Ventilatordrehzahlmodus im Kühl Heizbetrieb eingestellt ist Für Kühlbetrieb Die Ventilatordrehzahl ändert automatisch in Abhängigkeit von der Tempera tur der abgeblasenen Luft Sobald dieTemperatur den voreingestellten Wert erreicht wird ein sehr leich ...

Страница 32: ...t zu den voreingestellten Zeitpunkten ein aus und aus ein Der Schaltvorgang wird zuerst für die voreingestellte Zeit ausgeführt die früher auftritt Die auf dem Display erscheinende Pfeilmarkierung zeigt die Reihenfolge der Schaltvorgänge an 1 Die Ausschaltzeit Z e i t s c h a l t e r t a s t e drücken so daß die OFF Markierung blink PM 2 DieAusschaltzeitmitder Zeitschaltuhrtaste einstellen Die SUB...

Страница 33: ...Ein Piepton ertönt und die ZEITSCHALTER Kontrollampe an dem Innengerät leuchtet auf AM Beispiel Die Anlage wird rechtzeitig eingeschaltet so daß die voreingestellte Raumtemperatur um 7 00 Uhr morgens ungefähr erreicht ist Damit ist die Einstellung der Einschaltzeit abgeschlossen 4 Die Einschaltzeit mit der Zeitschaltuhrtaste einstellen 5 Das Signalfenster der Fernbedienung auf die Zimmereinheit ri...

Страница 34: ...ie Einschlaf Zeitschaltuhr um 11 38 p m abends auf 3 Stunden eingestellt wird ist die Ausschaltzeit 2 38 a m morgens Start Das Gerät wird von der Einschlaf Zeitschaltuhr ausund von der Einschalt Zeitschaltuhr eingeschaltet 1 Die Einschalt Zeitschaltuhr einstellen 2 Die SCHLAF Taste drücken und die Einschlaf Zeitschaltuhr einstellen AM AM In diesem Falle schaltet sich das Gerät in 2 Stunden um 1 38...

Страница 35: ...der horizontale Luftableiter nicht längere Zeit schwenken Am horizontalen Luftableiter kann sich Kondenswasser bilden und herabtropfen VORSICHT 2 Einstellen der klimatisierten Luft nach links und rechts Den horizontalen Luftreflektor gemäß Abbildung halten und verstellen um die klimatisierte Luft nach links und rechts zu verstellen Vertikal Vertikal etwa15 etwa 60 etwa 45 etwa 30 Beim Kühlbetrieb ...

Страница 36: ...rausnehmen 2 Mit einem Staubsauger Staub aus dem Luftfilter absaugen Bei zu starker Verschmutzung den Filter mit einem Waschmittel auswaschen und ihn gründlich spülen Danach den Filter an einem schattigen Ort trocknen 3 Die Filter mit der Markierung Front nach vorne einsetzen und sie in Originalstellung anbringen Nach Anbringen der Filter die Stirntafel an drei Punkten wie in der Abbildung dargest...

Страница 37: ...tafel mit beiden Händen vollständig geöffnet wurde den rechten Arm zum Lösen nach innen drücken und ihn nach vorne herausnehmen während man die Stirntafel leicht schließt Die Achsen des linken und rechten Arms in die Stufen des Gerätes bewegen und sie fest und sicher in die Loche einsetzen Achse Stufe Loch BENZINE THINNER A C I D Beim Säubern des Gerätes kein Wasser auf den Gerätekörper spritzen o...

Страница 38: ...em der Raum erwärmt ist den Betrieb leiser machen möchten wird die Verwendung der Einstellung AUTOMATIK empfohlen Mit NIEDRIG Einstellung wird die Kühlleistung leicht reduziert Bei der Einstellung NIEDRIG ändert sich die Wärmeleistung des Gerätes entsprechend der Betrie bsbedingung VERSCHIEDENE FUNKTIONEN Wenn die Timer Funktion programmiert worden ist arbeitet die Einheit auch nicht beim Erreiche...

Страница 39: ...en Positionen eingestellt Sind die ZU Abluftleitungen der internen und externen Einheit verstopft Ist die Ventilatorgeschwindigkeit NIEDRIG Wenn das Gerät nicht funktioniert Wenn das Gerät nicht richtig kühlt Wenn es nicht gut heizt Keine Signalsendung vom Fernbediengerät Das Fernbediendisplay zeigt niedrige Helligkeit oder ist leer Die nachstehenden Ereignisse zeigen keine Einheitsstörung an Betr...

Страница 40: ...m Inneneinheitsdisplay blinkt Da der Störungstyp mittels des Blinkzyklus identifiziert werden kann so überprüfen Sie den Blinkzyklus bevor den Selbstausschalter auszuschalten Anmerkungen Bei ruhigem Betrieb bzw nach dem Abschalten des Gerätes könnten die folgenden Zustände auftreten die jedoch keinerlei Probleme darstellen 1 Ströhmungsgeräusche des Kühlmittels im Kühlmittelkreis 2 Schleifegeräusch...

Страница 41: ...instructions après avoir entièrement lu ce mode d emploi Manuale di istruzioni Pag 61 80 Per garantire la migliore prestazione e la più lunga durataleggere attentamente e al completo le seguanti istruzioni Manual de instrucciones Página 81 100 Para obtener el mejor funcionamiento y asegurar años de uso libre de problemas lea cuidadosamente este manual de instrucciones Manual de instruções Página 1...

Страница 42: ...ppareil vous même Veuillez utiliser un fil de terre Ne placez pas le fil de terre près de l eau des tuyaux à gaz du paratonnerre ou de la ligne du téléphone Une erreur dans l installation d un fil de terre peut causer une électrocution Veiller à utiliser le kit de tuyaux spécifique pour R410A Dans le cas contraire les tuyaux en cuivre risquent de se casser ou il peut y avoir une panne Un interrupt...

Страница 43: ... électrique qui risquerait de provoquer un court circuit Veuillez vous assurer que la cadre d installation l appareil extérieur est bien installé en position stable et sans défaut Sinon il pourrait tomber et devenir une source de danger Il n est pas recommandé de placer des plantes ou des animaux directement sous l arrivée d air Ne montez pas sur l appareil extérieur ni ne posez a d objet dessus I...

Страница 44: ...ant le fonctionnement en mode refroidissement ou déshumidification Tuyaux et câbles Entrées d air à l arrière et à gauche À propos de l appareil extérieur Si Stop est sélectionné pendant le fonctionnement de l appareil intérieur le ventilateur de l appareil extérieur continue de fonctionner pendant 10 à 60 secondes pour refroidir les composants électriques Lors du fonctionnement en mode chauffage ...

Страница 45: ...t jusqu à 20 fois les nettoyer à l aide d un aspirateur ou les rincer sous l eau courante Si vous souhaitez le remplacer contactez votre revendeur Frame VOYANT DU FILTRE Vert Ce voyant s allume lorsque l appareil a fonctionné pendant environ 200 heures et qu il est temps de nettoyer le filtre Le voyant s éteint si vous appuyez sur la touche AUTO SWING et si l appareil est hors tension VOYANT DE FO...

Страница 46: ...r régler la minuterie Touche de mise à l arrêt Permet de choisir l heure à laquelle l appareil doit s arrêter Touche de mise en fonction Permet de choisir l heure à laquelle l appareil doit entrer en fonction Touche de réservation Réservation de réglage horaire Touche d annulation Réservation de durée d annulation AUTOMATIQUE CHAUFFAGE DÉSHUMIDIFICATION REFROIDISSEMENT VENTILATEUR PUISSANCEDESOUFL...

Страница 47: ... en premier l appareil détermine la température ambiante réelle et sélectionne en conséquence le mode de fonctionnement adéquat Lorsque la température ambiante s approche de la température programmée le climatiseur passe progressivement en fonctionnement de surveillance Si la température ambiante change par la suite le climatiseur sélectionne de nouveau le mode de fonctionnement approprié chauffag...

Страница 48: ...rce qu il permet de chauffer rapidement l intérieur de la pièce Cependant une sensation de fraîcheur est ressentie pendant les premières minutes de fonctionnement MOYEN Mode de fonctionnement silencieux FAIBLE Mode de fonctionnement encore plus silencieux 2 Régler la température intérieure de la pièce désirée avec les touches de réglage de température l afficheur fait apparaître le réglage qui est...

Страница 49: ...r du sélecteur de mode de fonctionnement pour changer de mode de fonctionnement Le réglage de température désirée est possible Il est également possible d utiliser le sélecteur de mode de fonctionnement pour choisir ce type de fonctionnement Fonction de déshumidification La déshumidification s active avec une température objective légèrement plus basse que la température du local Quoi qu il en soi...

Страница 50: ...raître le mode de fonctionnement REFROIDISSEMENT 1 Régler l intensité de circulation désirée avec la touche PUISSANCE DE SOUFFLERIE de la soufflerie l afficheur fait apparaître le réglage efectué AUTOMATIQUE L intensité de circulation est réglé sur FORT à la mise en fontion puis se commute automatiquement sur MOYEN dès que la température préréglée est atteinte FORT Réglage économique parce qu il p...

Страница 51: ...FORT C est la souffler de l air le plus fort MOYEN Mode de fonctionnement silencieux FAIBLE Mode de fonctionnement encore plus silencieux 2 Lorsque le mode de fonctionnement automatique de ventilateur est réglé en mode de refroidissement chauffage Cas du mode de chauffage La vitesse de fonctionnement du ventilateur changera automatiquement en fonction de la température de l air pulsé Il y a une br...

Страница 52: ...onction aux heures préréglées La commutation se produit tout d abord pour l heure préréglée qui apparaît en premier La flèche qui apparaît dans l afficheur indique dans quel ordre les opérations de commutation se déroulent 1 Appuyer sur la touche minuterie de mise à l arrêt pour que le signe arrêt clignote PM 2 Introduire l heure de mise à l arrêt avec la touche de minuterie Appuyer sur la touché ...

Страница 53: ...me Un signal sonore est émis et le témoin MINUTERIE s allume dans l appareil intérieur AM Exemple L appareil se mettra en marche tôt afin que la température préréglée soit presque atteinte à 7 heures du matin Le réglage de l heure de mise en marche est maintenant complet 4 Introduire l heure de mise en fonction avec la touche de minuterie 5 Diriger la fenêtre de transmission des signaux du boîtier...

Страница 54: ... Quand un réglage de 3 heures est programmé à la minuterie de temporisation à 23h38 l heure de mise à l arrêt sera 2h38 Mise en fonction Minuteriede temporisation L appareil intérieur s arrêtera par l intermédiaire de la minuterie de temporisation puis se mettra en fonction par l intermédiaire de la minuterie de mise en fonction 1 Faire les réglages de la minuterie de mise en fonction 2 Appuyer su...

Страница 55: ...utter ATTENTION 2 Ajustement de l air conditionné vers la gauche ou la droite Tenez le volet d air vertical comme indiqué sur la figure et ajustez l air conditionné vers la gauche ou la droite Vertical Vertical Environ 15 Environ 60 Environ 45 Environ 30 COMMENT REMPLACER LES PILES DE LA TÉLÉCOMMANDE 1 Retirer le couvercle en procédant de la façon représentée sur l illustration ci contre et retire...

Страница 56: ... soigneusement le panneau frontal et retirez le filtre 2 Enlevez la poussière du filtre à air à l aide d un aspirateur En cas d accumulation trop importante de poussière nettoyez le filtre avec un détergent et rincez le abondamment Par la suite séchez le à l ombre 3 Insérez le filtre dans sa position initiale le côté FRONT orienté vers l avant Une fois le filtre fixé appuyez sur les trois sections...

Страница 57: ...panneau frontal des deux mains placez le bras droit à l intérieur pour le détacher Rabaissez le panneau frontal pour le retirer Placez les axes des bras droit et gauche dans les rails de l appareil et insérez les correctement dans les interstices Axe Rail Interstice BENZINE THINNER A C I D Ne pas verser d eau sur ou contre le corps de l appareil pendant le nettoyage Il y aurait risque de court cir...

Страница 58: ...s allume pour confirmer que la programmation du Minuterie est terminée Lorsque l on appuie sur la touche TEMPORISATION quand le Minuterie EN FONCTION À L ARRÊT est programmé le mode Nuit a la priorité Durant le fonctionnement nuit la vitesse du ventilateur est FAIBLE indépendamment de la vitesse saisie L é cran de la télécommande ne change pas même si la fonction FAIBLE a été choisie PROGRAMMATION...

Страница 59: ...t il bouché par la poussière La température est elle appropriée Les déflecteurs d air horizontaux ont ils été correctement positionnés conformément au mode de fonctionnement sélectionné Y a t il des obstacles aux orifices d entrée ou de sortie de l air de l appareil intérieur ou extérieur Le ventilateur est il à la vitesse FAIBLE Lorsque l appareil refuse de fonctionner Lorsque l appareil n assure...

Страница 60: ...ate d installation Veuillez aussi l informer du défaut en question À noter Au moment de la mise en marche de l équipement notamment lorsque la pièce est sombre une légère variation de luminosité risque de se produire Ceci n a pas d effet nuisible Les conditions imposées par les compagnies d électricité locales doivent être respectées Elles sont dues aux odeurs et aux particules de fumée d aliments...

Страница 61: ...ntes instructions après avoir entièrement lu ce mode d emploi Manuale di istruzioni Pag 61 80 Per garantire la migliore prestazione e la più lunga durataleggere attentamente e al completo le seguanti istruzioni Manual de instrucciones Página 81 100 Para obtener el mejor funcionamiento y asegurar años de uso libre de problemas lea cuidadosamente este manual de instrucciones Manual de instruções Pág...

Страница 62: ...ll acqua sia scorrevole quando viene installato il tubo di drenaggio In caso di malfunzionamento del tubo di drenaggio l acqua può gocciolare dalle unità interna ed esterna bagnando il mobilio Accertarsi di utilizzare una fonte di alimentazione monofase da 230V L uso di altre fonti di alimentazione può provocare il surriscaldamento dei compo nenti elettrici con il conseguente rischio di incendio D...

Страница 63: ... che il telaio di supporto esterno sia fissato saldamente e senza difetti In caso contrario l unità esterna può crollare e provocare danni Non esporre piante o animali direttamente al flusso d aria perché ciò li danneggerebbe Evitare di salire sull unità esterna e di appoggiare su di essa oggetti di ogni tipo DIVIETO DIVIETO DIVIETO NON TOCCARE Quando il condizionatore é in funzionamento con porta...

Страница 64: ...deumidificazione consente lo scarico dell acqua condensata dall unità interna a quella esterna Tubazioni e cablaggi Prese d aria lati posteriore e sinistro Informazioni sull unità esterna Se si seleziona Stop durante il funzionamento dell unità interna la ventola dell unità esterna continua a girare per 10 60 secondi allo scopo di raffreddare le parti elettriche In modalità di riscaldamento si ver...

Страница 65: ...trambi i lati e una volta inserito il filtro nel telaio di supporto rilasciare Quando si utilizzano i filtri di pulizia dell aria e antiodori la capacità di raffreddamento può risultare leggermente ridotta e la velocità di raffreddamento diminuisce I filtri di pulizia dell aria e antiodori possono essere lavati con acqua corrente o puliti con un aspirapolvere e possono essere riutilizzati fino a 2...

Страница 66: ... la funzione di spegnimento automatico Tasti controllo temperatura Utilizzare questi tasti per aumentare o diminuire l impostazione della temperatura Tenere premuto per cambiare il valore più in fretta Tasto ORARIO Usare questo tasto per controllare e regolare l orario e la data Tasto RESET Premere questo tasto dopo la sostituzione delle batterie o quando si verifica un funzionamento anormale Tast...

Страница 67: ...na automaticamente la temperatura corrente della stanza e seleziona la modalità di funzionamento appropriata Dopo avere regolato la temperatura della stanza in base alla temperatura preimpostata il condizionatore comincia a monitorare il funzionamento Se successivamente la temperatura della stanza cambia il condizionatore seleziona di nuovo la modalità di funzionamento appropriata riscaldamento o ...

Страница 68: ...ria che soffia ALTA Un modo economico in quanto la temperatura ambiente aumenta rapidamente E però possibile sentire freddo all inizio MEDIA Modo silenzioso BASSA Ancora più silenzioso 2 Impostare la temperatura ambiente desiderata per mezzo dei tasti di controllo della temperatura il display indica l impostazione L impostazione della temperatura e la temperatura ambiente reale possono differire l...

Страница 69: ...ttore FUNCTION Regolare la temperatura su di un valore desiderato Per scegliere questo modo di funzionamento si può anche usare il tasto di selezione del funzionamento Funzione di deumidificazione La deumidificazione attivasi con una temperatura obiettivo leggermente più bassa dalla temperatura della stanza In ogni caso la temperatura obiettivo è 16 C anche quando la temperatura è regolata a 16 C ...

Страница 70: ...iaccio Premere il tasto di selezione delle operazioni in modo che il display indichi il modo RAFFREDDAMENTO 1 Impostare l intensità di circolazione desiderata col tasto VELOCITÀVENTILATORE il display indica l impostazione AUTOMATICO L intensità della circolazione è ALTA all inizio e diviene automaticamente MEDIA quando la temperatura preimpostata viene raggiunta ALTA Un modo economico in quanto la...

Страница 71: ...NTILATORE ALTA Il flusso d aria più forte MEDIA Modo silenzioso BASSA Ancora più silenzioso 2 VELOCITA DELLA VENTOLA AUTO Se la velocità della ventola AUTO viene impostata durante il riscaldamento o raffreddamento Durante il riscaldamento La velocità della ventola cambia automaticamente a seconda della temperatura dell aria scaricata Quando la temperatura del locale ha raggiunto la temperatura pre...

Страница 72: ... orari determinati La prima operazione di accensione spegnimento avviene all orario preim postato che viene raggiunto per primo La freccia che appare sul display indica la sequenza delle operazioni di accensione spegnimento 1 Premere il tasto SPEGNIMENTOVIATIMER in modo che l indicazione SPEGNIMENTO del display lampeggi PM 2 Regolare l orario di spegnimento con i tasti di controllo del timer Preme...

Страница 73: ...RISERVA si illumina Viene prodotto un segnale acustico e la spia TIMER sull unità interna si illumina AM Esempio L apparecchio si accende presto di modo che la temperatura stabilita venga raggiunta alle ore 7 00 circa L impostazione dell ora di spegnimento ora è completa 4 Impostare l ora di accensione con i tasti di controllo del timer 5 Puntare il telecomando verso l unità interna e premere il t...

Страница 74: ... display indica l orario di spegnimento AM Esempio Se si imposta il timer per 3 ore alle 11 38 p m l orario di spegnimento è alle 2 38 a m Timer spegnimento automatico Avvio L unità viene spenta dal timer per lo spegnimento automatico e viene accesa dal timer di accensione 1 Impostare il timer di accensione 2 Premere il tasto SPEGNIMENTO ed impostare il timer per lo spegnimento automatico AM AM Pe...

Страница 75: ...i tempo Sul deflettore potrebbe formarsi della condensa che pottrebbe gocciolare a terra CAUTELA 2 Regolazione del flusso dell aria condizionata verso sinistra e verso destra Afferrare il deflettore dell aria come indicato nella figura e regolare il flusso dell aria verso sinistra e verso destra Verticale Verticale Circa 15 Circa 60 Circa 45 Circa 30 Durante il raffreddamento e la deumidificazione...

Страница 76: ...uovere la polvere dal filtro dell aria con un aspirapolvere Se è presente una quantità eccessiva di polvere lavare il filtro con un detergente e risciacquarlo abbondantemente Quindi lasciarlo asciugare all ombra 3 Collocare i filtri con la scritta FRONT DAVANTI rivolta verso l alto e fissarli nella posizione originale Dopo avere riagganciato i filtri premere il pannello anteriore nei tre punti ind...

Страница 77: ...e Dopo avere sollevato completamente il pannello anteriore con entrambe le mani sganciarlo spingendo il braccio destro all interno Quindi richiudere leggermente il pannello anteriore e tirarlo verso di sé Collocare le aste dei bracci sinistro e destro negli appositi supporti dell unità e inserirle saldamente nei fori Asta Supporto Foro BENZINE THINNER A C I D Non gettare o dirigere acqua sul condi...

Страница 78: ...ti vengono rilasciati l indicazione delle impostazioni si spe gne entro 10 secondi e viene visualizzata solamente la modalità di funzionamento Premendo il pulsante con l unità in funzione il circuito protettivo funziona in modo che l unità non possa funzionare per 3 minuti circa Nella modalità di riscaldamento la spia indicatrice colorata dell unità per interni può lampeggiare senza che venga emes...

Страница 79: ...lle unità per interni ed esterni sono intasate La velocità della ventola è BASSA Quando il condizionatore non funziona Quando il condizionatore non raffredda o non riscalda bene Il telecomando non trasmette alcun segnale Il display del telecomando è sfocato o spento I seguenti fenomeni non indicano un guasto all unità All avviamento L unità è pronta per fornire aria calda Attendere prego Durante i...

Страница 80: ...e il proprio rivenditore Contattare immediatamente il proprio rivenditore se si verifica uno dei seguenti fenomeni L interruttore di rete si disinserisce oppure il fusibile salta frequentemente L interruttore di rete non funziona regolarmente Sono penetrati accidentalmente acqua o corpi estranei nell unità Il cavo di alimentazione si surriscalda eccessivamente oppure il relativo isolamento è usura...

Страница 81: ... présentes instructions après avoir entièrement lu ce mode d emploi Manuale di istruzioni Pag 61 80 Per garantire la migliore prestazione e la più lunga durataleggere attentamente e al completo le seguanti istruzioni Manual de instrucciones Página 81 100 Para obtener el mejor funcionamiento y asegurar años de uso libre de problemas lea cuidadosamente este manual de instrucciones Manual de instruçõ...

Страница 82: ...n dificultad Si se encontrase alguna avería en la línea de drenaje se produciría una fuga de agua en las unidades interior y exterior pudiendo llegar a mojar los enseres de la casa Asegúrese de utilizar una fuente de alimentación monofásica de 230V El uso de otras fuentes de alimentación puede sobrecalentar los componentes y por lo tanto provocar un incendio PROHIBICIÓN CONEXIÓN DE LA LÍNEA DE TIE...

Страница 83: ... causar una sacudida eléctrica Asegúrese de que el armazón exterior esté siempre estable firme y sin defectos De lo contrario la unidad exterior podría soltarse y causar daños No coloque plantas ni animales directamente debajo de la corriente de aire ya que esta es dañina para ambos No se suba a la unidad exterior ni coloque objetos encima PROHIBICIÓN PROHIBICIÓN PROHIBICIÓN NO TOCAR Si el calor d...

Страница 84: ... exterior durante las operaciones de refrigeración y deshumidificación Tubería y cableado Entradas de aire lados posterior e izquierdo Acerca de la unidad exterior Cuando se selecciona Stop durante el funcionamiento de la unidad interior el ventilador de la unidad exterior sigue girando durante 10 a 60 segundos para enfriar las partes eléctricas Durante la operación de calefacción se acumula agua ...

Страница 85: ... Y FUNCIONES DE CADA COMPONENTE INDICADOR LUMINOSO DEL FILTRO Verde Después de 200 horas de funcionamiento el piloto del filtro de la unidad se enciende para anunciar que ya es hora de limpiar el filtro El indicador luminoso se apaga cuando se presiona el botón OSCILACIÓN AUTOMÁTICA con la unidad en reposo INDICADOR LUMINOSO DE FUNCIONAMIENTO Amarillo Este piloto se enciende durante el funcionamie...

Страница 86: ...isión de señales señal de transmisión Dirija esta ventanilla hacia la unidad interior al enviar señales La señal de transmisión parpadea cuando se emite una señal Visualizador Indica la temperatura ambiente seleccionada la hora actual el estado del temporizador y la función y la intensidad de ventilación seleccionada Botón de INICIO PARADA Presione este botón para poner la unidad en marcha Presión...

Страница 87: ... el botón INICO PARADA La unidad se pondrà en marcha con un pitido Presión de nuevo para detener la unidad Puesto que los ajustes se almacenan en la memoria del mando a distancia la próxima vez bastará con apretar el botón INICIO PARADA Se puede aumentar o reducir el ajuste de temperatura según convenga en un máximo de 3 C Cada vez que presione el botón de TEMPERATURA el ajuste de temperatura se m...

Страница 88: ...ire que sale de la unidad ALTA Económica La habitación se calentará rápidamente pero puede sentir un poco de frío al principio MEDIA Silenciosa BAJA Más silenciosa 2 Seleccione la temperatura ambiente deseada con los botones de TEMPERATURA el visualizador indica el ajuste La temperatura preajustada y la temperatura ambiente actual pueden variar ligeramente dependiendo de las condiciones 3 Puesto q...

Страница 89: ...ratura está disponible También se puede utilizar el selector de FUNCIONES para seleccionar esta función Función de deshumidificación La función de deshumidificación se pondrá en marcha siempre y cuando la temperatura seleccionada sea ligeramente inferior a la temperatura ambiente preajustada Sin embargo la temperatura seleccionada es de 16ºC para un ajuste de temperatura de 16 C Si la temperatura ...

Страница 90: ... en la rejilla de salida de aire de la unidad interior Presione el selector de FUNCIONES hasta que el visualizador indique FRÍO 1 Seleccione la VELOCIDAD DEL VENTILADOR deseada con el botón VELOCIDAD DEL VENTILADOR el visualizador indica el ajuste AUTOMÁTICO Al principio la VELOCIDAD DEL VENTILADOR es ALTA y pasa a MEDIA automáticamente cuando se alcanza la temperatura preajustada ALTA Económica L...

Страница 91: ...DOR ALTA La corriente de aire más intensa MEDIA Silenciosa BAJA Más silenciosa 2 VELOCIDAD DEL VENTILADOR AUTOMÁTICA É Cuando el modo automático de velocidad del ventilador se ajusta Para la calefacción La velocidad del ventilador cambia automáticamente en función de la tem peratura del aire que sale Cuando la temperatura ambiente alcanza el valor preajustado de la unidad sale una brisa ligera La ...

Страница 92: ... CONEXIÓN y apagará DESCONEXIÓN a las horas establecidas Elcambiodeunestadoaotroseproduce a la hora preajustada más temprana La señal de flecha que aparece en el visualizador indica la secuencia de los cambios de estado 1 Presione el botón TEMPORIZADOR DE DESCONEXIÓN hasta que la señal DESCONEXIÓN parpadee PM 2 Ajuste la hora de des conexión con el botón de controldelTEMPORIZADOR Presione el botón...

Страница 93: ...ESERVADO se iluminará Se oirá un pitido y el indicador luminoso TEMPORIZADOR de la unidad interior se iluminará AM Ejemplo El aparato se enciende pronto de modo que la temperatura predeterminada se alcance alrededor de las 7 00 de la mañana La configuración de la hora de antivación se ha completado 4 Ajuste la hora de conexión con el botón de control del TEMPORIZADOR 5 Dirija la ventanilla de emis...

Страница 94: ...octurna el visualizador muestra la hora de desconexión AM Ejemplo Si a las 11 38 p m selecciona 3 horas la unidad se desconectará a las 2 38 a m Función Nocturna Inicio La unidad se conectará mediante la función de desconexión nocturna y se conectará mediante el temporizador de conexión 1 Presione el botón del temporizador de conexión 2 Presione el botón FUNCIÓN NOCTURNA y ajuste el temporizador d...

Страница 95: ...rían formar gotas de agua en el deflector horizontal y caer sobre los objetos PRECAUCIÓN 2 Ajuste del aire acondicionado hacia la izquierda y la derecha Sujete el deflector vertical tal como se muestra en la figura y ajuste el aire acondicionado hacia la izquierda y la derecha Vertical Vertical alrededor de 15 alrededor de 60 alrededor de 45 alrededorde30 En el enfriamiento y deshumidificación En ...

Страница 96: ...con cuidado el panel frontal y retire el filtro 2 Aspire el polvo del filtro de aire con un aspirador al vacío Si se ha acumulado demasiado polvo lave el filtro con un detergente y aclárelo a conciencia A continuación déjelo secar a la sombra 3 Sujete los filtros con la señal FRONT Frontal hacia delante e insértelos en su lugar Después de colocar los filtros empuje el panel frontal por los tres pu...

Страница 97: ...to por completo el panel frontal con ambas manos empuje el brazo derecho hacia el interior para soltarlo y mientras lo cierra ligeramente sáquelo hacia delante Mueva los ejes de los brazos izquierdo y derecho hacia el tramo de la unidad e insértelos de forma segura en los agujeros Eje Tramo Agujero BENZINE THINNER A C I D Al limpiarlo no derrame ni dirija el agua directamente al cuerpo de la unida...

Страница 98: ...distancia antes de poner en marcha el funcionamiento manual y se sueltan los botones la indicación de los ajustes se apagará al cabo de 10 segundos y sólo se mostrará el modo de funcionamiento Si se pulsa el botón mientras la unidad está en funcionamiento se disparará el circuito de protección de modo que la unidad no funcionará durante aproximadamente 3 minutos Durante el funcionamiento en modo d...

Страница 99: ...cidad del ventilador en BAJA Si no funciona Si no enfría correctamente Si no calienta correctamente Si el mando a distancia no transmite ninguna señal El visualizador está tenue o no muestra nada Las siguientes circunstancias no indican un fallo de la unidad de aire acondicionado Inicio del funcionamiento La unidad se está preparando para emitir aire caliente Por favor espere Durante el funcionami...

Страница 100: ...és de realizarse las comprobaciones anteriores apague el disyuntor o desenchufe el cable de alimentación y póngase en contacto con su distribuidor Póngase en contacto inmediatamente con su distribuidor si se produce alguna de las siguientes circunstancias El disyuntor se apaga o el fusible se funde con frecuencia El funcionamiento del interruptor no es estable Se han introducido accidentalmente el...

Страница 101: ...s présentes instructions après avoir entièrement lu ce mode d emploi Manuale di istruzioni Pag 61 80 Per garantire la migliore prestazione e la più lunga durataleggere attentamente e al completo le seguanti istruzioni Manual de instrucciones Página 81 100 Para obtener el mejor funcionamiento y asegurar años de uso libre de problemas lea cuidadosamente este manual de instrucciones Manual de instruç...

Страница 102: ...tada com um espaço máximo de 1 m entre os suportes Assegure um fluxo suave da água ao efectuar a instalação da mangueira de escoamento Se houver alguma falha no percurso de drenagem cairá água das unidades interior e exterior molhando o recheio da habitação Certifique se que seja usada uma única fase de 230 V da alimentação eléctrica O uso de uma alimentação eléctrica diferente pode causar aquecim...

Страница 103: ... eléctricas que causem choques eléctricos Assegure se de que a armação exterior se encontra sempre estável firme e sem defeitos Caso contrário a unidade exterior pode cair e causar perigos Não coloque plantas ou animais directamente sob o fluxo de ar porque é prejudicial para as plantas ou animais Não suba para cima da unidade exterior nem coloque objectos em cima do mesmo É PROIBIDO É PROIBIDO É ...

Страница 104: ...nto Drena a água recolhida durante a operação de desumidificação ou arrefecimento da unidade interior para o exterior Tubagem e cablagem Entradas de ar lados posterior e esquerdo Acerca da unidade interior Quando Stop Parar for seleccionado durante a operação da unidade interior a ventoinha da unidade exterior continua a rodar durante 10 a 60 segundos para arrefecer as partes eléctricas Na operaçã...

Страница 105: ...o seu representante Frame LUZ DO TEMPORIZADOR Cor de laranja Esta luz acende se sempre que o temporizador estiver em funcionamento DENOMINAÇÃO E FUNÇÃO DE CADA COMPONENTE LUZ DO FILTRO Verde Esta luz acende se depois de o aparelho ter funcionado cerca de 200 horas no total para indicar que é necessário limpar o filtro A luz apaga se quando o botão OSCILAÇÃO AUTOMÁTICA é premido depois de interromp...

Страница 106: ...Botões da TEMPERATURA Use estes botões para aumentar ou reduzir a temperatura ajustada mantendo o botão premido o valor altera se mais rapidamente Botão de HORA Utilize esse botão para ajastar e verificar a hora e a data Botão de REAJUSTE Prima este botão depois de substituir as pilhas ou sempre que detectar um funcionamento irregular Selector de FUNÇÕES Use este botão para seleccionar o modo de o...

Страница 107: ... AQUECIMENTO ou ARREFECIMENTO dependendo da actual temperatura ambiente Ao seleccionar primeiramente AUTOMÁTICO o dispositivo determinará a temperatura ambiente e seleccionará a operação adequada Assim que o aparelho de ar condicionado tiver ajustado a temperatura ambiente para a temperatura pré ajustada mais próxima começará a monitorizar a operação Se a temperatura ambiente se alterar o aparelho...

Страница 108: ...nte de acordo com a temperatura do ar soprado ALTA Económica já que a sala aquece rapidamente Mas a princípio poderá sentir arrepios MÉDIA Silenciosa BAIXA Mais silienciosa 2 Ajuste a temperatura ambiente desejada com os botões da TEMPERATURA o mostrador indica o ajuste O ajuste de temperatura e a temperatura ambiente actual poderão sofrer variações dependendo das condições 3 Visto que os ajustes ...

Страница 109: ...ara mudar o modo de operação Pode ajustar a temperatura desejada Também pode utilizar o selector de FUNÇÕES para seleccionar esta operação Função de desumidificação A desumidificação activa se em relação a uma temperatura meta que é ligeiramente mais baixa do que a temperatura da sala Entretanto a temperatura meta é de 16 C mesmo com uma temperatura definida em 16 C Se a temperatura da sala descer...

Страница 110: ...e algumas gotas na grelha de saída de ar do aparelho interior Prima o selector de FUNÇÕES até aparecer no mostrador a indicação ARREFECIMENTO 1 Ajuste a velocidade da ventoinha desejada com o botão VELOCIDADE DA VENTOINHA O mostrador indica o ajuste AUTOMÁTICO A VELOCIDADE DA VENTOINHA é ALTA a princí pio e varia automaticamente para MÉDIA depois de a temperatura préajustada ter sido atingida ALTA...

Страница 111: ...de ar MÉDIA Silenciosa BAIXA Mais silenciosa 2 VELOCIDADE DAVENTOINHA AUTOMÁTICO Quando o modo AUTOMÁTICO da velocidade da ventoinha está ajustado na operação de arrefecimento aquecimento Para a operação de aquecimento A velocidade da ventoinha muda automaticamente de acordo com a temperatura do ar descarregado Depois da temperatura da sala ter chegado à temperatura definida soprará uma brisa muit...

Страница 112: ... activar se á e desactivar se á na hora designada A activação efectua se primeiro na hora pré ajustada que aparece mais cedo A seta que aparece no mostrador indica a sequência das activações 1 Prima o botão T E M P O R I Z A D O R PARA DESLIGAR até queaindicação DESLIGAR fique a piscar PM 2 Ajuste a hora de desactivaçãocomobotão de comando do TEMPORI ZADOR Prima o botão RESERVA PM 3 Prima o botão ...

Страница 113: ...nde se Produz se um sinal acústico e a luz do TEMPORIZADOR acende se na unidade interior AM Por exemplo O aparelho liga se cedo de maneira que a temperatura previamente seleccionada seja quase alcançada lá pelas 7 00 da manhã A regulação da hora para acender se agora está terminada 4 Ajuste a hora de activação com o botão de comando do TEMPORIZADOR 5 Aponte a janela de transmissão de sinais do con...

Страница 114: ...Exemplo Ajustando 3 horas de dormir às 11 38 p m da noite a hora de desactivação é às 2 38 a m da manhã Temporizador para dormir Início O aparelho será desactivado pelo temporizador para dormir e activado pelo temporizador para ligar 1 Ajuste o temporizador para ligar 2 Prima o botão DORMIR e ajuste o temporizador para dormir AM AM Para aquecimento Neste caso o aparelho desliga se passadas 2 horas...

Страница 115: ...ento não se deve manter o desviador horizontal de ar em oscilação durante um longo período de tempo pois poderão formar se e cair algumas gotas CUIDADO 2 Ajuste do ár condicionado para a esquerda e paraa direita Segure um dos deflectores de ar verticais como se mostra na figura e ajuste a direccao do ar condicionado para a esquerda e para a direita COMO SUBSTITUIR AS PILHAS DO CONTROLO REMOTO 1 Re...

Страница 116: ...o PROCEDIMENTO 1 Abra cuidadosamente o painel frontal e retire o filtro 2 Limpe o pó do filtro de ar utilizando o aspirador Caso este tenha muito pó lave o com detergente e passe o bem por água Depois deixe o secar à sombra 3 Posicione o filtro com a indicação FRONT voltada para a frente e encaixe o conjunto na respectiva posição original Depois de montar os filtros empurre o painel frontal nas ár...

Страница 117: ...ontal estiver totalmente aberto desengate o no interior com a mão direita e ao fechá lo ligeiramente puxe o Mova os veios dos braços esquerdo e direito para os passos na unidade e introduza os bem nos orifícios Veio Passo Orifício BENZINE THINNER A C I D Não espalhe o deite directamente água no corpo da unidade quando limpar isso poderá causar curto circuitos Nunca utilize água quente acima de 40 ...

Страница 118: ...ntoinha em ALTA ou se quiser tornar a operação da unidade mais silenciosa após a sala estar aquecida é recomendada a utilização da definição AUTOMÁTICO Com a definição em BAIXA a capacidade de refrigeração do aparelho será um pouco mais baixa Com a definição BAIXA a capacidade de aquecimento das unidades variará com as condições de operação VÁRIAS FUNÇÕES Se o timer tiver sido programado o aparelh...

Страница 119: ...ou nas saídas de ar do aparelho interno ou externo O ventilador está na velocidade BAIXA Quando a unidade não funciona Quando a unidade não arrefece bem Quando a unidade não aquecer bem Se o controlo remoto não estiver a transmitir sinais O display do controlo remoto está fraco ou apagado Os seguintes fenómenos não indicam defeitos do aparelho Início de funcionamento O aparelho está a preparar se ...

Страница 120: ...cha da tomada e contacte imediatamente o seu agente de vendas Contacte imediatamente o seu revendedor se houver um dos seguintes fenómenos O interruptor desligar se ou se queimar se o fusível frequentemente O funcionamento do comutador não for estável Qualquer material estranho ou água acidentalmente entrar no aparelho interior O cabo de alimentação eléctrica aquecer se excessivamente ou o seu for...

Страница 121: ...tructions après avoir entièrement lu ce mode d emploi Manuale di istruzioni Pag 61 80 Per garantire la migliore prestazione e la più lunga durataleggere attentamente e al completo le seguanti istruzioni Manual de instrucciones Página 81 100 Para obtener el mejor funcionamiento y asegurar años de uso libre de problemas lea cuidadosamente este manual de instrucciones Manual de instruções Página 101 ...

Страница 122: ... ÙÔ ÂÚÈÛÛfiÙÂÚÔ fi 1 Ì ÙÚÔ Í ÛÊ Ï ÛÙ ÙËÓ ÓÂÌ fi ÈÛÙË ÚÔ ÙÔ ÓÂÚÔ Î Ù ÙËÓ ÂÁÎ Ù ÛÙ ÛË ÙÔ ÛˆÏ Ó ÔÛÙÚ ÁÁÈÛË Ó Ú ÂÈ ÛÙÔ ÛÙË È ÚÔÌ ÔÛÙÚ ÁÁÈÛË ı ÛÙ ÂÈ ÓÂÚfi fi ÙËÓ ÂÛˆÙÂÚÈÎ Î È ÙËÓ Â͈ÙÂÚÈÎ ÌÔÓ Ú ÔÓÙ Î È ÚÔÎ ÏÒÓÙ ËÌÈ ÛÙÔ Û ÙÈ ÃÚËÛÈÌÔ ÔÈ ÛÙ ÌÔÓÔÊ ÛÈÎ ËÁ ÙÚÔÊÔ ÔÛ ÚÂ Ì ÙÔ 230V Ú ÛË ÏÏˆÓ ËÁÒÓ ÙÚÔÊÔ ÔÛ Ì ÔÚÂ Ó ÚÔÎ Ï ÛÂÈ ÙËÓ ÂÚı ÚÌ ÓÛË ÙˆÓ ËÏÂÎÙÚÈÎÒÓ ÂÍ ÚÙËÌ ÙˆÓ ÌÂ Î Ó ÓÔ ÚÎ ÁÈ ƒ À π Ó ÛÙ ÙË ÁÚ ÌÌ Á ˆÛË ƒ À π ƒ...

Страница 123: ... ڠ٠٠fiÙÈ ÙÔ Ï ÛÈÔ ÛÙÂÚ ˆÛË ÙË Â͈ÙÂÚÈÎ ÌÔÓ Â Ó È ÛÙ ıÂÚfi Î È ÛÊ ÏÒ ÙÔ ÔıÂÙËÌ ÓÔ È ÊÔÚÂÙÈÎ Ë Â͈ÙÂÚÈÎ ÌÔÓ Ì ÔÚÂ Ó ÛÂÈ ÚÔÎ ÏÒÓÙ ÛÔ ÚÔ ÎÈÓ ÓÔ ªËÓ ÙÔ ÔıÂÙ ÙÂ Ê Ù Ò Â ı ÛÙË ÚÔ ÙÔ Ú fi ÙÔ ÎÏÈÌ ÙÈÛÙÈÎfi ÁÈ Ù Â Ó È Â È Ï ÁÈ Ù Ê Ù Î È Ù Ò ªËÓ Ó ÓÂÙ ÛÙËÓ Â͈ÙÂÚÈÎ ÌÔÓ Î È ÌËÓ ÙÔ ÔıÂ٠٠ÓÙÈΠÌÂÓ Â Óˆ Û ٠ƒ À π ƒ À π ƒ À π ª π ª π ŸÙ Ó ÙÔ ÎÏÈÌ ÙÈÛÙÈÎfi ÏÂÈÙÔ ÚÁ Ì ÙËÓ fiÚÙ Î È Ù Ú ı Ú ÓÔÈÎÙ Ë ÁÚ Û ÒÚ...

Страница 124: ... ÂÙ È ÂÍ ÈÙ ÙË Û Ì ÎÓˆÛË fi ÙËÓ ÂÛˆÙÂÚÈÎ ÚÔ ÙËÓ Â͈ÙÂÚÈÎ ÌÔÓ Î Ù ÙË ÏÂÈÙÔ ÚÁ ÍË Ê ÁÚ ÓÛË ˆÏËÓÒÛÂÈ Î È Î Ïˆ ÈÒÛÂÈ ÛÔ ÔÈ Ú Ûˆ Î È ÚÈÛÙÂÚ ÏÂ Ú ÏËÚÔÊÔÚ Â ÁÈ ÙËÓ Â͈ÙÂÚÈÎ ÌÔÓ ŸÙ Ó Â ÈÏ ÍÂÙÂ È ÎÔ Î Ù ÙË ÏÂÈÙÔ ÚÁ ÙË ÂÛˆÙÂÚÈÎ ÌÔÓ Ô ÓÂÌÈÛÙ Ú ÙË Â͈ÙÂÚÈÎ ÌÔÓ Û Ó ÂÈ Ó ÂÚÈÛÙÚ ÊÂÙ È ÁÈ 10 ˆ 60  ÙÂÚfiÏ ٠ÒÛÙÂ Ó ÎÚ ÒÛÔ Ó Ù ËÏÂÎÙÚÈÎ Ì ÚË ÙË Û ÛΠ٠ÙË ÏÂÈÙÔ ÚÁ ı ÚÌ ÓÛË ÙÚ ÂÈ Û Ì ÎÓˆÌ ÓÂÚfi ÂÍ ÈÙ ÙË fi ÍË ªËÓ Î Ï Ù...

Страница 125: ... ÛÙÈ Ô ÏÂ Ú ÙÔ Ì ÚÈ Ó Ì Ô Ó ÛÙÔ Ï ÛÈÔ fi ÔÛË ÍË ÊÙÂÈ ÂÏ ÊÚÒ Î È Ë Ù ÙËÙ ÍË ÌÂÈÒÓÂÙ È Ï ÁÔ fiÙ Ó ÚËÛÈÌÔ ÔÈÂ Ù È ÙÔ Ê ÏÙÚÔ Ú Î È ÙÔ ÔÛÌËÙÈÎfi Ê ÏÙÚÔ Ô Ê ÏÙÚÔ Ú Î È ÙÔ ÔÛÌËÙÈÎfi Ê ÏÙÚÔ Ï ÓÔÓÙ È Î È Ì ÔÚÔ Ó Ó ÚËÛÈÌÔ ÔÈËıÔ Ó Ì ÚÈ Î È 20 ÊÔÚ ŸÙ Ó ı ÏÂÙÂ Ó ÙÔ ÓÙÈÎ Ù ÛÙ ÛÂÙ  ı Óı Ù ÛÙÔÓ ÓÙÈ ÚfiÛˆ Ô ª π π π Àƒ π ª ƒ À π π ø ƒπ ª ª π ºπ ƒ À Ú ÛÈÓÔ ªÂÙ fi ÂÚ Ô 200 ÒÚ ÏÂÈÙÔ ÚÁ ÙË Û ÛΠÙÔ Ï Ì ÎÈ ºπ ƒ À Ó ÂÈ ÁÈ...

Страница 126: ...À À ÃÚËÛÈÌÔ ÔÈ ÛÙ Ùfi ÙÔ ÎÔ Ì ÁÈ Ó Ú ıÌ ÛÂÙ ÙÔ ÚÔÓÔ È Îfi ÙË ÓÔ Ô Ì È ƒª ƒ π ªÂ Ù Ù ÎÔ Ì È Ì ÔÚ ÙÂ Ó Í ÛÂÙÂ Ó ÌÂÈÒÛÂÙ ÙËÓ ÙÈÌ ÙË ıÂÚÌÔÎÚ Û Ú ÙÒÓÙ Ù ÙËÌ Ó Ë ıÂÚÌÔÎÚ Û ÏÏ ÂÈ ÈÔ ÁÚ ÁÔÚ Ô Ì Ãƒ ÃÚËÛÈÌÔ ÔÈ ÛÙ Ùfi ÙÔ ÎÔ Ì ÁÈ Ó Ú ıÌ ÛÂÙÂ Î È Ó ÂÏ ÁÍÂÙ ÙËÓ ÙÚ Ô Û ÒÚ Î È ËÌÂÚÔÌËÓ Ô Ì È º ƒ RESET Ù ÛÙ Ùfi ÙÔ ÎÔ Ì ÊÔ ÏÏ ÍÂÙÂ Ì Ù Ú Â fiÙ Ó ÚÔ ÛÈ ÛÙÂ Ô ÔÈ ÔÙÂ ÓˆÌ Ï ÛÙË ÏÂÈÙÔ ÚÁ Ô Ì π π Àƒ π ÃÚËÛÈÌÔ ÔÈ ÛÙ Ùfi ...

Страница 127: ... ÏÂÈÙÔ ÚÁ ƒª æÀ Ó ÏÔÁ Ì ÙËÓ ÙÚ Ô Û ıÂÚÌÔÎÚ Û ÙÔ ÒÚÔ ŸÙ Ó Â ÈÏ ÁÂÙ À ª π Àƒ π ÁÈ ÚÒÙË ÊÔÚ Ë Û ÛΠÓÈ Ó ÂÈ ÙËÓ ÙÚ Ô Û ıÂÚÌÔÎÚ Û ÙÔ ÒÚÔ Î È Â ÈÏ ÁÂÈ ÙÔÓ Î Ù ÏÏËÏÔ ÙÚfi Ô ÏÂÈÙÔ ÚÁ ŸÙ Ó Ë ıÂÚÌÔÎÚ Û ÙÔ ÒÚÔ ÚÔÛÂÁÁ ÛÂÈ ÙË Ú ıÌÈÛÌ ÓË ıÂÚÌÔÎÚ Û ÂÓÂÚÁÔ ÔÈÂ Ù È Ë ÏÂÈÙÔ ÚÁ Ú ÎÔÏÔ ıËÛË ÙÔ ÎÏÈÌ ÙÈÛÙÈÎÔ Ó Ë ıÂÚÌÔÎÚ Û ÏÏ ÍÂÈ ÙÔ ÎÏÈÌ ÙÈÛÙÈÎfi ı  ÈÏ ÍÂÈ ÙËÓ Î Ù ÏÏËÏË ÏÂÈÙÔ ÚÁ ı ÚÌ ÓÛË ÍË ÒÛÙÂ Ó ÚÔÛ ÚÌfiÛÂÈ ÙË ıÂÚÌÔ...

Страница 128: ...Û ÙÔ Ú Ô Á ÓÂÈ fi ÙÔ ÎÏÈÌ ÙÈÛÙÈÎfi Àæ ÈÎÔÓÔÌÈÎ ÁÈ Ù Ô ÒÚÔ ÂÛÙ ÓÂÙ È ÁÚ ÁÔÚ ª ÔÚ fï ÛÙËÓ Ú Ó ÓÈÒÛÂÙÂ Ó ÚÂ Ì ÎÚ Ô Ú ª π Û Ë ÏÂÈÙÔ ÚÁ à ª ÎfiÌË ÈÔ Û Ë ÏÂÈÙÔ ÚÁ 2 ƒ ıÌ ÛÙ ÙËÓ Â Èı ÌËÙ ıÂÚÌÔÎÚ Û ˆÌ Ù Ô Ì ٠ÎÔ Ì È ƒª ƒ π ÛÙËÓ ÔıfiÓË ÂÌÊ Ó ÂÙ È Ë ÓÙ ÛÙÔÈ Ë Ó ÂÈÍË Ú ıÌÈÛÌ ÓË ıÂÚÌÔÎÚ Û Î È Ë Ú ÁÌ ÙÈÎ ıÂÚÌÔÎÚ Û ÙÔ ÒÚÔ Ì ÔÚÂ Ó ÚÔ ÛÈ Ô Ó ÔÎÏ ÛÂÈ Ó ÏÔÁ Ì ÙÈ Û Óı Π3 ÂÈ ÔÈ Ú ıÌ ÛÂÈ ÔıËΠÔÓÙ È ÛÙË ÌÓ ÌË ÙÔ ÙË...

Страница 129: ...Ô ÚÁ ÚËÛÈÌÔ ÔÈ ÛÙ ÙÔ ÎÔ Ì π π Àƒ π ª ÔÚ ÙÂ Ó Ú ıÌ ÛÂÙ ÙËÓ Â Èı ÌËÙ ıÂÚÌÔÎÚ Û ª ÔÚ Ù  ÛË Ó Â ÈÏ ÍÂÙ ÙË ÏÂÈÙÔ ÚÁ Ù Ì ÙÔ ÎÔ Ì π π Àƒ π ÂÈÙÔ ÚÁ Ê ÁÚ ÓÛË Ê ÁÚ ÓÛË Ú ÁÌ ÙÔ ÔÈÂ Ù È ÌÂ Ú ıÌÈÛÌ ÓË ıÂÚÌÔÎÚ Û ÂÏ ÊÚÒ ÌËÏfiÙÂÚË fi ÙËÓ ÙÈÌ ıÂÚÌÔÎÚ Û ÙÔ ˆÌ Ù Ô øÛÙfiÛÔ Ë Ú ıÌÈÛË ÙË ıÂÚÌÔÎÚ Û Â Ó È 16ÆC ÁÈ ıÂÚÌÔÎÚ Û ˆÌ Ù Ô 16ÆC Ó Ë ıÂÚÌÔÎÚ Û ˆÌ Ù Ô ÛÂÈ ÌËÏfiÙÂÚ fi ÙË Ú ıÌÈÛÌ ÓË ıÂÚÌÔÎÚ Û Ë ÏÂÈÙÔ ÚÁ Ê ÁÚ ÓÛË ÛÙ ...

Страница 130: ...Ë ÛÙË Û Ú ÂÍfi Ô Ú ÙË ÂÛˆÙÂÚÈÎ ÌÔÓ Ù ÛÙ ÙÔ ÎÔ Ì π π Àƒ π Ì ÚÈ Ó ÂÌÊ ÓÈÛÙ ÛÙËÓ ÔıfiÓË Ë Ó ÂÈÍË æÀ 1 ƒ ıÌ ÛÙ ÙËÓ Â Èı ÌËÙ ÃÀ ªπ ƒ Ì ÙÔ ÎÔ Ì ÃÀ ªπ ƒ ÛÙËÓ ÔıfiÓË ÂÌÊ Ó ÂÙ È Ë ÓÙ ÛÙÔÈ Ë Ó ÂÈÍË À ª ÃÀ ªπ ƒ Â Ó È Àæ ÛÙËÓ Ú Î È ÛÙË Û Ó ÂÈ ÏÏ ÂÈ ÙfiÌ Ù Û ª π fiÙ Ó Ë ıÂÚÌÔÎÚ Û ÙÔ ÒÚÔ Êı ÛÂÈ ÛÙË Ú ıÌÈÛÌ ÓË ÙÈÌ Àæ ÈÎÔÓÔÌÈÎ ÁÈ Ù Ô ÒÚÔ ÂÛÙ ÓÂÙ È ÁÚ ÁÔÚ ª π Û Ë ÏÂÈÙÔ ÚÁ à ª ÎfiÌË ÈÔ Û Ë ÏÂÈÙÔ ÚÁ 2 ƒ ıÌ ÛÙ ÙËÓ Â ...

Страница 131: ...ÎÔ Ì ÃÀ ªπ ƒ Àæ Ô ÚÂ Ì Ú ÂÈ ÙË ÌÂÁ Ï ÙÂÚË ÓÙ ÛË ª π Û Ë ÏÂÈÙÔ ÚÁ à ª ÎfiÌË ÈÔ Û Ë ÏÂÈÙÔ ÚÁ 2 ÃÀ ªπ ƒ À ª π ŸÙ Ó Â ÈÏ ÍÙ À ª Ù ÙËÙ ÓÂÌÈÛÙ Ú ÛÙË ÏÂÈÙÔ ÚÁ ÍË ı ÚÌ ÓÛË È ÙË ÏÂÈÙÔ ÚÁ ı ÚÌ ÓÛË Ù ÙËÙ ÙÔ ÓÂÌÈÛÙ Ú ÏÏ ÂÈ ÙfiÌ Ù Ó ÏÔÁ Ì ÙË ıÂÚÌÔÎÚ Û ÙÔ Ú Ô Á ÓÂÈ fi ÙÔ ÎÏÈÌ ÙÈÛÙÈÎfi ŸÙ Ó Ë ıÂÚÌÔÎÚ Û ˆÌ Ù Ô Êı ÛÂÈ ÛÙË Ú ıÌÈÛÌ ÓË ıÂÚÌÔÎÚ Û ÙÔ ÚÂ Ì ÙÔ Ú ÂÈ ÔÏ ÌÈÎÚ ÓÙ ÛË ÏÂÈÙÔ ÚÁ Ú ÂÈ Ì Àæ Ù ÙËÙ Ì ÚÈ Ë ıÂÚÌÔÎÚ Û ˆ...

Страница 132: ... ÓÔÈÎÙ ÙËÓ ÚÔÁÚ ÌÌ ÙÈÛÌ ÓË ÒÚ ÚÔÁÚ ÌÌ ÙÈÛÌ ÓË Ó ÚÍË È ÎÔ ÏÂÈÙÔ ÚÁ ÙÔ ÎÏÈÌ ÙÈÛÙÈÎÔ Î ıÔÚ ÂÙ È Ó ÏÔÁ Ì ÙÔ ÔÈ ÚÔËÁÂ Ù È ÚÔÓÈÎ Ô ÏÔ Ô ÂÌÊ Ó ÂÙ È ÛÙËÓ ÔıfiÓË ËÏÒÓÂÈ ÙË ÛÂÈÚ ÙˆÓ ÚÔÁÚ ÌÌ ÙÈÛÌ ÓˆÓ ÏÂÈÙÔ ÚÁÈÒÓ ÙÔ ÚÔÓÔ È Îfi ÙË 1 Ù ÛÙ ÙÔ ÎÔ Ì π π Àƒ π ÒÛ Ô ÛÙËÓ ÔıfiÓË Ó Ú ÛÂÈ Ó Ó ÔÛ ÓÂÈ Ë Ó ÂÈÍË π PM 2 ƒ ıÌ ÛÙ ÙËÓ ÒÚ ÙË ÚÔÁÚ ÌÌ ÙÈÛÌ ÓË È ÎÔ ÏÂÈÙÔ ÚÁ Ì ÙÔ ÎÔ Ì ƒÀ ªπ à π Ù ÛÙ ÙÔ ÎÔ Ì À PM 3 Ù ÛÙ ÙÔ ÎÔ Ì ƒ...

Страница 133: ... Ó ÂÈÍË ƒ Ú Ì ÓÂÈ Ó ÌÌ ÓË ÓÙ Ó Ó ÔÛ ÓÂÈ Î È Ó ÂÈ Ë Ó ÂÈÍË À ÎÔ ÁÂÙ È Ó Ô Î È ÙÔ Ï Ì ÎÈ Ãƒ π Ó ÂÈ ÛÙËÓ ÂÛˆÙÂÚÈÎ ÌÔÓ AM Ú ÂÈÁÌ To ÎÏÈ ÙÈÛÙÈÎfi ı Ú ÛÂÈ Ó ÏÂÈÙÔ ÚÁ ÚÎÂÙ ÓˆÚ ÒÛÙÂ Ó Êı ÛÂÈ ÛÙËÓ ÚÔÎ ıÔÚÈÛÌ ÓË ıÂÚÌÔÎÚ ÛÈ ÛÙ 7 00 Ì Ú ıÌÈÛË ÙÔ ÚfiÓÔ Ó ÚÍË ÏÂÈÙÔ ÚÁ ÂÈ ÔÏÔÎÏËÚˆıÂÈ 4 ƒ ıÌ ÛÙ ÙËÓ ÒÚ ÙË ÚÔÁÚ ÌÌ ÙÈÛÌ ÓË Ó ÚÍË ÏÂÈÙÔ ÚÁ Ì ÙÔ ÎÔ Ì ƒÀ ªπ à π 5 ÙÚ Ù ÙÔ Ú ı ÚÔ ÂÎ ÔÌ Û Ì ÙÔ ÙÔ ÙËÏ ÂÈÚÈÛÙ ÚÈÔ ÚÔ ÙËÓ ...

Страница 134: ... Ó ÛÙ Ì Ù ÛÂÈ Ó ÏÂÈÙÔ ÚÁ ÙÔ ÎÏÈÌ ÙÈÛÙÈÎ ÌÂÙ fi 3 ÒÚ ÛÙÈ 11 38 p m ÙfiÙÂ Ë ÒÚ È ÎÔ ı Â Ó È 2 38 a m ÃÚÔÓÔ È Îfi ÙË ÓÔ ƒ Û ÛΠı ÛÙ Ì Ù ÛÂÈ Ó ÏÂÈÙÔ ÚÁ fi ÙÔ ÚÔÓÔ È Îfi ÙË ÓÔ Î È ı ÙÂı ÏÈ Û ÏÂÈÙÔ ÚÁ ÙËÓ ÚÔÁÚ ÌÌ ÙÈÛÌ ÓË ÒÚ Ó ÚÍË ÙÔ ÚÔÓÔ È Îfi ÙË 1 ƒ ıÌ ÛÙ ÙËÓ ÚÔÁÚ ÌÌ ÙÈÛÌ ÓË Ó ÚÍË ÏÂÈÙÔ ÚÁ 2 Ù ÛÙ ÙÔ ÎÔ Ì À ª π Àƒ π À À Î È Ú ıÌ ÛÙ ÙÔ ÚÔÓÔ È Îfi ÙË ÓÔ AM AM È ÙË ÏÂÈÙÔ ÚÁ ı ÚÌ ÓÛË ÙËÓ ÂÚ ÙˆÛË Ù Ë Û ÛÎÂ...

Страница 135: ...ÂÚÛ Â Ó ÂÎÙÂÏÔ Ó ÏÈÓ ÚÔÌÈÎ Î ÓËÛË ÁÈ ÌÂÁ ÏÔ ÚÔÓÈÎfi È ÛÙËÌ ª ÔÚÂ Ó Û ËÌ ÙÈÛÙÂ ÁÚ Û ÛÙÈ ÔÚÈ fiÓÙÈÂ ÂÚÛ Â Î È Ó ÛÙ ÍÂÈ ÓÂÚfi ƒ Ã 2 ƒ ıÌÈÛË ÙË Î ÙÂ ı ÓÛË ÙÔ ÎÏÈÌ ÙÈÛÌ ÓÔ Ú ÚÔ Ù ÚÈÛÙÂÚ Î È ÚÔ Ù ÂÍÈ Ú Ù ÛÙÂ ÙÈ Î ıÂÙÂ ÂÚÛ Â fi ˆ Â ÓÂÈ Ë ÂÈÎfiÓ Î È Ú ıÌ ÛÙÂ ÙËÓ Î ÙÂ ı ÓÛË ÙÔ ÎÏÈÌ ÙÈÛÌ ÓÔ Ú ÚÈÛÙÂÚ Î È ÂÍÈ ıÂÙÔ ıÂÙÔ Á Úˆ ÛÙÔ 15Æ Á Úˆ ÛÙÔ 60 Á Úˆ ÛÙÔ 45 Á Úˆ ÛÙÔ 30 ŸÙ Ó ÂÈ Î ÓÔÓÙ Ê ÁÚ ÓÛË ŸÙ Ó ıÂÚÌ ÓÂÈ ª ƒπø Ã π...

Страница 136: ...Ê ÏÙÚÔ 2 ÔÌ ÎÚ ÓÂÙ ÙË ÛÎfiÓË fi ÙÔ Ê ÏÙÚÔ Ú Ì ÌÈ ËÏÂÎÙÚÈÎ ÛÎÔ Ó Ú ÂÈ ÂÚ ÔÏÈÎ ÛÎfiÓË Ï ÓÂÙ ÙÔ Ê ÏÙÚÔ ÌÂ È Ï Ì ÔÚÚ ÓÙÈÎÔ Î È ÍÂ Ï ÓÂÙÂ Î Ï ªÂÙ Ê ÛÙ ÙÔ Ó ÛÙÂÁÓÒÛÂÈ ÙÂÏ ˆ ÛÙË ÛÎÈ 3 Ô ÔıÂÙ ÛÙ ÙÔ Ê ÏÙÚÔ ÛÙËÓ Ú ÈÎ ÙÔ ı ÛË Ì ÙËÓ Ó ÂÈÍË FRONT ÛÙÚ ÌÌ ÓË ÚÔ ÙÔ Ì ÚÔ Û ÊÔ ÙÔ ÔıÂÙ ÛÂÙÂ Ù Ê ÏÙÚ È ÛÙ ÙÔ Ì ÚÔÛÙÈÓfi Ï ÛÈÔ ÛÙ ÛËÌÂ Ô Â ÓÔ Ó Ù ÙÚ ÏË ÛÙËÓ ÂÈÎfiÓ Î È ÎÏ ÛÙ ÙÔ ªËÓ ÙÔ Ï ÓÂÙ Ì ÂÛÙfi ÓÂÚfi Û ıÂÚÌÔÎÚ Û...

Страница 137: ... ÚÔÛÙÈÓÔ Ï ÈÛ Ô ÊÔ ÂÙ ÓÔ ÍÂÈ ÙÔ Ì ÚÔÛÙÈÓfi Ï ÛÈÔ Î È ÙÔ ÎÚ Ù Ù ÌÂ Ù Ô Û ÚÈ È ÛÙ ÛÙË ÂÍÈ ÏÂ Ú ÁÈ Ó ÛÊ Ï ÛÂÈ Î È ÊÔ ÙÔ ÎÏ ÛÂÙÂ Ï ÁÔ ÙÚ ÍÙ ÙÔ ÚÔ ÙÔ Ì ÚÔ Û ÁÈ Ó ÁÂÈ fi ÙË ı ÛË ÙÔ ªÂÙ ÎÈÓ ÛÙ ÙÈ ÁÏÒÛÛ ÙÔ Ú ÔÓ ÙË ÚÈÛÙÂÚ Î È ÂÍÈ ÏÂ Ú Ì Û ÛÙÔ Ô ËÁÔ ÙË ÌÔÓ Î È ÏÙ ÙÈ ÛÙÈ ÙÚ Â ÏÒÛÛ ËÁfi Ú BENZINE THINNER A C I D ªËÓ ÓÂÙÂ Î È ÌËÓ Ï ÓÂÙ Ì ÓÂÚfi ÙË ÌÔÓ fiÙ Ó ÙËÓ Î ı Ú ÂÙ ÁÈ Ù Ì ÔÚÂ Ó ÚÔÎÏËıÂ Ú Î ÎÏˆÌ ªËÓ Ú...

Страница 138: ... ÚÁ ı ÚÌ ÓÛË Î È Ì  ÈÏÂÁÌ ÓË ÙËÓ Àæ Ù ÙËÙ ÓÂÌÈÛÙ Ú Ó ı ÏÂÙÂ Ó ÏÂÈÙÔ ÚÁ ÈÔ ıfiÚ Ë ÌÔÓ ÊÔ ÙÔ ˆÌ ÙÈÔ ÂÈ ÂÛÙ ıÂ Û ÓÈÛÙ Ù È Ë Â ÈÏÔÁ ÙË ÙfiÌ ÙË ÏÂÈÙÔ ÚÁ À ª ªÂ  ÈÏÂÁÌ ÓË ÙË Ã ª Ù ÙËÙ ÓÂÌÈÛÙ Ú Ë ÎÙÈÎ ÈÎ ÓfiÙËÙ ÙË ÌÔÓ ÌÂÈÒÓÂÙ È ÂÏ ÊÚ ªÂ ÙË Ú ıÌÈÛË Ã ª Ë ıÂÚÌ ÓÙÈÎ fi ÔÛË ÙË ÌÔÓ ÔÈÎ ÏÏÂÈ Ó ÏÔÁ Ì ÙÈ Û Óı ΠÏÂÈÙÔ ÚÁ π º ƒ π Àƒ π ŸÙ Ó ÂÈ ÚÔÁÚ ÌÌ ÙÈÛÙÂ Ô ÚÔÓÔ È Îfi ÙË Ë ÌÔÓ ÂÓ ı Ú ÛÂÈ Ó ÏÂÈÙÔ ÚÁ ÎfiÌË Î È fiÙ ...

Страница 139: ... ÓÂ Ú ıÌÈÛË ÙË Ù ÙËÙ ÓÂÌÈÛÙ Ú Â Ó È Ã ª Ô ÎÏÈÌ ÙÈÛÙÈÎfi ÂÓ ÏÂÈÙÔ ÚÁÂ Ô ÎÏÈÌ ÙÈÛÙÈÎfi ÂÓ ÂÈ Î Ï Ô ÎÏÈÌ ÙÈÛÙÈÎfi ÂÓ ÂÛÙ ÓÂÈ Î Ï Ô ÙËÏ ÂÈÚÈÛÙ ÚÈÔ ÂÓ ÂÎ Ì ÂÈ Û Ì ÔıfiÓË ÙÔ ÙËÏ ÂÈÚÈÛÙËÚ Ô Â Ó È ÛÎÔÙÂÈÓ ÎÂÓ Ú Î Ùˆ Ê ÈÓfiÌÂÓ ÂÓ ÔÙÂÏÔ Ó ÂÓ Â ÍÂÈ Ï Ë ÙË ÌÔÓ ÎÎ ÓËÛË ÏÂÈÙÔ ÚÁ ÌÔÓ ÂÙÔÈÌ ÂÙ È Ó Á ÏÂÈ ÂÛÙfi Ú Ú ÂÈ Ó ÂÚÈÌ ÓÂÙ ٠ÙË ÏÂÈÙÔ ÚÁ Â͈ÙÂÚÈÎ ÌÔÓ ÂÎÙÂÏ fi ÍË Ú ÂÈ Ó ÂÚÈÌ ÓÂÙ fiÚ ÔÈ Ô ÔÊ ÏÔÓÙ È ÛÙË ÚÔ ÎÙÈÎÔ ÛÙ...

Страница 140: ...ÁÂ Î ÓÔÓÈÎ ÊÔ ÂÎÙÂÏ ÛÂÙÂ ÙÔ Ú Óˆ ÂÏ Á Ô ÎÏÂ ÛÙÂ ÙÔÓ ÛÊ ÏÂÈÔ È Îfi ÙË ÔÛ Ó ÛÙÂ ÙÔ Î ÏÒ ÈÔ ÚÂ Ì ÙÔ fi ÙËÓ Ú Î È Â ÈÎÔÈÓˆÓ ÛÙÂ Ì Ûˆ ÌÂ ÙÔÓ ÓÙÈ ÚfiÛˆ Ô ÈÎÔÈÓˆÓ ÛÙÂ Ì Ûˆ ÌÂ ÙÔÓ ÓÙÈ ÚfiÛˆ Ô Ó Û Ì Â Î ÙÈ fi Ù Ú Î Ùˆ È Îfi ÙË ÛÊ ÏÂ ÎÏÂ ÓÂÈ Ë ÛÊ ÏÂÈ Î ÁÂÙ È Û Ó ÏÂÈÙÔ ÚÁ ÙÔ È Îfi ÙË Â Ó È ÛÙ ı Ó ÓÙÈÎÂ ÌÂÓ ÓÂÚfi Ô Ó Ì ÂÈ Î Ù Ï ıÔ ÛÙÔ ÂÛˆÙÂÚÈÎfi ÙË ÌÔÓ Ô Î ÏÒ ÈÔ ÚÂ Ì ÙÔ ÂÛÙ ÓÂÙ È ÂÚ ÔÏÈÎ Ë ÌfiÓˆÛ ÙÔ Â Ó È Êı ÚÌ ÓË ÔÁ Ì...

Страница 141: ...MEMO ...

Страница 142: ...MEMO ...

Страница 143: ...MEMO ...

Страница 144: ... 437 B ...

Страница 145: ...nt water from entering the cycle The difference in height between the indoor and outdoor unit should be kept below 10m The connecting pipe no matter big or small should all be insulated with insulation pipe and then wrapped with vinyl tape The insulator will deteriorate if it is not wrapped with tape The connection of insulated drain hose Inner diameter 16mm Please use insulated drain hose for the...

Страница 146: ...manual If the indoor unit won t operate check the cable for correct connection Turn on the lamp in the room where the indoor unit is installed and check the remote controller for normal operation How to remove the front cover How to Attach the Front Cover Check that the drain pan is securely attached After installing the front cover onto the unit hook three claws at upper side of the cover securel...

Страница 147: ...en Das Isoliermaterial verrottet wenn es nicht mit Klebeband umwickelt wird Der Anschluß für den isolierten Ablaßschlauch Innendurchmesser 16 mm Bitte verwenden Sie für die Innenrohrleitung einen im Handel erhältlichen isolierten Ablaßschlauch Über 100mm Über 300mm Über 50mm soviel wie möglich Freiraum gewähren Über 200mm Achten Sie da rauf daß alle Zwischenräume mitKittausgefüllt werden Maximale ...

Страница 148: ...Stelle der Halterung einwandfrei empfangen kann Ein Piepton ertönt wenn ein Signal von der Fernbedienung empfangen wird Die Signalübertragung wird durch Neonlicht geschwächt Daher schalten Sie das Licht während des Montieren der Halterung auch tagsüber ein um die richtige Stelle für die Halterung zu finden Die Fernbedienung muß am unteren Teil der Halterung festhaken Führen Sie festhaken Führen Si...

Страница 149: ...e L isolant se détériorera s il n est pas entouré de ruban Raccordement du tuyau de vidange isolé Diamètre intérieur 16 mm Utilisez le tuyau de vidange isolé pour les tuyaux intérieurs produit commercial Plus de 100mm Plus de 300mm Plus de 50mm distance de dégagement maximale souhaitée Plus de 200mm Veiller à boucher complètement tous les espaces au mastic Longueur maximale du tuyau 20 m APPAREIL ...

Страница 150: ...ivant l interrupteur de l appareil intérieur Dans ce cas coupez le disjoncteur Lorsque l appareil extérieur est alimenté Retirez le panneau de la base des bornes et vissez le câble Courroie du cordon Câblage correspondant à la tuyauterie à l horizontale depuis le côté droit Pour ne pas gêner le tuyau de vidange pliez le câble du côté du tuyau de vidange du boîtier électrique comme illustré à gauch...

Страница 151: ... m I tubi di collegamento grandi o piccoli devono essere tutti isolati mediante tubi di isolamento e quindi avvolti con nastro adesivo Il tubo di isolamento si deteriora se non è avvolto con nastro adesivo Collegamento del flessibile di scarico isolato Diametro interno 16 mm Utilizzare il flessibile di scarico isolato per la tubazione interna prodotto commerciale oltre 100mm oltre 300mm oltre 50mm...

Страница 152: ...VO DI ALIMENTAZIONE Alimentazione fornita all unità interna AVVERTENZA La parte denudata dell anima del cavo deve essere di 10 mm Fissarla saldamente al terminale quindi tirare il singolo cavo per verificare che il contatto sia saldo Un collegamento errato potrebbe provocare la bruciatura del terminale Accertarsi di utilizzare l unico cavo specificato per l uso del condizionatore Per informazioni ...

Страница 153: ...nidad mm Sieslaunidadinternalaqueestá conectada a la alimentación tire del cable de alimentación del compartimiento de cables situado a la derecha o izquierda de la unidad interior Compartimiento de cables lado derecho 330 310 10 10 500 35 50 12 125 Más de 100mm Más de 300mm Longitud máxima del tubo 20 m más de 50 mm si se instala en un balcón UNIDAD INTERIOR 1 Perforación de la pared e instalació...

Страница 154: ...iona correctamente Remoción de la cubierta frontal Inserción de la cubierta frontal Mando a distancia Tornillo 2 piezas Soporte del mando a distancia S608 C Tramo Eje Agujero ÚLTIMA ETAPA DE LA INSTALACIÓN 1 Fuente de alimentación y prueba de funcionamiento ADVERTENCIA No manipule la clavija del cable de alimentación ni extienda el cable alargador Deje un sobrante de cable y no someta el cable a f...

Страница 155: ...ctado pela humidade Tenha cuidado para evitar que entre água no ciclo A diferença em altura entre a unidade interna e externa deve ser mantida inferior a 10 cm O tubo de ligação pequeno ou grande deve ser isolado com tubo isolador e envolvido em fita de vinilo O isolador será deteriorado se não for envolvido em fita A ligação da mangueira de escoamento isolada Diâmetro interno 16 mm Use mangueira ...

Страница 156: ...á uma queda de voltagem de corrente alternada entre o terminal LN se a alimentação estiver ligada Por isso certifique se de que remove a ficha da tomada Por favor durante o teste de funcionamento assegure se de que o ar condicionado está em condições normais de funcionamento Explique ao cliente os procedimentos próprios de funcionamento como descritos no manual do utilizador Se a unidade interior ...

Страница 157: ...ÌÔ ÔÈ ÛÙ ÌÔÓˆÌ ÓÔ ÛˆÏ Ó ÔÛÙÚ ÁÁÈÛË ÁÈ ÙËÓ ÂÛˆÙÂÚÈÎ ÌÔÓ ÚÔ fiÓ ÙÔ ÂÌ ÔÚ Ô Óˆ fi 100mm Óˆ fi 300mm Óˆ fi 50mm Ê ÛÙ fiÛÔ ÙÔ Ó ÙfiÓ ÂÚÈÛÛfiÙÂÚÔ ÒÚÔ Óˆ fi 200mm Ï Ù fiÏ Ù ÎÂÓ Ì ÛÙfiÎÔ ª ÁÈÛÙÔ Ì ÎÔ ÛˆÏ Ó 20 m ÛˆÙÂÚÈÎ ÌÔÓ 1 Ô Ôı ÙËÛË ÙÔ Ï ÈÛ Ô Ó ÚÙËÛË ÙÚ ËÌ ÙÔ Ô Î È ÂÁÎ Ù ÛÙ ÛË ÙÔ ÚÔÛÙ Ù ÙÈÎÔ ÛˆÏ Ó ƒ à ÔÛÙÚ ÁÁÈÛË ÙÔ Û ÏÏ ÎÙË ÓÂÚÔ Ì Û ÛÙËÓ ÂÛˆÙÂÚÈÎ ÌÔÓ Á ÓÂÙ È fi Ù ÚÈÛÙÂÚ ÔÌ Óˆ ÙÔ Ï ÛÈÔ Ú ÂÈ Ó ÙÔ ÔıÂÙËı ÔÚÈ fiÓ...

Страница 158: ...Ù ÒÛÙ ٠ÙÚ ÁÎÈÛÙÚ ÛÙËÓ Â Óˆ ÏÂ Ú ÙÔ Î Ï ÌÌ ÙÔ ªÂÙ È ÛÙ ÙÔ Î ÓÙÚÔ ÙÔ Ì ÚÔÛÙÈÓÔ Î Ï ÌÌ ÙÔ ÁÈ Ó ÛÊ Ï ÛÔ Ó Ù ÁÎÈÛÙÚ tm Ê ÍÙ ÙÈ Ô Â Ô ÔıÂÙ ÛÙ ÙÔ Ê ÏÙÚÔ ÚÒÍÙ ÙÈ ÁÏÒÛÛ ÙÔ ÂÍÈÔ Î È ÚÈÛÙÂÚÔ Ú ÔÓ ÙÔ Ï ÈÛ Ô Î Ù Ì ÎÔ ÙˆÓ Ô ËÁÒÓ ÒÛÙÂ Ó ÂÈÛ ˆÚ ÛÔ Ó ÛÙÈ ÙÚ Â Ì ÚÈ Ó ÛÙ Ì Ù ÛÔ Ó ÊÔ Â Èˆı Ù fiÙÈ ÔÈ ÁÏÒÛÛÂ Ô Ó Ì ÂÈ Î Ï ÛÙË ı ÛË ÙÔ ÎÏ ÛÙ ÙÔ Ï ÛÈÔ Ê ÈÚ ÛÙ ÙÔ Ì ÚÔÛÙÈÓfi Ï ÛÈÔ Ú Ù Ù ÙÔ Ì ÚÔÛÙÈÓfi Ï ÛÈÔ Î È Ì Ù...

Отзывы: