background image

Section 2

2.1 Startup  

z

  2–1

2. Basic Operating Procedures

2.1

Startup

2.1.1

Starting an operation

1.

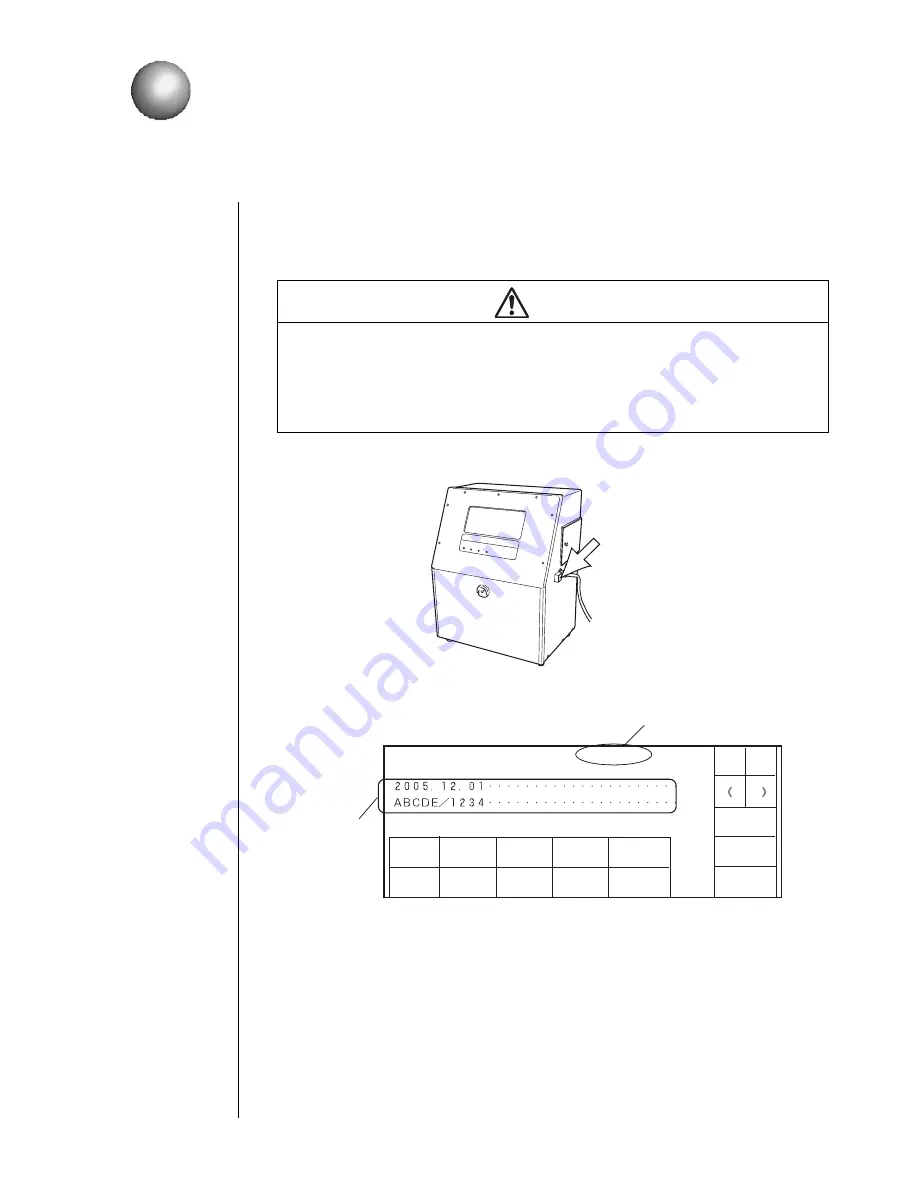
Press the power ON/OFF switch to turn ON the power supply of the printer.

The following print description screen opens.

z

It takes about 10 seconds for the above screen to open.

z

Verify that the print descriptions are entered.

CAUTION

z

The ink and makeup ink employed contain organic solvents. When handling ink,
wear protective gloves and safety goggles to avoid direct skin contact. 

z

The printer is provided with an LCD touch key panel. When manipulating the keys,
do not apply excessive force to them.

z

If the system becomes inoperative, press the power switch to OFF. After you have
turned the printer back ON, see 

Section 7., "Emergency Procedures"

.

3UHVV

3ULQWGHVFULSWLRQ

6WDWXV6WRS

0HVVDJHQDPH$$$$$$$$$$$$

(GLW

PHVVDJH

3ULQWIRUPDW

3ULQWVSHF

6HOHFW

PHVVDJH

6DYH

PHVVDJH

0DLQWH

QDQFH

$X[LOLDU\

IXQFWLRQ

(QYLURQPHQW

VHWXSPHQX

6KRZ

IDXOW:DUQLQJ

3ULQWGHVFULSWLRQ
VHWWLQJDUHD

7KHFXUUHQWRSHUDWLQJVWDWXVLVLQGLFDWHGVHH6HFWLRQ

6WDWXVIRUGHWDLOV

6WDUW

XS

For entry of print 
descriptions, see 

Section 3., 

"Editing Print Data 

and Printing"

.

Содержание PB Series

Страница 1: ...ic operating maintenance and other detailed handling procedures of the Hitachi IJ Printer Model PB If the printer is improperly handled or maintained it may not operate smoothly and become defective or cause an accident It is therefore essential that you read this manual to gain a complete understanding of the printer and use it correctly After thoroughly reading the manual properly store it for f...

Страница 2: ...diting Print Data and Printing 3 1 Setting Print Format 3 2 3 1 1 Overview 3 2 3 1 2 Operating procedure 3 4 3 2 Printing Characters 3 5 3 2 1 Printing fixed characters 3 5 3 2 2 Printing calendar characters 3 7 3 2 3 Printing the characters indicating the number of elapsed days 3 8 3 2 4 Printing week number 3 10 3 2 5 Printing day of the week 3 12 3 2 6 Printing count characters 3 14 3 3 Setting...

Страница 3: ...1 5 1 2 Deleting registered data 5 3 5 1 3 Changing a message name 5 5 5 2 Creating a User Pattern 5 7 5 2 1 Saving a user pattern 5 7 5 2 2 Recalling a user pattern 5 11 Section 6 If a Warning Condition Fault Occurs 6 1 Indications Given When a Warning Condition Fault Occurs 6 1 6 2 On screen Message Descriptions 6 3 6 2 1 Fault messages 6 3 6 3 Viewing the Warning Condition and Fault Occurrences...

Страница 4: ... DANGER is used to indicate the presence of a hazard which may cause severe personal injury or death if the warning against performing an incorrect handling procedure is ignored CAUTION CAUTION is used to indicate the presence of a hazard which may cause personal injury or property damage if the warning against performing an incorrect handling procedure is ignored This symbols are used to indicate...

Страница 5: ... head When the printer is ready to print a high voltage approximately 6 kV is applied to the deflection electrode section in the print head Exercise caution to avoid electric shock injury or fire z Do not remove the outer covering High voltage is applied to some sections of the printer Exercise caution to avoid electric shock or injury z Use an AC voltage of 100 to 120 V or 200 to 240 V 10 and a m...

Страница 6: ...er and consult a physician z When an earthquake fire or other emergency occurs while the printer is engaged in printing or turned on press the ON OFF power switch to turn off the mains supply z The printer must be handled in compliance with all appropriate regulations Read and understand the appropriate Material Safety Data Sheet MSDS before using ink or makeup ink z Only use Hitachi approved cons...

Страница 7: ...wn Attempting to clean the printer when energized will cause makeup ink or vapors of makeup ink to enter the printer possibly catching on or causing a fire When the cleaning is done open the maintenance cover and make sure that no makeup ink has entered and no vapors stay inside z Should you find a leak of ink or makeup ink inside the printer while the printer is operating or being maintained imme...

Страница 8: ...or the ink makeup ink handling area and printer installation site At least 200 m3 must be provided per print head Ensure that adequate ventilation is provided 2 When handling the ink or makeup ink wear protective gloves and safety goggles to avoid direct skin contact If the ink or makeup ink comes into contact with your skin wash thoroughly with soap and warm or cold water 3 When transferring the ...

Страница 9: ...th the conveyor or other devices 3 If the employed print target detector is housed in a metal case use a plastic mounting brace for the purpose of insulating the detector from the conveyor and other devices 4 Be sure that the print target detector wiring is not bundled together with other power supply cables FCC Notice This equipment has been tested and found to comply with the limits for a Class ...

Страница 10: ...x ...

Страница 11: ...ning the proper replacement intervals However since the proper replacement intervals vary with the printer operating environmental conditions temperature humidity dust etc determine the best replacement intervals depending on the results of printing and replace all ink within the printer with new ink when necessary Ink Type Replacement intervals operating hours or elapsed time whichever comes earl...

Страница 12: ...tle label for proper handling purposes 4 The makeup ink must be added to the printer within one year after opening the tank Note that the makeup ink added to the printer needs no replacement 1 1 1 4 Ink differences and handling precautions 1 Differences For the part code numbers of the inks and makeup inks listed above see Section 8 Maintenance DANGER Do not drain the ink or makeup ink waste solut...

Страница 13: ...lack pigment of the JP K31A may cohere depending on the environmental conditions For enhanced pigment stability you should perform the following maintenance programs z Replace the main ink tank on a periodic basis at intervals of about 2400 operating hours When replacement is needed contact your local service personnel z Replace the stainless filter within the shutoff valve MV9 mounted on the prin...

Страница 14: ...wn requires draining the ink completely from the ink circulation system and refilling it with the makeup ink which requires a specific operation on a restart See Section 6 15 Long term Shutdown for details Moreover in the case of operating the printer regularly note that the time necessary for an intermediate operation is different depending on the ink to be used and ambient temperature of the pla...

Страница 15: ...tter z While the print head is wet do not orient its end upwards z If you use the JP K60 JP F63 JP K68 ink you must allow the print head to dry thoroughly before operating the printer because the ink does not dry easily 1R OH OHDQLQJ UDQJH XWWHU R QRW SRXU WKH PDNHXS LQN RYHU WKLV VHFWLRQ LSH WKH SULQW KHDG FOHDQ ZLWK ZLSLQJ SDSHU GDPSHQHG ZLWK WKH PDNHXS LQN R QRW SRXU WKH PDNHXS LQN RYHU WKLV VH...

Страница 16: ...page may have remained on the surface of the mounting base In this case remove the positive deflecting electrode and clean the mounting surface with wiping paper moistened with makeup Also remove the charging electrode and wipe off the surface of the orifice plate as well 5 When printing is performed frequently or there is not much space between the print material and the print head ink splashes m...

Страница 17: ...hut down key to stop an operation more than two successive times 2 If you stop an operation with the No cleaning stop key immediately initiate ink ejection If such a condition is allowed to continue the nozzle may become stuck with the ink causing the ink beam to be bent or the nozzle to be clogged Accordingly apply makeup ink to the orifice plate to wash it within 30 minutes after a stop and then...

Страница 18: ...hs 1 Example If you use JP K69 ink at 20 C the IJ printer must eject the ink for one hour or more 2 The makeup ink which enters the IJ printer by automatic cleaning will evaporate naturally and then the ink returns to its initial state PELHQW WHPSHUDWXUH 7KH LQN FRQWDLV 0 7KH LQN FRQWDLQV WKDQRO 3 PELHQW WHPSHUDWXUH QHFHVVDU FRQGLWLRQ RI RSHUDWLQJ KRXUV QHFHVVDU FRQGLWLRQ RI RSHUDWLQJ KRXUV 3 5 7 ...

Страница 19: ...VZLWFK 9DULRXV VLJQDOV LQWDNHV 0DLQWHQDQFH GRRU 3RZHU FDEOH LVSOD SDQHO 2SHUDWLQJ VWDWXV LQGLFDWRU ODPSV LVSOD V 5HDG DXOW DQG DUQLQJ 3RZHU ODPS 6HH 6LJQDO RQQHFWLRQV 3XVK 21 SXVK 2 DOWHUQDWLYH RQQHFWLRQ WXEH P 2SHQHG FORVHG IRU LQN UHSODFHPHQW DQG RWKHU PDLQWHQDQFH SXUSRVHV LU SXUJH FRQQHFWLRQ SRUW KDXVW GXFW FRQQHFWLRQ SRUW 6HH 6HFWLRQ 3ULQW KHDG DLU SXUJH ...

Страница 20: ...ponent Names and Functions Section 1 1 2 2 Main body internal parts arrangement 0DLQWHQDQFH GRRU QN UHVHUYRLU QN SUHVVXUH JDXJH 0DNHXS LQN UHVHUYRLU QN ILOWHU 9DULRXV VLJQDOV FRQQHFW LQJ SRUWLRQ OHFWULFDO DFFHVV GRRU ...

Страница 21: ...Section 1 1 2 Component Names and Functions z 1 11 1 2 3 Print head 1R OH XWWHU 3ULQW KHDG FRYHU ORFN WKXPEVFUHZ 3OXV GHIOHFWLRQ HOHFWURGH KDUJH HOHFWURGH 0LQXV GHIOHFWLRQ HOHFWURGH ...

Страница 22: ...urge the interior of print head by air You will require dry clean air a pressure reducing valve and an air filter Amount air required 1l minute 9 When installing the print head and print head cable the following conditions must be met DANGER z Ensure that there is no flame or arc generating device within a distance of 5 m to the printer The ink and makeup ink are both flammable and may cause ignit...

Страница 23: ... m above the print head 11 If you fixed the print head ensure that the minimum bending radius of the print head cable is at least 150 mm 12 The ink beam may sometimes be deflected for instance due to dirt Any facilities positioned in the direction of ink ejection should be covered as needed to avoid soiling with ink 13 When connecting an exhaust duct to the printer install a damper and adjust the ...

Страница 24: ... using magnetic material such as iron the cover switch will not work correctly resulting in a Cover Open error Therefore only use nonmagnetic resins or metals to fix the print head 15 To properly carry the printer grasp it from the direction of the arrows shown in the drawing below ...

Страница 25: ...id direct skin contact z The printer is provided with an LCD touch key panel When manipulating the keys do not apply excessive force to them z If the system becomes inoperative press the power switch to OFF After you have turned the printer back ON see Section 7 Emergency Procedures 3UHVV 3ULQW GHVFULSWLRQ 6WDWXV 6WRS 0HVVDJH QDPH GLW PHVVDJH 3ULQW IRUPDW 3ULQW VSHF 6HOHFW PHVVDJH 6DYH PHVVDJH 0DL...

Страница 26: ...e starting a printing operation after 24 hours or more of printer inactivity e g starting daily operation after a holiday complete the print head cleaning procedure in the same manner as for a shutdown See Section 2 2 Shutdown and Section 1 1 Usage Precautions 3ULQW KHDG LQW IUHH ZLSHV RU WKH OLNH 3UHVV WKH 6WDUW XS EXWWRQ 3UHVV WKH 6WDUW XS EXWWRQ 6WDUW XS QN HW 6WDUWXS RQILUPDWLRQ MHFWV LQN ZKLO...

Страница 27: ...curs at the beginning of an operation z When the temperature is low below approx 20 C it takes slightly longer for the printer to get Ready for printing than at normal temperatures 4 Input the print target detection signal and verify the printing results z When the print target detection signal is input while the printer is Ready the preselected print data will be printed 3UHVV WKH 2 EXWWRQ 6KXW G...

Страница 28: ... loosening its retaining screw 3UHVV WKH 2 EXWWRQ 6KXW GRZQ 0DQXDO 3UHVV WKH 0DQXDO EXWWRQ 0DQXDO RQWURO 0HQX 6WRSV LQN HMHFWLRQ ZLWKRXW FOHDQLQJ 1R FOHDQLQJ VWRS 6WDQGE 6ZLWFKHV EHWZHHQ WKH UHDG IRU SULQWLQJ VWDWH DQG VWDQGE VWDWH 1R FOHDQLQJ VWRS DQFHO 6WDQGE 0DQXDO RQWURO 0HQX 3UHVV WKH 1R FOHDQLQJ VWRS EXWWRQ 0DQXDO RQWURO 0HQX RQILUPDWLRQ 6KXWGRZQ ZLOO VWRS WKH LQN MHW 6ROXWLRQ 7R VWRS WKH LQ...

Страница 29: ...low them to dry 4 With the print head cover removed press the Start up and Eject ink keys in sequence z The ink jets out of the nozzle The status changes from Stop to Starting z Perform an operation while the end of the print head is placed in a beaker 2ULILFH SODWH 0RXQWLQJ EDVH HDNHU OHDQLQJ ERWWOH UHD WR EH FOHDQHG XWWHU HIOHFWLRQ HOHFWURGH KDUJH HOHFWURGH 3UHVV WKH 6WDUW XS EXWWRQ 3UHVV WKH 6W...

Страница 30: ...ss the Erase message key 7 Wait until the status changes to Ready 8 Input the print target detection signal and verify the printing results Section 2 1 1 Starting an operation DANGER z When checking the ink beam position wear protectors goggles and mask z If the ink or makeup ink should enter your eyes or mouth immediately flush with warm or cold water and see a physician z Before ejecting the ink...

Страница 31: ...ing Edit message Calendar condition Count condition Print format Printing specifications Select message Save message Ready Standby Stop Maintenance work User environment setup Operation management Date time setup Excitation update Password setup update Functional limitation Password protection Display environment Standby Stop Auxiliary function User pattern creation Procedure 1 Display the cursor ...

Страница 32: ...KH 0DQXDO EXWWRQ 6ZLWFKLQJ IURP 5HDG VWDWH WR 6WDQGE VWDWH 6ZLWFKLQJ IURP 6WDQGE VWDWH WR 5HDG VWDWH 0DQXDO RQWURO 0HQX 0DQXDO RQWURO 0HQX 7KH FRQILUPDWLRQ VFUHHQ RSHQV 0DQXDO RQWURO 0HQX 6WRSV LQN HMHFWLRQ ZLWKRXW FOHDQLQJ 1R FOHDQLQJ VWRS 6WDQGE 6ZLWFKHV EHWZHHQ WKH UHDG IRU SULQWLQJ VWDWH DQG VWDQGE VWDWH 1R FOHDQLQJ VWRS 6WDQGE DQFHO 0DQXDO RQWURO 0HQX 1R FOHDQLQJ VWRS 5HDG DQFHO 3ULQW ERUW RQ...

Страница 33: ...the printing method of interlaced control 1 Ensure that the setting on line number is two 2 The particle use percentage is 04 0DQXDO RQWURO 0HQX 3UHVV WKH MHFW LQN EXWWRQ 6WDUW XS MHFWV LQN ZKLOH DSSO LQJ GHIOHFWLRQ YROWDJH MHFW LQN MHFWV LQN ZKLOH DSSO LQJ QR GHIOHFWLRQ YROWDJH 0DQXDO RQWURO 0HQX 6WDUW XS MHFW LQN DQFHO 6WDUW XS 7KH PDQXDO FRQWURO PHQX DSSHDUV 3UHVV WKH 6WDUW XS EXWWRQ This featu...

Страница 34: ...ow them to dry 2 The nozzle rubber seal assures dryness of the orifice plate and prevents accumulation of dust For easier startup of the printer it is recommended that you install the nozzle rubber seal between the orifice plate and charge electrode when the printer is not used Refer to the next page 4 If the print head cover is dirty apply makeup ink and clean it 1 Clean the portion soiled with s...

Страница 35: ...tment 2 The nozzle rubber seal prevents the orifice plate from drying and accumulation of dust When shutting down the printer it is recommended that you install the nozzle rubber seal between the orifice plate and charge electrode to assure easy startup of the printer later Usage precautions 1 Store the nozzle rubber seal in a vinyl bag or similar to prevent it from collecting dirt and dust 2 Befo...

Страница 36: ...2 12 z 2 2 Shutdown Section 2 ...

Страница 37: ...ber can be set up using no more than two z Select the Print format Edit message and Print spec screens from the menu and set them step by step Number of lines Number of characters 1 80 x 1 line 2 40 x 2 lines GLW PHVVDJH 3ULQW IRUPDW 3ULQW VSHF 6HOHFW PHVVDJH 6DYH PHVVDJH 0DLQWH QDQFH X LOLDU IXQFWLRQ QYLURQPHQW VHWXS PHQX 6KRZ IDXOW DUQLQJ 3ULQW GHVFULSWLRQ 6WDWXV 6WRS 0HVVDJH QDPH 6WDUW XS 3ULQW...

Страница 38: ...e ranges are listed below 3 1 1 3 Character size z The character size can be varied z The following character sizes are available To change between the sizes 5 x 8 and 5 x 7 see Section 4 2 Setting the User Environment NOTE If no associated character is available after a change of the character size a space will be used as substitute If the user pattern for a new selected character size is not sav...

Страница 39: ...re available If a character size exceeds the range for this setting the nearest acceptable value will be used 3 1 1 5 Character width increase z The character width can be enlarged z The available range of enlargement is from 1 to 9 times the original size Character size Inter character space 5 x 8 or 5 x 7 0 to 3 7 x 10 0 to 3 12 x 16 0 to 4 ...

Страница 40: ...r line space input field If the cursor is not displayed press Show cursor 2 Touch the line of the setting item you wish to change in order to move the cursor to that line 3 Change the value as designed with a numeric key Decrement or Increment key 4 Press Apply 5 Press Back You are then returned to the Print description screen 3ULQW IRUPDW 6KXW GRZQ HFUH PHQW QFUH PHQW DFN 0DQXDO 6KRZ FXUVRU LQH Q...

Страница 41: ...the Setting Contents If the cursor is not displayed press Show cursor 1 Press Edit message The Edit message screen then opens 2 Touch the print description setting area for lower line The cursor will move 3 Press ABC 4 Successively press A B and C on the keyboard The display then shows ABC GLW PHVVDJH 3ULQW IRUPDW 3ULQW VSHF 6HOHFW PHVVDJH 6DYH PHVVDJH 0DLQWH QDQFH X LOLDU IXQFWLRQ QYLURQPHQW VHWX...

Страница 42: ... Press Back The system returns to the Print description screen GLW PHVVDJH 3ULQW IRUPDW 3ULQW VSHF 6HOHFW PHVVDJH 6DYH PHVVDJH 0DLQWH QDQFH X LOLDU IXQFWLRQ QYLURQPHQW VHWXS PHQX 6KRZ IDXOW DUQLQJ 3ULQW GHVFULSWLRQ 6WDWXV 5HDG 0HVVDJH QDPH 6KXW GRZQ 0DQXDO ...

Страница 43: ... appears 4 Press Year The first depression on the Year key prints the last digit of the year AD represented by a y The second depression of the Year key prints the last two digits of the year AD represented by yy The fourth depression of the Year key prints all four digits of the year AD represented by yyyy The subsequent description assumes that Year is pressed twice GLW PHVVDJH 3ULQW IRUPDW 3ULQ...

Страница 44: ...made on the special keyboard z Using the elapsed days function allows you to print the current number of days elapsed since January 1 in accordance with the internal calendar z The table below shows the difference between a common year and a leap year 3 2 3 2 Operating procedure z Entering a 3 digit value into the second line to print the number of elapsed days General instructions on the modifica...

Страница 45: ... elapsed days TTT appears in the display 5 Press Apply 6 Press Back You are returned to the Print description screen The print image area shows 188 for example ĸ ĺ GLW PHVVDJH 6WDWXV 5HDG 6LJQ 6KXW GRZQ 0DQXDO 6KRZ FXUVRU QVHUW HOHWH 8VHU SDWWHUQ 6SHFLDO DFN 6KLIW 6SDFH GLW PHVVDJH 6WDWXV 5HDG 6LJQ 6KXW GRZQ 0DQXDO 6KRZ FXUVRU QVHUW HOHWH 8VHU SDWWHUQ 6SHFLDO DFN 6KLIW 6SDFH DOHQGDU FRQGLWLRQV RXQ...

Страница 46: ... not included in the first week will be counted as the last week of the preceding year Example of counting week numbers at the end and beginning of year 3 2 4 2 Operating examples z To set a 2 digit week number 1 From the Print description screen press Edit message The Edit message screen opens 2 Touch the location beside character string WEEK The cursor will move to the touch position Mon Tue Wen...

Страница 47: ...eads 27 GLW PHVVDJH 6WDWXV 5HDG 6LJQ 6KXW GRZQ 0DQXDO 6KRZ FXUVRU QVHUW HOHWH 8VHU SDWWHUQ 6SHFLDO DFN 6KLIW 6SDFH DOHQGDU FRQGLWLRQV RXQW FRQGLWLRQV RXQW HDU 0RQWK D RXU 0LQXWH 7RWDO GD V 1 HHN QXPEHU D RI WKH ZHHN 86 00 86 GLW PHVVDJH 3ULQW IRUPDW 3ULQW VSHF 6HOHFW PHVVDJH 6DYH PHVVDJH 0DLQWH QDQFH X LOLDU IXQFWLRQ QYLURQPHQW VHWXS PHQX 6KRZ IDXOW DUQLQJ 3ULQW GHVFULSWLRQ 6WDWXV 5HDG 0HVVDJH QDP...

Страница 48: ...o set 1 digit day of the week 1 From the Print description screen press Edit message The Edit message screen opens 2 Touch the location beside character string WEEK The cursor will move to the touch position 3 Press Special The calendar input keyboard appears Mon Tue Wen Thu Fri Sat Sun 1 to 7 1 2 3 4 5 6 7 A to G A B C D E F G GLW PHVVDJH 3ULQW IRUPDW 3ULQW VSHF 6HOHFW PHVVDJH 6DYH PHVVDJH 0DLQWH...

Страница 49: ...ress Back You are returned to the Print description screen The print image area reads 4 86 GLW PHVVDJH 3ULQW IRUPDW 3ULQW VSHF 6HOHFW PHVVDJH 6DYH PHVVDJH 0DLQWH QDQFH X LOLDU IXQFWLRQ QYLURQPHQW VHWXS PHQX 6KRZ IDXOW DUQLQJ 3ULQW GHVFULSWLRQ 6WDWXV 5HDG 0HVVDJH QDPH 0DQXDO 6KXW GRZQ ...

Страница 50: ...r by one after every printing 1 From the Print description screen press Edit message If the cursor is not displayed press Show cursor The Edit message screen opens 2 Press Special 3 Press Count six times The display then shows CCCCCC 4 Press Apply GLW PHVVDJH 3ULQW IRUPDW 3ULQW VSHF 6HOHFW PHVVDJH 6DYH PHVVDJH 0DLQWH QDQFH X LOLDU IXQFWLRQ QYLURQPHQW VHWXS PHQX 6KRZ IDXOW DUQLQJ ĸ ĺ GLW PHVVDJH 6W...

Страница 51: ... screen Value 000001 Range 000000 199999 Direction 1 Update 000000 Jump 199999 000001 000001 Key Function Increment Increments a numeric setting Decrement Decrements a numeric setting Upper line Handles the count conditions for upper line Lower line Handles the count conditions for lower line ĸ ĺ RXQW FRQGLWLRQV 6WDWXV 5HDG 6KXW GRZQ HFUH PHQW QFUH PHQW 2 0DQXDO 6KRZ FXUVRU 9DOXH 5DQJH LUHFWLRQ XS...

Страница 52: ...he cursor moves to the second line The following counting results are obtained Only the essential numbers for which the count setup has been performed are shown 3 Press Apply 4 Press Back You are then returned to the Edit message screen Initial value 000001 Range 000000 991999 Direction 1 Update 000000 Jump 1000 000001 0001 㧜㧜㧜㧜㧜㧝 ޓޓ 㧜㧜㧜㧜㧜㧞 ޓޓ ޓޓ 㧜㧜㧜㧥㧥㧤 ޓޓ 㧜㧜㧜㧥㧥㧥 㧜㧝㧝㧜㧜㧜 ޓޓ 㧜㧞㧜㧜㧜㧝 ޓޓ ޓޓ 㧥㧤㧜㧥㧥㧤 ޓޓ 㧥...

Страница 53: ...ter width can be set in the range from 0 to 199 z When the product speed matching feature is implemented rotary encoder is connected set the character width as indicated below LUVW GLVSOD 6HFRQG GLVSOD ĸ ĺ 3ULQW VSHFLILFDWLRQV 6WDWXV 5HDG 6KXW GRZQ HFUH PHQW QFUH PHQW DFN 0DQXDO 6KRZ FXUVRU 5HSHDW LQWHUYDO VFDQQLQJ XQLW 6 5HSHDW FRXQW QRQH FRQWLQXRXV 6HQVRU ILOWHU WLPH VHWXS XQWLO HQG RI SULQW 6HW...

Страница 54: ...ected automatically in accordance with the print format setup z When making interlaced prints perform the following setup i Ensure that the setting on line number is two ii The particle use percentage should be 04 3 3 1 5 Write start position z The printing start position can be specified z The write position can be specified on either individual character basis or individual scan basis Setting Fe...

Страница 55: ...m this setting when operation shall be continued normally even if chattering occurs z In the case that a printing target detection signal chatters the time to ignore the sensor filter is set z When a fault caused by chattering occurs the message Print Overlap Error will be displayed z If the sensor filter feature is not needed set the value to 0 z The value can be set from 0 to 9999 milliseconds z...

Страница 56: ...n selected The same result is obtained by pressing Increment ĸ ĺ 3ULQW VSHFLILFDWLRQV 6WDWXV 5HDG 6KXW GRZQ HFUH PHQW QFUH PHQW DFN 0DQXDO 6KRZ FXUVRU KDUDFWHU KHLJKW KDUDFWHU ZLGWK KDUDFWHU RULHQWDWLRQ UURZ 3ULQWLQJ GLUHFWLRQ 3ULQWLQJ PHWKRG VLQJOH VFDQ LQWHUODFHG ULWH VWDUW SRVLWLRQ VFDQQLQJ XQLW 6 1H W GLVSOD 8QLW FKDQJH ĸ ĺ 3ULQW VSHFLILFDWLRQV 6WDWXV 5HDG 6KXW GRZQ HFUH PHQW QFUH PHQW DFN 0DQ...

Страница 57: ...l characters ii On an individual character basis Number of characters x print target size print width of all characters Example Print target size 64 mm print width of all characters 25 mm number of characters 6 character size 5 x 7 dots inter character space 2 dots On an individual scan basis 5 2 x 1 x 6 2 x 1 1 x 64 25 99 84 100 On an individual character basis 6 x 64 25 15 36 15 z Round the calc...

Страница 58: ...ess 9 four times successively The repeat count is set to 9999 7 Press Apply 8 Press Back You are then returned to the Printing description screen ĸ ĺ 3ULQW VSHFLILFDWLRQV 6WDWXV 5HDG 6KXW GRZQ HFUH PHQW QFUH PHQW DFN 0DQXDO 6KRZ FXUVRU KDUDFWHU KHLJKW KDUDFWHU ZLGWK KDUDFWHU RULHQWDWLRQ UURZ 3ULQWLQJ GLUHFWLRQ 3ULQWLQJ PHWKRG VLQJOH VFDQ LQWHUODFHG ULWH VWDUW SRVLWLRQ VFDQQLQJ XQLW 6 1H W GLVSOD 8...

Страница 59: ...2 07 28 02 07 28 02 07 01 03 07 29 01 07 28 02 07 28 02 07 28 02 07 01 03 07 30 01 07 28 02 07 28 02 07 28 02 07 01 03 07 31 01 07 28 02 07 28 02 07 28 02 07 01 03 07 01 02 07 28 02 28 01 03 28 01 03 28 02 03 28 02 02 07 01 03 07 02 03 07 02 03 07 03 03 07 27 02 07 26 03 07 27 03 07 27 03 07 28 03 07 28 03 07 27 03 07 28 03 07 28 03 07 29 03 07 01 03 07 31 03 07 01 04 07 01 04 07 02 04 07 28 01 08...

Страница 60: ...ndar conditions screen opens with the cursor positioned in the year input field Calendar clock date Day preceding same day Same day 1 year 4 years 1 year 4 years 29 02 08 28 02 09 28 02 12 28 02 09 29 02 12 GLW PHVVDJH 3ULQW IRUPDW 3ULQW VSHF 6HOHFW PHVVDJH 6DYH PHVVDJH 0DLQWH QDQFH X LOLDU IXQFWLRQ QYLURQPHQW VHWXS PHQX 6KRZ IDXOW DUQLQJ ĸ ĺ GLW PHVVDJH 6WDWXV 5HDG 6LJQ 6KXW GRZQ 0DQXDO 6KRZ FXUV...

Страница 61: ...r item touch the line of the item to be set and repeat the steps 4 and 5 7 Press Back You are then returned to the Edit message screen 8 Press Back You are returned to the Print description screen DOHQGDU FRQGLWLRQV 2IIVHW HUR VXSSUHVVLRQ HDU LVDEOH QDEOH 0RQWK LVDEOH QDEOH D LVDEOH QDEOH RXU LVDEOH QDEOH 0LQXWH LVDEOH QDEOH 6WDWXV 5HDG 6KXW GRZQ 0DQXDO 6KRZ FXUVRU RZHU OLQH 8SSHU OLQH DFN HFUH PH...

Страница 62: ...ion screen press Save message The system returns to the Save message screen 2 Press A B and C successively The message name field then shows ABC 3 Press Execute save The system saves the data and returns to the Print description screen z Press Cancel to return to the Print description screen without saving the print data GLW PHVVDJH 3ULQW IRUPDW 3ULQW VSHF 6HOHFW PHVVDJH 6DYH PHVVDJH 0DLQWH QDQFH ...

Страница 63: ...e message No 6 3 Press OK The recall confirmation message appears 4 Press Enter The system then recalls the print data FFFFFFFFFFFF and returns to the Print description screen z If print data is recalled during a printing operation the screen will show the recalled print data but printing of the previous contents is continued The new data will be printed in the next printing operation GLW PHVVDJH ...

Страница 64: ...3 28 z 3 7 Recalling Saved Data Section 3 ...

Страница 65: ...e is displayed The standard value is constantly displayed Cumulative operating time The cumulative operating time is displayed This value cannot be changed The displayed value is incremented up to 999 999 hours Print count The total number of prints made is displayed This value can be changed A setting between 0 and 999 999 999 can be selected Ink name The type of ink is displayed Makeup ink name ...

Страница 66: ...QFH X LOLDU IXQFWLRQ QYLURQPHQW VHWXS PHQX 6KRZ IDXOW DUQLQJ 0DLQWHQDQFH PHQX 6WDWXV 5HDG 0DQXDO 6KXW GRZQ DFN QYLURQPHQW VHWXS PHQX 2SHUDWLRQ PDQDJHPHQW 7HVW SULQW FLWDWLRQ XSGDWH 1R OH WHVW RJ PDQDJHPHQW LUFXODWLRQ FRQWURO 6RIWZDUH PDQDJHPHQW 3DVVZRUG SURWHFWLRQ ĸ ĺ 2SHUDWLRQ PDQDJHPHQW 6WDWXV 5HDG 6KXW GRZQ HFUH PHQW QFUH PHQW 2 0DQXDO 6KRZ FXUVRU 2SHUDWLQJ WLPH KRXUV DUQLQJ WLPH KRXUV VWDQGDUG...

Страница 67: ...0DQXDO SSO 2SHUDWLQJ WLPH KRXUV DUQLQJ WLPH KRXUV VWDQGDUG YDOXH XPXODWLYH RS WLPH KRXUV 3ULQW FRXQW SULQWV QN PDNHXS LQN 3 7 7 3 FLWDWLRQ VHWXS a FLWDWLRQ IUHTXHQF N 1H W GLVOSD 5H FRYHU 5HVHW Entry procedures Key Function Reset Resets the value to 0 when the cursor is placed in the operating time alarm time print count or cumulative operating time field Recover Reverts the setting at the current...

Страница 68: ...he product speed matching feature is disabled 1 1 Calendar offset Specifies whether the same day or day preceding same day option is selected for calendar month year offset Day preceding same day Day of the week Set the type of character for printing calendar day of the week 1 to 7 Character size Specifies the character size to be used The following sizes can be selected 1 5 x 8 Character size 1 5...

Страница 69: ...cursor moves to the product speed matching field GLW PHVVDJH 3ULQW IRUPDW 3ULQW VSHF 6HOHFW PHVVDJH 6DYH PHVVDJH 0DLQWH QDQFH X LOLDU IXQFWLRQ QYLURQPHQW VHWXS PHQX 6KRZ IDXOW DUQLQJ 0DLQWHQDQFH PHQX 6WDWXV 5HDG 0DQXDO 6KXW GRZQ DFN QYLURQPHQW VHWXS PHQX 2SHUDWLRQ PDQDJHPHQW 7HVW SULQW FLWDWLRQ XSGDWH 1R OH WHVW RJ PDQDJHPHQW LUFXODWLRQ FRQWURO 6RIWZDUH PDQDJHPHQW 3DVVZRUG SURWHFWLRQ QYLURQPHQW VH...

Страница 70: ...ivision input field 7 Press 0 0 and 3 successively The frequency division input field then shows 3 8 Press Apply 9 Press Back The system returns to the Environment setup menu screen 3URGXFW VSHHG PDWFKLQJ LVDEOH QDEOH UHTXHQF GLYLVLRQ a QWHU GHQRPLQDWRU DOHQGDU RIIVHW GD SUHFHGLQJ VDPH GD VDPH GD D RI WKH ZHHN a a KDU VL H FLWDWLRQ ZDUQLQJ LVDEOH QDEOH ĸ ĺ 6KXW GRZQ HFUH PHQW QFUH PHQW DFN 0DQXDO ...

Страница 71: ...nted 1 Choose Environment setup menu from the maintenance menu The Environment setup menu screen appears If the cursor is not displayed press Show cursor 2 Press Date time setup The Date time setup screen opens 3 Touch the line to set Calendar time control The cursor moves to the calendar time control field Same as current time The current time is used as the calendar time Clock stop A predefined ...

Страница 72: ...s 23 hour 00 minute 12 second with the cursor positioned in the second input field 8 Press 0 and 0 successively The calendar time is set as indicated below with the cursor positioned in the year input field 9 Press OK You are returned to the Environment setup menu screen 2005 year 07 month 07 day 23 hour 00 minute 00 second ĸ ĺ 6KXW GRZQ HFUH PHQW QFUH PHQW 2 0DQXDO 6KRZ FXUVRU DWH WLPH VHWXS 6WDW...

Страница 73: ...etup menu screen opens 2 Press Password setup update The Password setup update screen opens z If no password was selected before you do not need to enter the old password The cursor is placed in the new password input field z Pressing ABC displays an upper case alphabetical keyboard 3 With the cursor positioned in the old password input field press A Y Z 0 and 2 A string of marks is displayed for ...

Страница 74: ...ons occurs an error message will appear 1 The entry in the old password field does not agree with the current password The error does not occur if you type in NOCHECK for the password This is useful when you forgot your password z Old password mismatch 2 The entries in the new password field and new password reentry field do not match z New password mismatch ĸ ĺ 3DVVZRUG VHWXS XSGDWH 6WDWXV 6WRS 6...

Страница 75: ...ge function is restricted z Character input z Calendar conditions z Count conditions z Select message 2 When Save message is restricted z Save message 3 When Print specifications is restricted z Print specifications 4 When Print format is restricted z Print format 5 When Service is restricted z User environment setup z Date time setup z Display environment setup z Operation management z Excitation...

Страница 76: ...ay the alphanumeric keyboard GLW PHVVDJH 3ULQW IRUPDW 3ULQW VSHF 6HOHFW PHVVDJH 6DYH PHVVDJH 0DLQWH QDQFH X LOLDU IXQFWLRQ QYLURQPHQW VHWXS PHQX 6KRZ IDXOW DUQLQJ 0DLQWHQDQFH PHQX 6WDWXV 5HDG 0DQXDO 6KXW GRZQ DFN QYLURQPHQW VHWXS PHQX 2SHUDWLRQ PDQDJHPHQW 7HVW SULQW FLWDWLRQ XSGDWH 1R OH WHVW RJ PDQDJHPHQW LUFXODWLRQ FRQWURO 6RIWZDUH PDQDJHPHQW 3DVVZRUG SURWHFWLRQ 3DVVZRUG SURWHFWLRQ 6WDWXV 6WRS D...

Страница 77: ... You are returned to the Maintenance menu screen The restricted function is no longer available z To restrict other items as needed to place the cursor in the target field and then press 1 3DVVZRUG SURWHFWLRQ 6WDWXV 6WRS DFN IWHU RX KDYH HQWHUHG D FRUUHFW SDVVZRUG RX DUH SHUPLWWHG WR FKDQJH WKH SDVVZRUG SURWHFWLRQ VHWWLQJV EHORZ 3DVVZRUG GLW PHVVDJH 6HOHFW PHVVDJH DFHVV SURWHFW 6DYH PHVVDJH DFHVV ...

Страница 78: ...4 14 z 4 5 Controlling the Executable Functions Section 4 ...

Страница 79: ...Choose Auxiliary function from the menu The Auxiliary function menu screen opens 2 Press Message number change The Message number change screen opens 3 Touch the line of No 3 The cursor moves to line No 3 GLW PHVVDJH 3ULQW IRUPDW 3ULQW VSHF 6HOHFW PHVVDJH 6DYH PHVVDJH 0DLQWH QDQFH X LOLDU IXQFWLRQ QYLURQPHQW VHWXS PHQX 6KRZ IDXOW DUQLQJ X IXQFWLRQ PHQX 6WDWXV 6WRS 6WDUW XS DFN 0HVVJH QXPEHU FKDQJH...

Страница 80: ... are returned to the Auxiliary reduction menu screen 1R 0HVVDJH QDPH 1R 0HVVDJH QDPH 0HVVDJH QXP FKDQJH 6WDWXV 6WRS 6KXW GRZQ 3UHY OLVW 1H W OLVW 6HOHFW GHVHOHFW DQFHO 6HOHFW WKH PRYH GHVWLQDWLRQ 1R 0HVVDJH QDPH 1R 0HVVDJH QDPH 0HVVDJH QXP FKDQJH 6WDWXV 6WRS 6KXW GRZQ 3UHY OLVW 1H W OLVW 6HOHFW GHVHOHFW DQFHO 6HOHFW WKH PRYH GHVWLQDWLRQ 1R 0HVVDJH QDPH 1R 0HVVDJH QDPH 0HVVDJH QXP FKDQJH 6WDWXV 6WR...

Страница 81: ...e deletion The Registered data deletion screen opens 3 Touch the line No 2 The cursor moves to line No 2 GLW PHVVDJH 3ULQW IRUPDW 3ULQW VSHF 6HOHFW PHVVDJH 6DYH PHVVDJH 0DLQWH QDQFH X LOLDU IXQFWLRQ QYLURQPHQW VHWXS PHQX 6KRZ IDXOW DUQLQJ X IXQFWLRQ PHQX 6WDWXV 6WRS 6WDUW XS DFN 0HVVJH QXPEHU FKDQJH 6WRUHG PHVVDJH GHOHWLRQ 0HVDJH QDPH FKDQJH 8VHU SDWWHUQ FUHDWLRQ 7RXFK VFUHHQ FRRUGLQDWH FDOLEUDWLR...

Страница 82: ...s list to see the rest of the list 5 Press Execute deletion The BBBBBBBBBBBB print data is then deleted 6 Press Cancel You are returned to the Auxiliary function menu screen 6WRUHG 0HVVDJH HOHWLRQ RQILUPDWLRQ 3ULQW GDWD ZLOO EH GHOHWHG DQFHO 2 1R 0HVVDJH QDPH 1R 0HVVDJH QDPH 6WRUHG PHVVDH GHO 6WDWXV 6WRS 6KXW GRZQ 3UHY OLVW 1H W OLVW 6HOHFW DQFHO 6HOHFW WKH PHVVDJH WR EH GHOHWHG ...

Страница 83: ...ge of the message name opens If more than 13 sets of print data are registered press Next list or Previous list to see the rest of the list 3 Press Select The input screen for a message name change opens GLW PHVVDJH 3ULQW IRUPDW 3ULQW VSHF 6HOHFW PHVVDJH 6DYH PHVVDJH 0DLQWH QDQFH X LOLDU IXQFWLRQ QYLURQPHQW VHWXS PHQX 6KRZ IDXOW DUQLQJ X IXQFWLRQ PHQX 6WDWXV 6WRS 6WDUW XS DFN 0HVVJH QXPEHU FKDQJH ...

Страница 84: ... Auxiliary function menu screen ĸ ĺ 0HVVDJH QDPH FKDQJH 6WDWXV 6WRS 6KXW GRZQ QVHUW HOHWH 2 DQFHO 6KLIW 6LJQ 6SDFH XUUHQW PHVVDJH QDPH 1HZ PHVVDJH QDPH 1R 0HVVDJH QDPH 1R 0HVVDJH QDPH 0HVVDJH QDPH FKDQJH 6WDWXV 6WRS 6KXW GRZQ 3UHY OLVW 1H W OLVW 6HOHFW DQFHO 6HOHFW WKH PHVVDJH QDPH WR EH FKDQJHG XSOLFDWH 0HVVDJH 1DPH 3ULQW GDWD KDYLQJ WKH VDPH PHVVDJH QDPH KDV DOUHDG EHHQ VWRUHG DQFHO If the messa...

Страница 85: ...e character size of 5 x 7 and inter character spacing of 0 For general instructions on the modification of settings see Section 2 1 3 Operations for Modifying the Setting Contents 1 Verify that the printer is in Stop or Standby state Choose Auxiliary function from the menu The Auxiliary function menu screen opens 2 Press User pattern creation The User pattern creation screen opens Character size 5...

Страница 86: ...he cursor is positioned at the upper left corner of the pattern creation area To move the cursor use the key matrix located beside the dot pattern creation area Examples for moving the cursor are shown below Ĺ NH Ļ ĸ ĺ Ĺ Ļ Ĺ Ļ NH NH NH NH NH NH NH ...

Страница 87: ... are reversed To change the cursor type press Invert next 3 Press key five times successively This moves the cursor to the lower left corner of the matrix 4 Press Invert next The cursor changes to reversal mode z The following indications are given Dot present No dot present z Press Clear to erase the pattern generated in the creation area so far 5 Press four times successively This moves the curs...

Страница 88: ... 40 destinations can be selected for every character size To see another screen press Next char set 10 Press OK The system registers the created pattern and returns to the User pattern creation screen The memorized pattern is displayed You can press Cancel to return to the User pattern creation screen without saving the created pattern 11 Press Back You are returned to the Auxiliary function menu ...

Страница 89: ...uxiliary function menu screen opens 2 Press User pattern creation The User pattern creation screen opens 3 Press Select The Pattern select screen opens GLW PHVVDJH 3ULQW IRUPDW 3ULQW VSHF 6HOHFW PHVVDJH 6DYH PHVVDJH 0DLQWH QDQFH X LOLDU IXQFWLRQ QYLURQPHQW VHWXS PHQX 6KRZ IDXOW DUQLQJ X IXQFWLRQ PHQX 6WDWXV 6WRS 6WDUW XS DFN 0HVVJH QXPEHU FKDQJH 6WRUHG PHVVDJH GHOHWLRQ 0HVDJH QDPH FKDQJH 8VHU SDWW...

Страница 90: ...The system then returns you to the User pattern creation screen and displays the selected pattern in the editing area Press Cancel to return to the User pattern creation screen without recalling the selected pattern The procedure for modifying and registering a recalled pattern is similar to that used to create and register a pattern ŀ î î î GRWV 6WDWXV 6WRS 6KXW GRZQ 2 DQFHO 1H W FKDU VHW 3DWWHUQ...

Страница 91: ...window opens to display a fault or warning message z The following on screen indications are given 1 When a fault occurs z When you press Reset after eliminating the cause the fault condition clears and the message disappears z When you press Erase message the fault window clears but the fault condition persists z When a fault condition no longer exists only the Erase message key is displayed 2SHU...

Страница 92: ...ss judgment z The confirmation messages are described in the context of the associated operating procedures QN RZ DUQLQJ Ƈ Ƈ Ƈ Ƈ Ƈ Ƈ Ƈ Ƈ Ƈ Ƈ Ƈ Ƈ Ƈ Ƈ 7KH LQN OHYHO LQ WKH LQN UHVHUYRLU LV ORZ DXVH 7KH LQN UHVHUYRLU LV DOPRVW HPSW 7KH LQN OHYHO VHQVRU LV GHIHFWLYH 6ROXWLRQ GG PRUH LQN ZLWKLQ PLQXWHV UDVH PHVVDJH 7KH QDPH RI WKH ZDUQLQJ FRQGLWLRQ LV GLVSOD HG KHUH PHVVDJH FDXVH DQG VROXWLRQ RI WKH ZD...

Страница 93: ...es after indication of the warning z Add makeup ink to the makeup ink tank 4 Replenishment Time out The automatic replenishment sequence is taking too much time z Contact your nearest Hitachi distributor 5 Ink Drop Charge Too Low The ink particles are poorly charged charge too low z Clean the gutter deflection electrode and adjacent parts z Adjust the excitation setting to make sure that the ink p...

Страница 94: ... Fault M Failure of the engine section hardware z Contact your nearest Hitachi distributor 17 F Memory Fault S Failure of the engine section hardware z Contact your nearest Hitachi distributor 18 Hardware Error C Failure of the controller section hardware z Contact your nearest Hitachi distributor 19 Ink Heating Fault Failure of the ink heating section z Contact your nearest Hitachi distributor 20...

Страница 95: ... the sensor closer to the nozzle head so that no more than four print targets can enter between the sensor and nozzle head 5 Print Data Changeover In Progress S The IJ printer entered the printing state during a print specifications print format changeover z Do not print during print specifications print format changeover 6 Print Data Changeover In Progress C The IJ printer entered the printing st...

Страница 96: ...ing to make sure that the ink particles are properly shaped z Adjust the ink pres sure z Check that the ink beam is correctly retracted 11 Internal Communication Error C Failure of data processing within the engine section z Turn OFF the power and then turn back ON 12 Internal Communication Error M Failure of data processing within the engine section z Turn OFF the power and then turn back ON No M...

Страница 97: ... Contact your nearest Hitachi distributor 7 Battery Low The voltage of the built in battery is too low z Contact your nearest Hitachi distributor z When you start print ing set the correct cal endar time again from the date time setup screen Section 4 3 Set ting the Date and Time on page 4 7 8 Product Speed Matching Error The next speed follow up signal is input while printing is activated by the ...

Страница 98: ... Section 6 13 Excitation Setting Review Excitation setting needs to be reviewed z Determine the opti mum excitation setup value running the noz zle property test and update the old excita tion setup value No Message Meaning of message Remedy ...

Страница 99: ...og management The following screen opens to display a list of warning conditions fault messages z When there are more than 8 messages press Next list to view the rest of the list Pressing Previous list returns you to the previous screen 2 Press Back The system returns you to the Maintenance menu screen 0DLQWHQDQFH PHQX 6WDWXV 6WDQGE 0DQXDO 6KXW GRZQ DFN QYLURQPHQW VHWXS PHQX 2SHUDWLRQ PDQDJHPHQW 7...

Страница 100: ...6 10 z 6 3 Viewing the Warning Condition and Fault Occurrences Section 6 ...

Страница 101: ...tion z If the power supply is shut off by a power failure also perform the procedure described above Press the power ON OFF switch to turn OFF the power DANGER z If an earthquake fire or other emergency arises while the printer is print ing or energized turn OFF the power by pressing the power ON OFF switch Never perform this procedure except in case of emergency CAUTION In the event of a power fa...

Страница 102: ...7 2 z Emergency Procedures Section 7 ...

Страница 103: ... parts including consumable parts are 7 years after termination of production z When you order consumable parts specify the part name and the part code No Consumable Approximate replacement interval Replacement procedure reference section 1 Ink filter 2 400 hrs Section 6 9 Ink Filter Replacement 2 Circulation filter 2 400 hrs Section 6 11 Instruction Manual Circulation Filter Replacement 3 Recover...

Страница 104: ...on 6 13 Instruction Manual Excitation Setting Adjustment and Section 6 14 Instruction Manual Ink Particle Generation Status Checkout Procedure 4 When the printer is operated 24 hours a day record the operating time and print count on a periodic basis The operating log may be lost in the event of a power failure 8 3 Parts to be replaced periodically The clock battery circulation system parts pump s...

Страница 105: ... 1 First hook the square slot at the bottom of air filter cover onto the projecting tab of printer 2 Turn the knob until the air filter cover comes into contact with the printer CAUTION z Insert the filter completely If not dust may enter the printer and cause a failure LU ILOWHU 5HG 0DUN 7KH UHG PDUN VLGH LV WKH LQVLGH RI WKH SULQWHU LU ILOWHU LU ILOWHU XLGH LU ILOWHU FRYHU 6TXDUH VORW 7XUQ 3URMH...

Страница 106: ... 4 Failures caused by defects conveyor or product defect outside the ink jet printer or caused by movement or delivery of the ink jet printer after installation 5 Failures caused by improper operating conditions Ink Makeup ink Type Part code number Type Part code number JP K33 451313 TH 18 451022 JP K31A 451387 TH TYPE E 451386 JP K60 451509 TH 60 451510 JP K62 451512 TH 18 451022 JP F63 451513 TH...

Страница 107: ...y manufacturing loss due to downtime of the ink jet printer and product damages product or facility loss caused by failure or malfunction of the ink jet printer However in the event of a printer failure Hitachi will send service engineers as soon as possible to repair the printer and reduce the downtime Your Hitachi sales representative Telephone Person in charge Your Hitachi distributor Telephone...

Страница 108: ...8 6 z 8 3 Parts to be replaced periodically Section 8 ...

Отзывы: