background image

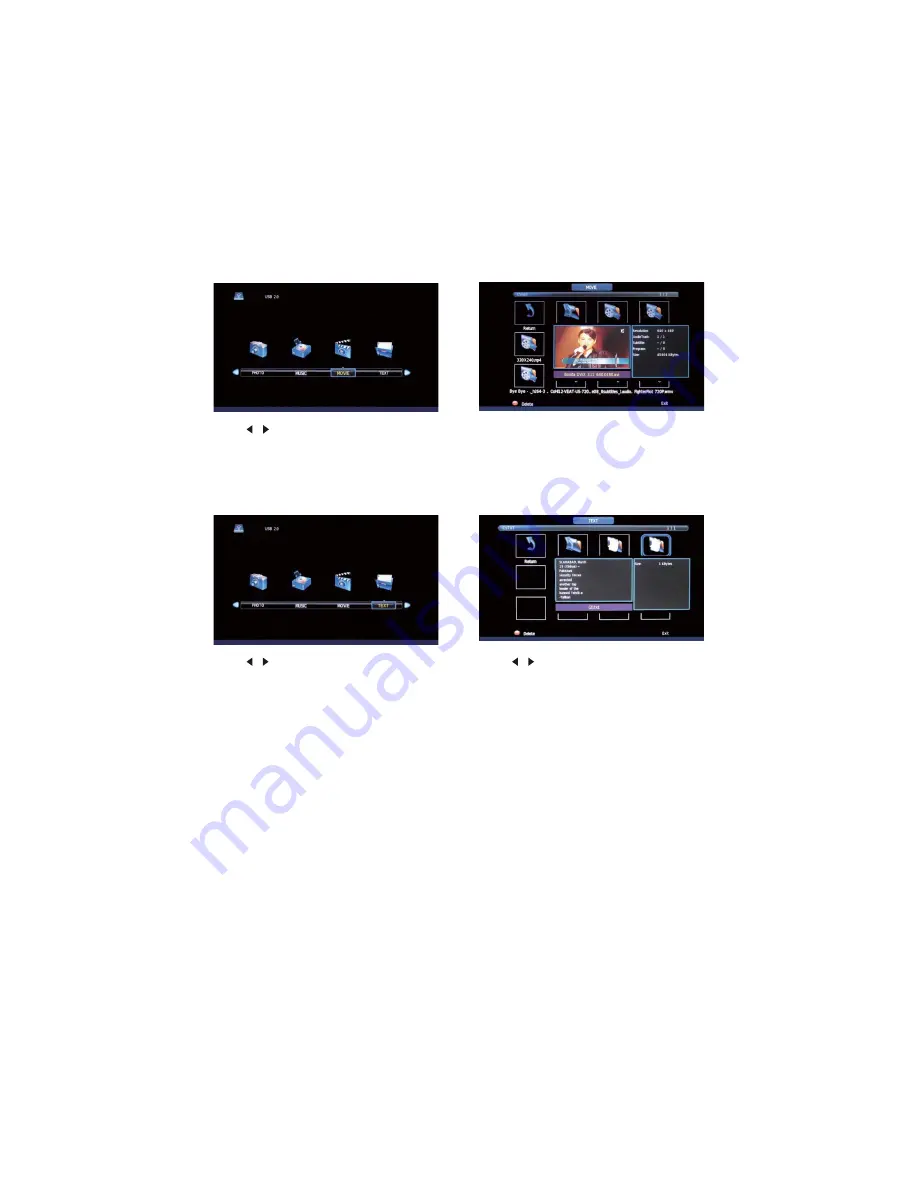
Media - Movie

Media - Text

Press   /   to select Movie, then press [OK] to enter. Press [DISPLAY] to show the 
function panel on the bottom of the screen. The basic operations within the movie 
menu are the same as for those in the Music menu (previous page). 

Press 

 / 

 to select Text, then press 

[OK] to enter.

Press 

 / 

to select the file you want to 

view in the file selection menu. When 
highlighting the option you select, 
the file information will appear on the 
right and the file can be previewed in 
the centre. Press [OK] to start viewing 
the text in full screen.

Media (USB) Mode 

(Cont.)

37

Содержание LE19ECD05AU

Страница 1: ...you for purchasing this HITACHI product To obtain the best performance and safety please read this manual carefully Please keep this manual for future reference User Manual LED LCD TV LE32ECD05AU LE32HECD05AU ...

Страница 2: ...ing Started 17 Basic Operations 19 EPG Electronic Programme Guide 21 Recording PVR function 23 The On Screen Display OSD Menu 26 Menu Options in TV Mode 27 Menu Options in PC Mode 34 Media USB Mode 35 Built in DVD Player Operations 38 Cleaning and Maintenance 44 FAQs 45 46 Contents 2 ...

Страница 3: ...Thank you for purchasing this HITACHI product To obtain the best performance and safety please read this manual carefully Please keep this manual for future reference Welcome 3 ...

Страница 4: ... IFBU cPVME NFMU UIF JOTVMBUJPO BOE eYQPTF MJvF XJreT t TIJT T7 TFU DBO POMZ CF EJTcPOOFcUFE GrPN UIF QoXFS TVQQMZ CZ VOQMVHHJOH JU frPN UIF XBMM TPDLFU MBLF TVrF UIF QMVH BOE TPDLFU BrF rFBEJMZ BccFTTJCMe CAUTION 3 4 0 C53 4 0 0 O5 01 CAUTION TP QreveOU UIF rJTL PG FMFcUrJD TIPDL EP OPU rFNovF UIF covFS PS CBDL TIJT VOJU coOUBJOT OP VTFr TFrWJcFBCMF QBrUT JOTJEe RefFS BMM TIJT TZNCPM JT JOUFOEFE ...

Страница 5: ...ollowing circumstances t If you will not be using it for a long period of time t If it has been subject to impact or has been dropped and is damaged t If its power cord or plug or the wall socket are damaged t The appliance is not intended for use by persons including children with reduced physical sensory or mental capabilities or lack of experience and knowledge unless they have been given super...

Страница 6: ...similar t Do not put any objects filled with liquids such as vases on top of the TV set t Do not place any naked flame sources such as lighted candles on top of the TV t Do not install the unit in an unstable space Cleaning and maintenance WARNING Be sure to disconnect the power cord before proceeding with any cleaning or maintenance task t Dust the TV set by wiping the screen and cabinet with a s...

Страница 7: ...trated on the right There are a total of 4 screws to fasten the base to the TV support column The stand is now fully assembled Assembling the stand Contents of carton 1 x LED LCD TV 1 x Remote control 2 x AAA batteries 1 x Instruction manual 1 x Warranty card 1 x Stand base 4 x KA4 12 Screws for stand 7 NOTE Two of these screws are already assembled on the connecting part to hold it in place durin...

Страница 8: ...ll mounting brackets NOTE The distance between the holes is 200 x 100mm in width and heigh 200 100 t For wall mounting remove all five screws to remove the entire stand assembly NOTE The screws in the package are for securing the TV stand only If you are wall mounting the TV consult a qualified installer for further instructions on bracket support and wall support Assembly Cont 8 ...

Страница 9: ... TV rating label General control buttons 1 Power Stand by button 2 Input source select button SOURCE 3 Menu button MENU 5 Channel up button CH 4 Channel down button CH 7 Volume increase button VOL 6 Volume decrease button VOL 10 Remote sensor 11 Power indicator For the DVD player 8 Play Pause button 9 Eject button 9 Disc slot ...

Страница 10: ...Composite audio video input sockets L R VIDEO 4 Coaxial output socket COAXIAL OUT 3 USB port MEDIA 7 VGA interface input socket VGA 6 PC audio input socket PC AUDIO 5 Component video input sockets Y Pb Cb Pr Cr 3 2 8 Antenna Cable TV input socket RF 75Ω 10 3 2 5 ...

Страница 11: ...AV Connection Component YPbPr USB Connection Controls and Connections Cont Connections 11 3 3 2 3 ...

Страница 12: ...VGA PC Connection HDMI Connection Controls and Connections Cont 12 2 2 ...

Страница 13: ...Remote control The buttons on the remote control and similarly marked ones on the main unit perform similar functions Controls and Connections Cont 2 1 3 4 5 7 9 10 11 14 16 17 6 8 12 13 15 18 19 13 ...

Страница 14: ... Menu button MENU 17 Volume control buttons 18 Sleep timer button SLEEP 19 Multidigits button EPG DVD MENU Electronic programme guide button DVD disc menu button FAV Favourite programme channel list button SIZE ZOOM Teletext size buton DVD zoom in out button SUBTITLE Subtitle button MEDIA Media select button USB DVD play pause button USB DVD fast backward button USB DVD fast forward button USB DVD...

Страница 15: ...ress to play the previous title chapter track Press to play the next title chapter track GOTO Press to activate the on screen scroll down menu for editing REPEAT Press the YELLOW button to play back a portion automatically choose between OFF CHAPTER TRACK REP ALL A B Press the BLUE button to start the repeat portion from A B Teletext buttons TEXT MIX HOLD Teletext hold button SUBTITLE Subtitle but...

Страница 16: ...sed captions is still working on most Australian television channels This service allows you to activate subtitles while watching normal television programmes that provide it Accessing closed captions While watching a programme press the teletext button TEXT MIX on the remote control then enter the numbers 801 on the remote control to activate the subtitles To exit the subtitles press the TEXT MIX...

Страница 17: ...on of the unit deteriorates Precautions when using batteries t Do not use old and new batteries together t batteries together t Note that there are chargeable and non chargeable batteries Do not attempt to charge non chargeable batteries t Always remove the batteries from the remote control unit and store the unit in a dry place if you do not intend to use the remote control for more than a month ...

Страница 18: ...t the desired language then press OK to enter the Channel Tuning screen The default language of this TV is English 5 The TV will start searching channels automatically from the lowest frequency When it finds a station it will store this in the first location and move to the next When auto tuning is completed the TV will display the channels in logical channel number LCN order 6 Press MENU or EXIT ...

Страница 19: ...red stand by to blue on The unit will switch to stand by mode and the power indicator turns red Basic Operations TV channel selection then choose your channel one of the following ways t Press CH or CH on the main unit t Press 0 9 combined if necessary to input the channel number directly t Press LAST CH to go back to the previous channel you watched last time Mute function Press MUTE again or the...

Страница 20: ...URCE on the TV remote control to select it The input source menu appears 1 Use the up down navigation keys to move the highlighted bar to the desired source item 2 Press OK or to confirm information of the selected source name will appear on the TV screen for a few seconds Information display Press DISPLAY on the remote control the related information about the current source will appear on the sc...

Страница 21: ...re you can view any EPG information you have to activate every channel for which you want to view programme information To do this use the buttons to select a channel in the left column then press OK to confirm 3 Press the button to access the column on the right containing the list of programmes for the currently selected channel Use the buttons to select a different programme and display informa...

Страница 22: ...isplay Press the GREEN button to show information about the selected programme Schedule Press the YELLOW button to display the Scheduled Recording and Reminders list Press to select a reminder Press the RED button to delete a reminder Remind Press the BLUE button to display a reminder menu Press to select an item to change Press OK to add the programme to the reminder list An updated reminder list...

Страница 23: ...s and OK to confirm Once you are in PVR mode use the arrow keys at the bottom of the screen when watching the recording Time shift recording Use the same one touch recording method as described above for time shifting a programme you are currently watching Time shifting is the recording of TV programmes to a storage medium your USB device for viewing at a later more convenient time Use it to recor...

Страница 24: ...and with a USB device properly inserted press the EPG button on your remote control to display the EPG interface Then follow steps 2 5 under EPG on page 21 2 When you have found a programme you want to set to record press the RED button on the remote control Then press OK and then you will see the scheduled programme displayed at the bottom of the screen Recording PVR function Cont NOTE When you a...

Страница 25: ...n Cont To format a compatible device using the TV perform the following steps 1 Press MENU then press five times so that SETUP is displayed at the left of the window 2 Press four times so that PVR file system is highlighted in Yellow then press OK The window below will be displayed 3 Press two times so that Format is highlighted then press OK 4 Press OK then once to begin the formatting process 5 ...

Страница 26: ... DTV only Available in DTV only Available in DTV only Available in DTV only Available in DTV only Available in DTV only The On Screen Display OSD Menu CHANNEL PICTURE SOUND Auto Tuning Picture Mode Sound Mode Treble Bass Balance Auto Volume SPDIF Mode AD Switch Contrast Brightness Colour Tint Sharpness Colour Temperature Noise Reduction ATV Manual Tuning DTV Manual Tuning Program Edit Signal Infor...

Страница 27: ...or editing the current channel 1 Press the RED button to delete the current channel 2 Press the GREEN button to rename it ATV only 3 Press the YELLOW button and the keys to move it ATV only 4 Press the BLUE button to skip it 5 Press FAV to add it to your favourite channels list If it already is one of your favourite channels pressing this button again will delete it from the list Signal informatio...

Страница 28: ...ress or OK to enter the sub menu then press to set the picture contrast intensity Brightness Press or OK to enter the sub menu then press to set the picture brightness Colour Press or OK to enter the sub menu then press to set the picture colour intensity Tint Press or OK to enter the sub menu then press to set the picture tint only available for NTSC video signal Sharpness Press to set the pictur...

Страница 29: ...your desired value for treble or bass or set your desired balance for the left and right channel speakers Auto volume Press or OK to enter the sub menu then set the automatic volume level to On or Off When set to On the volume of the channel is automatically controlled SPDIF Mode You can select the type of digital sound output from the COAXIAL connection for connecting a sound system Press or OK t...

Страница 30: ...he Sleep Timer sub menu then press to set the sleep timer to off or to switch the TV off automatically after 10 20 30 60 90 120 180 or 240 minutes You can also press SLEEP repeatedly on the remote control to change the sleep timer directly Auto stand by You can select the time after which you want the TV to switch automatically to stand by Press or OK to enter the sub menu then press to set auto s...

Страница 31: ...e from different classification categories as pictured on the right Lock menu Press MENU to display the main menu Press to select Lock in the main menu then press or OK to enter Lock system This allows you to turn the system lock on or off When this option is on you cannot manually search and adjust channels To change this setting you must enter a password first the default password is 0000 Set pa...

Страница 32: ...V t Max Volume Set the maximum volume value t Clear Lock Clear all hotel mode locks Set up menu t Press MENU to display the main menu t Press to select Set up in the main menu then press or OK to enter OSD Language t Press or OK to enter the OSD Language sub menu t Press to select your preferred OSD menu language The factory default setting is English TT Language Press or OK to enter the sub menu ...

Страница 33: ...Auto 4 3 16 9 Zoom1 Zoom2 Just Scan 16 9 is the default setting NOTE Just Scan is panoramic display so black edging may appear according to the data rate Auto and Just Scan may be not available in some sources Blue screen Press or OK to set the blue screen display to On or Off Set to On it will display a blue screen when there is no signal on the currently selected source First time installation P...

Страница 34: ...l generally adjust the picture s location on the screen clock and phase according to the signal output from the PC you connected Under certain circumstances auto adjustment may not work If this happens you can adjust the position clock and phase manually H Offset V Offset Press or OK to enter the sub menu then press to adjust the horizontal or vertical position of the picture Size Press or OK to e...

Страница 35: ...u Alternatively use the corresponding buttons on the remote control to select the desired function Press to select Photo then press OK to enter Select Return with the buttons to return to the previous menu or select C to enter Media Photo Plug in a USB device with FAT32 format then press SOURCE to set the input source to Media Press to select Media in the source menu then press OK or to enter Pres...

Страница 36: ...ill appear on the right and the song will be played automatically To show the function panel on the bottom of the screen press DISPLAY then press to select the desired function and OK to confirm your selection Press EXIT to return to the main menu Alternatively use the corresponding buttons on the remote control to select the desired function Media USB Mode Cont 36 ...

Страница 37: ...enu are the same as for those in the Music menu previous page Press to select Text then press OK to enter Press to select the file you want to view in the file selection menu When highlighting the option you select the file information will appear on the right and the file can be previewed in the centre Press OK to start viewing the text in full screen Media USB Mode Cont 37 ...

Страница 38: ...n number 4 DVD video discs DVD video discs DVD video discs are divided into titles and the titles are subdivided into chapters Built in DVD Player Operations You may find the following markings on DVD video discs they are explained below Multiple languages Multi language subtitles Multi angle Multi aspect Region number Closed captions Audio CD discs Audio CD discs are divided into tracks 38 ...

Страница 39: ... from the centre to the outside of the disc t Never use chemical cleaning spray liquids or solvents to clean discs These chemicals will permanently damage the plastic surface of the disc t To remove a disc from its storage case press down on the center of the case and lift the disc out holding it carefully by the edges t Return any discs to their cases after use to protect them from dust and scrat...

Страница 40: ... control Password Change the password Default Load the factory setting Style ChangethebackgroundcolourofOSD Custom Setup Press the OK button to Exit Setup Mode Brightness Adjust the picture brightness Contrast Adjust the picture contrast Last Memory Back to the position of your last watching Language Setup TV System Select PAL AUTO or NTSC OSD Set the OSD language Screen Saver Set the screen saver...

Страница 41: ...ck of a CD press to stop playback press it again to resume playback To temporarily stop playback of a DVD press once to stop playback press it twice to stop playback completely Selecting a DVD menu NOTES The operation may differ depending on the disc used Selecting a menu may not be possible on some discs 1 Press DVD MENU during playback the main menu screen will appear 2 Press or the number butto...

Страница 42: ...ng of the section you want to repeat Point A A appears on the TV screen 2 Press A B again at the end of the section you want to repeat Point B 3 To return to normal playback press A B again CD If you want to Press REPEAT Repeat current track Once Repeat all tracks Twice Three times Important note t The DVD default password is 0000 you need that to enter the password lock menu so that you can set y...

Страница 43: ... the language is not recorded on the disc only the available language on the disc will be heard t When you turn off the power or change the disc you have to select the language again On screen information Press DISPLAY repeatedly to show the disc information available Title Chapter Title elapsed playing time Language etc Picture JPEG CD playback To start a slide show from the thumbnail pictures 1 ...

Страница 44: ...e TV set by wiping the screen and cabinet with a soft clean cloth t If necessary wipe the outside of the unit with a clean soft cloth moistened with lukewarm water t Do not use benzene thinner or alcohol as these chemicals will mar the surface finish Maintenance t Do not dismantle this product by yourself as this may cause damage There are no user serviceable parts contained in the TV set t If you...

Страница 45: ... appropriate colour system setting t Select the appropriate sound system setting Sound or picture interference t Some equipment that causes interference is close to the TV t More than one device is plugged into the same power outlet t An incorrect sound system mode is set t Keep interference causing equipment away from the TV t Plug the power cord into another separate power outlet t Set a correct...

Страница 46: ...OUT AUDIO 1 TV system PAL Sound system B G I D K Antenna impedance 75 Ohm HD compatible 480i 480P 576i 576P 720P 1080i 1080P Wall mounting mm VESA 200 x 100 Dimensions W x H x D mm 772x482x57 withoutstand 772x541x202 withstand Weight net TV only 11 1kg Operating temperature 0 C 40 C Operating humidity 20 80 LED LCD LE32ECD05AU 80cm 31 5 16 9 1920 horizontal x 1080 vertical 6000 1 9ms 1 1 1 1 1 3 1...

Страница 47: ... 1080P Wall mounting mm VESA 100 x 100 Dimensions WxHxD mm 456x296x46 withoutstand 456x325x160 withstand Weight net TV only 3 1kg Operating temperature 0 C 40 C Operatinghumidity 20 80 LED LCD LE22ECD05AU 54cm 21 5 16 9 1920 horizontal x 1080 vertical 1000 1 5ms 1 1 1 1 1 2 1 1 PAL B G I D K 75 Ohm 480i 480P 576i 576P 720P 1080i 1080P VESA 100 x 100 527x335x47 withoutstand 527x366x187 withstand 3 ...

Страница 48: ......

Отзывы: