


English
- 25 -
Other Features
TV Status
Programme Number
,
Programme Name,
Sound Indicator
and
Zoom Mode
are displayed
on the screen when a new programme is entered or
button is pressed
.
Mute Indicator
It is placed in the upper side of the screen when
enabled.
To cancel mute, there are two alternatives; the first
one is pressing the
button and the second one is
increasing the volume level.
PIP and PAP modes
Press the
button to switch to PIP mode.
At PIP Mode, a small picture (PIP picture) is displayed
on the main picture. Aspect Ratio of the PIP window is
fixed and 4:3.
When PIP Mode is entered, the default active window
is PIP window and the active window is indicated by
a white frame around it. The active window can be
changed by pressing
_
/
`
button. The status info
OSD belongs to active window. The place of the sta-
tus OSDs are same for both windows.
Press the
button again to switch PAP mode.
At PAP Mode, two pictures with equal sizes are dis-
played on the screen. Aspect Ratios of the windows
are fixed.
When you switch to PAP Mode, Main window in PIP
Mode is displayed on the right side of the screen. The
active window can be changed by pressing
_
/
`
button.
Press the
button again to exit the PAP mode.
NOTE
: In all HDMI modes, Pip and PAP are not vis-
ible. In YPbPr 1080i , Pip is not visible.
NOTE:
See Appendix C for all PIP/PAT modes.
AV Modes
You can switch your TV to
AV
modes by using re-
lated buttons on the remote control.
First, press
button till
INPUT
OSD is displayed
on the screen. You can then use;
AV1
,
AV2
,
AV3
,
AV4
,
AV5
,
HDMI1
or
HDMI2
buttons on your remote
control to select the desired source (except being in
teletext).
Note that in PIP/PAP modes, pressing
button
will directly change sources.
Freeze Picture
You can freeze the picture on the screen by pressing
the
button. At PIP and PAP layouts, only the main
picture can be frozen.
Zoom Modes
Zoom mode can be changed by pressing the
Aspect ratio
button. You can change the screen
size according to the picture aspect ratio. Select the
optimum one from the following
ZOOM
modes.
NOTE:
InYPBPR and HDMI modes,while in 720 and
1080 resolutions,
Full 1
and
Full 2
modes
will be visible.
NOTE:
When in Full 1 mode; if picture defects in
top and bottom lines occur because of the
broadcast, switch to Full 2 mode to avoid. If
such defects in the edges of picture are not
experienced, it is advised that you watch in
Full 1 mode.
NOTE:
You can only choose 4:3 and FULL in PC
mode.
Auto:
When a
WSS (Wide Screen Signalling)
signal,
which shows the aspect ratio of the picture, is in-
cluded in the broadcast signal or the signal from an
external device, the TV automatically changes the
ZOOM
mode according to the
WSS
signal.
When the
AUTO
mode does not function correctly
due to poor
WSS
signal quality or when you want to
change the
ZOOM
mode, change to another
ZOOM
mode manually.
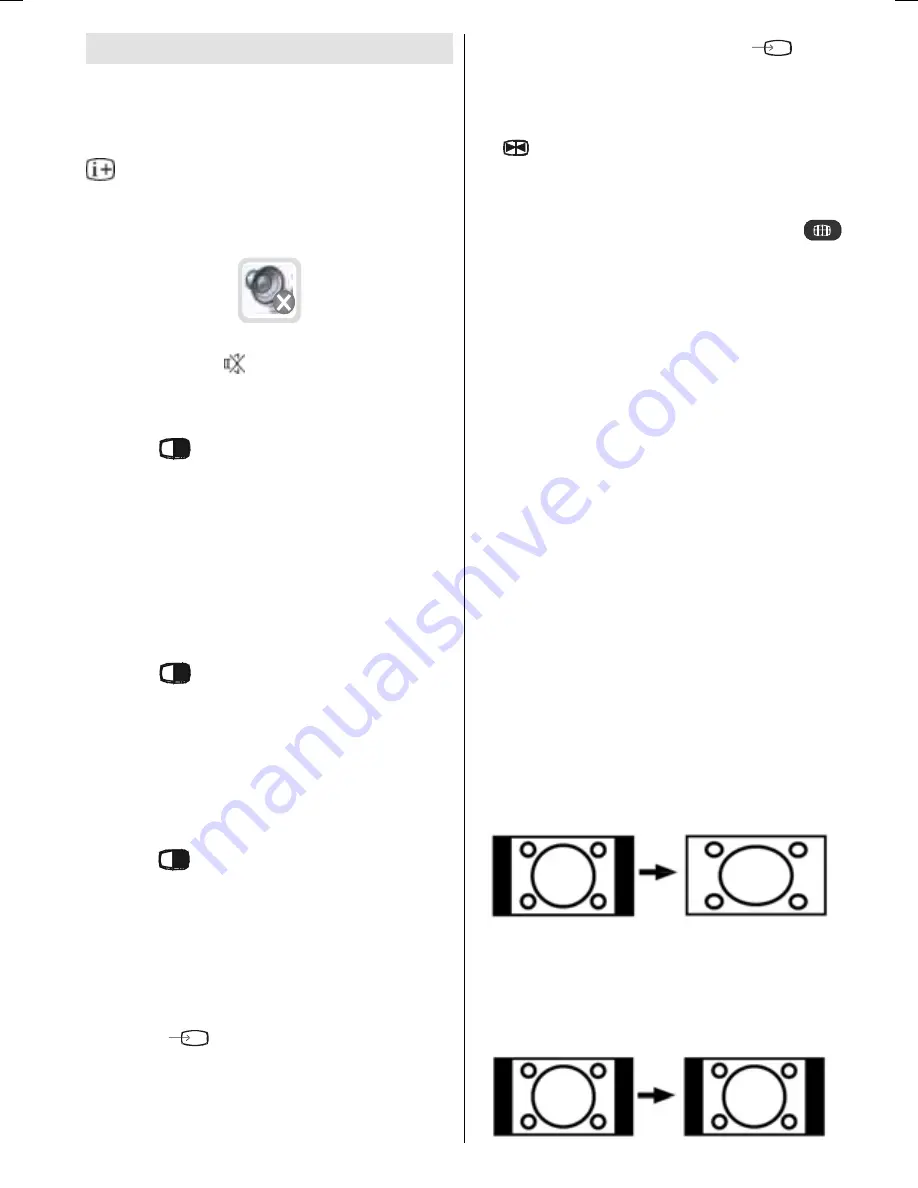
Full:
This uniformly stretches the left and right sides of a
normal picture (4:3 aspect ratio) to fill the wide TV
screen.
For 16:9 aspect ratio pictures that have been
squeezed into a normal picture (4:3 aspect ratio),
use the
Full
mode to restore the picture to its original shape.
4:3
Use to view a normal picture (4:3 aspect ratio) as this
is its original shape.
IB-ENG-(L42VP01U A)-MB26 UK-42780W-(RRC1001-2511E)-(ECO PIP)-10059409-5013XXXX.p6528.08.2008, 10:22
25


